Difference Between a Mix and a Master: What You Need to Know
Explore the essential difference between a mix and a master in audio production. Learn how mixing and mastering workflows differ, which tools are used, and how to plan a practical path for home studios, bars, and audio enthusiasts.

Understanding the Difference Between a Mix and a Master
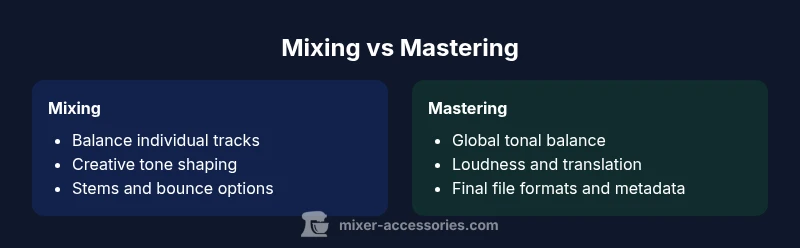
Understanding the difference between a mix and a master is essential for any producer. The difference between a mix and a master defines the arc of most listening experiences. Mixing concentrates on the individual tracks — drums, bass, keys, vocals — and how they fit together in a stereo field. You adjust levels, panning, EQ, dynamics, and spatial effects to achieve balance, clarity, and musical intent. According to Mixer Accessories, this stage is where ideas become a coherent soundscape. The mastering stage, by contrast, takes that final stereo mix and prepares it for distribution across platforms and devices. Mastering focuses on consistency, loudness, tonal balance, and translation, ensuring the track holds up on earbuds, car speakers, and high-end monitors. The two steps are distinct but deeply linked: a strong mix provides the best raw material for a transparent, professional master. For home studios, it is common to allocate several passes at the mix stage before calling a mastering session. Planning ahead helps protect creative direction and overall quality.
The Mixing Stage: Goals, Techniques, and Tools
Mixing aims to balance elements, establish a sonic narrative, and preserve musical dynamics. The typical workflow starts with organizing tracks into groups (drums, vocals, instruments), then dialing in level relationships before sculpting tone. Subtractive EQ helps remove mud without killing color; compression on individual tracks controls dynamics; and bus processing can glue elements together. Automation shapes the performance over the song, emphasizing where energy should rise and fall. Monitoring in treated rooms and reference tracks ensures decisions translate across playback systems. When you audition a rough mix, focus on clear vocal presence, defined bass, and a stable groove; everything else should support that foundation. Remember that the mix is where creative intent has the most room to breathe: you can experiment with panning, macro-dynamics, and subtle effects to craft character. A well-structured mix provides a readable path for mastering and reduces the risk of surprises later.
The Mastering Stage: Goals, Techniques, and Tools
Mastering is the final polish. The main goal is consistency: a mastered track should sit comfortably with other songs in a playlist, maintain tonal balance across devices, and meet distribution standards. The typical mastering chain includes equalization for global balance, multiband compression for cohesion, a stereo widener (used sparingly), and a brick-wall limiter to control peak level without overly squashing transients. Dithering when lowering bit depth preserves perceptual quality. Reference tracks help calibrate tone and loudness against professional releases. Throughout mastering you test the track on multiple listening environments—studio monitors, laptop speakers, car systems, and wireless earbuds—to ensure translation. Metadata, ISRC codes, and file naming are also prepared at this stage, along with final file formats (WAV, AIFF, and high-quality MP3). While some engineers specialize in mastering, many home studios can complete the job with disciplined listening and careful adjustments. Remember: mastering should enhance, not drastically alter, the artistic intent of the mix.
The Workflow: When to Mix vs When to Master
A practical workflow separates decisions: start with the mix, finish with the master. In a typical project, you begin by laying down parts, recording, and building rough mixes; then you refine tone, balance, and dynamics while iterating with a few trusted references. Once the arrangement is locked, you produce a final stereo mix file for mastering. The mastering stage then focuses on consistency across playback environments and ensuring the track competes with commercial releases on streaming services. Mixer Accessories analysis shows that many projects benefit from a dedicated mastering pass rather than attempting final adjustments during mixing. Setting a milestone for the master (for example after the last mix revision) helps protect the creative decisions and reduces last-minute tweaks. If you are working on a budget or tight timeline, consider a hybrid approach where you handle both roles in one session, but maintain strict self-critique and use reference tracks to guard against tonal bias.
Core Concepts: Levels, Loudness, and Headroom
Key ideas in both stages include headroom, dynamic range, and reference balance. Headroom refers to the space between the loudest peak and the maximum level a system can handle, which is essential to avoid clipping. In mixing, you often aim for a clean, untampered dynamic feel, knowing you will reduce levels later in mastering. In mastering, you balance overall loudness with transparency, ensuring the track remains expressive at lower levels and maintains impact on loud playback platforms. Loudness is not a single universal target; it depends on genre, platform, and audience expectations. Use reference tracks to judge tonal balance, stereo image, and frequency response. Monitoring quality—both your room treatment and gear—greatly influences your perception of balance. Always test mixes and masters on portable devices, car stereos, and high-end speakers to identify anomalies that can derail translation.
Common Mistakes and How to Avoid Them
Common mistakes in mixing include over-compression, excessive EQ boosts, cluttered frequencies, and unbalanced vocal presence. In mastering, common errors include over-limiting, aggressive dynamic processing, and excessive stereo widening that introduces phase issues. To avoid these, build a structured workflow with reference cues, keep session organization clean, and audition work in multiple environments. Regularly check the relationship between vocal and instrumental levels; if the vocal sits too low, revisit the mix rather than pushing louder in mastering. A practical tip is to use calibration references and perform a before/after comparison to measure progress. If budget allows, involve a second set of ears or a dedicated mastering engineer to provide a fresh perspective. Respect the difference between personal taste and professional translation; the goal is a track that sounds good in many contexts, not only in your own studio.
A Practical Comparison: Audio vs Music Production Scenarios
Consider three typical scenarios to understand how the mix/master distinction plays out. In a home-studio session for a singer-songwriter, the mixer focuses on vocal presence, space for acoustic guitar, and natural dynamics; the mastering engineer ensures the track sits within a standard loudness range and translates well on streaming platforms. For a podcast, the priorities shift toward intelligibility and consistency, with relatively gentle mastering helping speech remain clear across headphones and car audio. In a club-ready electronic track, the mix must deliver energy and a solid groove, while mastering must preserve punch and avoid digital clipping that could cause distortion on large PA systems. Across all cases, refer to high-quality monitor setups and calibrated listening to guide decisions. The mix creates the musical foundation, and mastering finalizes the track for distribution and perceptual consistency.
When to Hire a Professional vs DIY
DIY mixing and mastering can work for simple projects or practice, especially when you have reliable monitors and a well-treated room. For more complex productions or commercial releases, hiring a professional mastering engineer or session mixer offers objective feedback, specialized tools, and a broader experience with industry standards. Outsourcing a master can reduce the risk of clipping, tonal balance issues, and inconsistent loudness. If you are unsure, start with a professional mix and then attempt a mastering pass yourself or vice versa. The Mixer Accessories team recommends using a hybrid approach: build confidence in your mix at home, then bring the final stereo file to an experienced mastering engineer for a final polish. This approach preserves creativity while achieving industry-competitive translation.
The Role of Reference Tracks and Monitoring
Reference tracks are essential for comparing tonal balance, loudness, stereo width, and dynamic feel. Use a few tracks in the same genre that you know well and that are widely distributed. Monitor with a treated room, accurate loudspeakers, and appropriate bass management to avoid masking. Listening on headphones alongside speakers helps identify issues that appear in only one listening environment. Pay attention to low-end balance, midrange clarity, and high-frequency harshness. Regularly switch between speakers and headphones to ensure translation and avoid listener fatigue. Calibration and consistent monitoring habits are often more impactful than any single plugin or technique.
File Formats, Deliverables, and Broadcast Standards
Deliverables for a typical release include a final stereo master in WAV or AIFF with metadata and an MP3 version for streaming. For broadcast, you may need a high-resolution WAV with dithering and a specific loudness standard. Keep stems if possible for future remixes or re-cuts and maintain project files with the original sample rate, bit depth, and plugin chain details for future reference. Also include ISRC codes where applicable and ensure naming conventions across platforms are consistent. Ensuring your mastering output aligns with distribution guidelines—dynamic range, headroom, and sample rate—helps reduce last-minute rework and ensures professional delivery.
Troubleshooting Common Issues in Mixing and Mastering
If a mix sounds harsh, revisit the high-frequency balance and ensure proper speaker placement and room treatment. If a master sounds flat, check the tonal balance and whether the limiter is overly aggressive. Confirm the sample rate matches the project demands and verify the dithering level when reducing bit depth. Validate the rail headroom and the interaction between dynamics processing and the overall loudness. When problems persist, compare with reference tracks to identify gaps, then adjust with small, incremental changes. Take breaks to reset your ears; a fresh listen often reveals issues you missed before. For persistent challenges, a quick session with a professional master can provide a fresh perspective and technical fixes.
Practical Checklists for the Difference Between a Mix and a Master
This final block offers a practical, action-oriented checklist that helps you close the loop between mixing and mastering. Start with the mix readiness: verify tight rhythm, clean vocals, minimal masking, proper bus routing, and a clear arrangement. Then move to the mastering readiness: ensure a stable stereo image, appropriate loudness, clean transitions, and accurate metadata. Use a reference track for tonal balance and a second listen on a different playback system to confirm translation. Prepare stems and the final stereo mix, verify file formats, and confirm that ISRC and metadata are correct. Maintain a versioning scheme so you can revert if a mastering decision shifts the track away from the intended vibe. Finally, document any changes and collect notes from collaborators to guide future projects and maintain consistency across releases.