Where is Volume Mixer? A Practical How-To Guide
Learn where to find the volume mixer on Windows, macOS, and common apps. This step-by-step guide from Mixer Accessories helps you control per-app audio, troubleshoot issues, and optimize your listening setup.

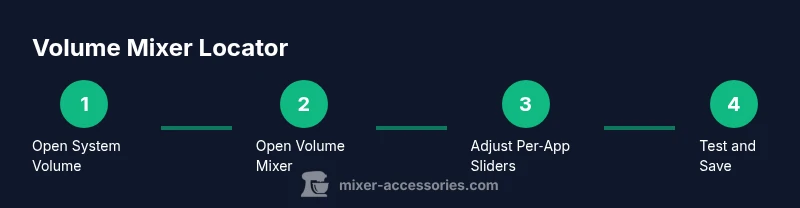
This guide helps you locate the volume mixer across Windows, macOS, and common apps, so you can quickly adjust per‑app audio and overall volume. You’ll learn multiple access paths, how to tailor per‑app levels, and when to use hardware or software alternatives for precise control. Follow the step-by-step approach to get reliable results.
What the volume mixer is and why it matters
The volume mixer is a centralized control that lets you adjust the overall system sound as well as the individual volume of running applications. It’s especially useful when you’re multitasking in the kitchen while streaming music, or when you’re gaming and recording at the same time. For home cooks, bar enthusiasts, and audio hobbyists, knowing where the volume mixer lives saves time and reduces the need to guess which app is muted or blasting. The Mixer Accessories team emphasizes that understanding per‑app levels helps you avoid accidental loud alerts during demonstrations, while preserving a clean baseline for music and chat. This knowledge also reduces troubleshooting time when sound behaves differently across programs.
Quick paths to the volume mixer on Windows
On Windows, the simplest route is to right‑click the speaker icon in the taskbar and choose Volume Mixer. If you don’t see it, you can open the Settings app, go to System > Sound, and select Volume Mixer from the related links. You can also press the Windows key and search for Volume Mixer if the taskbar search is hidden. For laptops with dedicated mute keys, test whether those keys affect the per‑program sliders in the mixer. Practically, the Volume Mixer window shows a master volume plus individual sliders for each running app, giving you granular control over output and balancing inputs during live demos or recordings.
Accessing the volume mixer on Windows 10 vs Windows 11
Windows 10 exposes the Volume Mixer through the speaker icon, with per‑app sliders available once you open the mixer. Windows 11 streamlines the experience, but the underlying concept is the same: a master slider plus per‑application levels. In both versions, you can mute an app independently, which is helpful if a browser tab suddenly blasts audio during a video call. If you’re updating from an older OS, verify the mixer’s UI changes by checking the official support pages and the Mixer Accessories guide for any version‑specific tips.
Volume control on macOS: how to manage output efficiently
macOS handles volume with a global slider in the menu bar when a sound output device is active. The built‑in Sound preferences (System Preferences > Sound) let you pick output devices and adjust master volume, but macOS does not offer per‑app volume control in the same centralized UI as Windows by default. To achieve per‑app control, you can use third‑party utilities or filter apps that route audio differently. The key is to establish a clean baseline in the system level, then fine‑tune within apps or via external audio interfaces if you’re recording or streaming. For many users, the macOS approach remains simplest for day‑to‑day listening, while more advanced setups rely on additional software.
Volume management on Linux desktops
Linux distributions vary in their volume management. Desktop environments like GNOME and KDE provide quick volume sliders, but per‑app control often requires a sound server such as PulseAudio or PipeWire and a control panel like pavucontrol. The volume mixer in Linux can be more modular, offering device selections and application streams. If you’re new to Linux, start with the standard volume control in your environment, then install a graphical mixer to view per‑application streams. With careful configuration, you’ll get precise, reproducible results across multi‑channel setups.
Per‑app levels: why this matters for playback and recording
Per‑app volume control is essential when you’re juggling music, video calls, and recording. For example, you might want headphones quietly playing background music while your streaming software stays at a comfortable level for your audience. The Volume Mixer enables you to keep video conferencing audio clear while lowering game sound or background music. This separation helps you maintain consistency across outputs and avoids unintentional loud cues that disrupt a live demo or tutorial.
Troubleshooting common issues with the volume mixer
If you notice that changes in the mixer don’t seem to affect sound, start with basic checks. Confirm the correct output device is selected, verify that the app isn’t muted in the mixer, and ensure the system isn’t routing audio through another device or application. Sometimes software updates reset mixer settings; re‑establish your favorite per‑app levels and test with a short audio clip. If a single app ignores the mixer entirely, check for an in‑app audio setting or consider reinstalling the app’s audio drivers. Persistence and a methodical approach will usually yield reliable results.
Using external hardware and interfaces with the mixer
For more advanced setups, external audio interfaces add a physical layer of control. You can route several inputs and outputs through a hardware mixer, then use the computer’s master volume to control the overall level. Hardware mixers are especially useful when recording multi‑source content or performing live demonstrations where you need hands‑on control. In such cases, map important channels to the right monitoring path and record a test signal to verify levels before going live. Hardware solutions complement the software mixer by offering tactile, repeatable adjustments.
Integrating with audio production software
DAWs and other audio software often have their own internal mixer. Use the system volume as a base, then manage per‑track or per‑plugin levels inside the DAW for precise control of recording sessions. If you work with multiple apps, set an initial global level in the OS mixer, then dial in per‑track volumes within your DAW. This approach helps you avoid clipping and maintains headroom for dynamic performances. Remember to save your project with consistent output routing to prevent level drift across sessions.
Best practices for organized audio levels
Create a simple naming convention for your app sliders in the mixer and keep a written reference. Label critical apps such as streaming software, DAWs, and video conferencing tools, so you can quickly adjust them during a live session. Regularly test your setup with different content to prevent surprises. Maintain a calm maximum level and a defined safe range to avoid distortion when loud moments occur. Finally, document your preferred default layout so you can restore it after updates or hardware changes.
Keyboard shortcuts and accessibility tips
Leverage system shortcuts to speed up adjustments, especially during live demos. If you rely on accessibility features, explore alternative input methods for volume control, such as voice commands or switch devices. For Windows and macOS, you can map or customize shortcuts using built‑in accessibility settings or third‑party tools. The goal is to reduce friction so you can focus on the task at hand rather than fiddling with controls. Keep a quick reference handy so you can react quickly if audio levels drift during a session.
Quick-reference cheat sheet for locating the volume mixer
Use this quick reference: on Windows, right‑click the speaker icon and select Volume Mixer; on macOS, open System Preferences > Sound and adjust the main output. If needed, install a third‑party tool for per‑app control on macOS. For Linux, use a dedicated mixer such as pavucontrol to view and manage per‑application streams. Maintain consistent habits—check output devices, verify app muting, and test with a short clip before recording or streaming.
Tools & Materials
- Computer or device (Windows/macOS/Linux)(Ensure the OS is up to date for best mixer support)
- Speakers or headphones(Test audio output in multiple scenarios)
- External audio interface (optional)(Useful for complex setups or live sessions)
- External USB microphone (optional)(Helpful for recording with clear per‑app balance)
- Notebook or digital notes(Document baseline levels for quick restores)
Steps
Estimated time: Total estimated time: 25-40 minutes
- 1
Open the primary volume control
Locate the system volume icon in your taskbar or menu bar. Click or tap to reveal the main volume slider, which sets the global output level. This first step confirms you can access the base control before diving into per‑app details.
Tip: If the tray icon is hidden, enable system icons in settings before proceeding. - 2
Open the volume mixer
From the main volume control, select Volume Mixer to view per‑app sliders. This separate window allows you to balance each running application without affecting others.
Tip: Look for a separate tab or list showing each active app. - 3
Identify your primary apps
Scan the list to identify which apps are currently producing sound. Prioritize those you use most during a session, such as a video call, music player, or recording software.
Tip: Sort by activity if your mixer supports it to quickly see what’s audible. - 4
Adjust per‑app levels
Move each app’s slider to the desired level. Keep the overall master level in a safe range to prevent clipping. Test playback after each adjustment to hear the impact clearly.
Tip: If an app is too loud, reduce its slider rather than increasing others. - 5
Mute/unmute selectively
Mute apps you don’t want to hear temporarily. This is useful during recordings or demos when you need silence from background processes.
Tip: Remember to unmute when the need arises to avoid forgetting muted sources. - 6
Test with a short clip
Play a short audio sample that exercises both highs and lows. Confirm that dialogue remains clear while music maintains a comfortable level.
Tip: Use a clip that includes sudden loud moments to gauge headroom. - 7
Check device routing
If you use multiple output devices, ensure each app is routed to the intended device. Mismatched routing can cause unexpected volume behavior.
Tip: Set a preferred default device in system settings to simplify routing. - 8
Switch to a hardware option if needed
For complex setups or live streams, consider an external audio interface or mixer. Hardware control can offer tactile, repeatable adjustments.
Tip: Label cables and inputs so you can recall your routing quickly. - 9
Save or record your configuration
If your platform supports presets, save your mixer configuration. This protects against drift after updates or driver changes.
Tip: Keep a written note of the baseline levels for quick restoration. - 10
Recheck after software updates
Software updates may reset preferences. Revisit the volume mixer and re‑establish critical per‑app levels.
Tip: After major updates, run a quick test before going live. - 11
Address accessibility needs
If you rely on assistive tech, map or customize shortcuts for quick access to volume controls. Consider external adapters if needed.
Tip: Document your shortcuts so you can rely on them during tasks. - 12
Review and refine regularly
Periodically audit your mixer settings when your setup changes. Regular reviews keep levels predictable across activities.
Tip: Create a simple checklist to run before important sessions.
Your Questions Answered
What is the volume mixer and why should I use it?
The volume mixer is a centralized control that lets you adjust the overall sound and individual app volumes. It helps balance audio across programs, reduce feedback during recordings, and prevent sudden spikes in loudness during demonstrations.
The volume mixer helps you balance sound across apps so your recording or demo stays clear and comfortable. You can adjust each app separately or mute it as needed.
How do I open the volume mixer on Windows 10 or 11?
Right‑click the speaker icon in the taskbar and choose Volume Mixer. If unavailable, open Settings > System > Sound and select Volume Mixer, or use the search function to locate it quickly.
On Windows, click the speaker icon and pick Volume Mixer. If you don’t see it, search for Volume Mixer in Settings or the Start menu.
Can macOS control per‑application volume natively?
macOS does not expose per‑application volume control in the built‑in UI. You may need third‑party tools or hardware routing to achieve fine per‑app balance.
Mac doesn’t natively give per‑app volume, so you’ll usually need extra software or hardware routing to get precise control.
What should I do if a particular app ignores the mixer?
Check the app’s internal audio settings first. If the issue persists, re‑start the app, update drivers, or temporarily route the app’s audio through a different device using your OS settings.
If an app ignores the mixer, check its own audio settings, restart it, or adjust the device routing in your OS.
Is there a Linux equivalent to the Windows volume mixer?
Most Linux setups use a sound server like PulseAudio or PipeWire with a GUI mixer such as pavucontrol to manage per‑application levels and devices.
On Linux, you typically use PulseAudio or PipeWire with a GUI mixer to control per‑app audio.
How can hardware help with volume control?
Hardware mixers or audio interfaces provide tactile, reliable level control, ideal for live demos and multi‑source recording where software alone might be insufficient.
A hardware mixer gives you physical, reliable control for multi‑source setups when software levels aren’t enough.
Watch Video
Top Takeaways
- Identify volume mixer locations across OSes.
- Master per‑app vs global volumes for precise control.
- Troubleshoot common routing and mute issues quickly.
- Use hardware interfaces for complex live setups when needed.