Where is Sound Mixer in Windows 11: Step-by-Step Guide
Learn exactly where to find the Windows 11 sound mixer, how to adjust per-app volumes, and access legacy controls. This step-by-step guide from Mixer Accessories covers Settings paths, Quick Settings, and testing tips for reliable audio.

To find the Windows 11 sound mixer, open Settings and navigate to Sound, or click the volume icon and choose Open Sound settings. Step 1: Start > Settings > System > Sound. Step 2: Under Output and Input, select your device and click Device properties. Step 3: Use App volume and device preferences for per-app control.
Finding the Windows 11 sound mixer and understanding its place in the interface
If you're wondering where is sound mixer in Windows 11, you're not alone. The modern Windows 11 design keeps most audio controls centralized, with quick access from the taskbar and a dedicated Settings page for deeper tuning. According to Mixer Accessories, the sound mixer resides primarily in Settings > System > Sound, while the Quick Settings panel on the taskbar offers fast access to basic volume controls. This article unpacks the paths and options, so you can locate the sound mixer quickly and tailor audio for your needs—home cooks adjusting kitchen audio, bar enthusiasts fine-tuning playlist sound, or audio hobbyists testing recording levels. Throughout, we’ll reference practical, real-world scenarios and avoid vague “adjust as needed” guidance. If you ask where is sound mixer in Windows 11, the answer is: it lives in both quick access and the Settings menu, with the classic Sound Control Panel available for legacy apps. By understanding these entry points, you’ll save time and avoid silent surprises when you switch devices or apps.
In practice, the Windows 11 sound mixer is designed for fast adjustments during daily tasks, from video calls to streaming music. The goal is to give you a reliable baseline (system-wide outputs/inputs) plus per-app controls that let you tailor volume on a per-application basis. This is especially helpful when you’re juggling multiple audio sources—music in the background, a video call, and a recording app all in use at once. The Mixer Accessories team emphasizes thatgetting a consistent listening experience often starts with knowing the exact paths to your audio settings and testing changes with a quick playback test. The goal here is clarity and confidence: locate the sound mixer, understand what you’re adjusting, and confirm changes with a quick sound check.
The quick takeaway is simple: you can reach the sound mixer from Settings, from the taskbar volume icon, or from the classic Sound Control Panel. Keep in mind that Windows sometimes surfaces names slightly differently across builds, but the core concepts remain stable: Output, Input, Device properties, App volume, and device preferences. In this guide, we’ll walk through each, with actionable steps you can follow today to master your Windows 11 audio.
For users who are new to Windows or coming from older versions, the modern approach can feel unfamiliar. The key is to become fluent in the two main hubs: the Settings sound page for system-level controls and the App volume panel for per-application tuning. The Windows 11 sound mixer is intentionally distributed across these two experiences to accommodate both quick adjustments and precise fine-tuning. As you practice, you’ll start to rely on the speed of the taskbar volumes for everyday tweaks and reserve Settings for deeper configuration and troubleshooting.
Tools & Materials
- Windows 11 device(Any edition that can access Settings and the taskbar volume controls)
- Speakers or headphones(Connected and working for testing audio output)
- Keyboard and mouse or trackpad(Essential for navigating menus quickly)
- Optional: microphone(Helpful for testing input levels and mic mute/boost settings)
- Web browser(Useful for following online guides or official docs)
Steps
Estimated time: 15-25 minutes
- 1
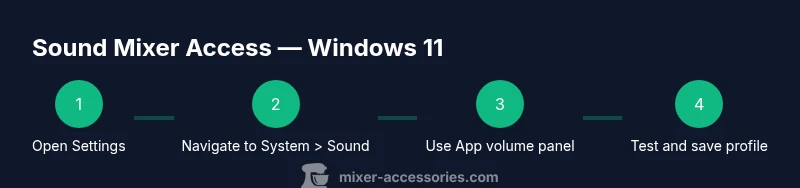
Open Settings > System > Sound
Click the Start menu, select Settings, then choose System and finally Sound. This path exposes the core sound controls: output, input, and device properties. Understanding this first step is essential, because almost all adjustments begin here.
Tip: If you prefer quick access, you can also press Win + I to open Settings directly. - 2
Test your default audio devices
In the Sound page, verify that your intended output and input devices are selected. Use the Test button to ensure sound plays through the chosen output and that mic input is active if applicable.
Tip: If you don’t hear sound, check that the device is not muted and that the correct driver is installed. - 3
Open App volume and device preferences
Scroll to App volume and device preferences to see a per-app volume list. If you’re running multiple apps, you can adjust each one independently to balance levels between music, calls, and games.
Tip: Launch the app you want to test, then tweak its slider while audio is playing to calibrate in real time. - 4
Adjust per-app volumes
Set individual app volumes to your liking. For example, you might keep a music app loud while keeping a video conferencing app at a lower level to prevent feedback.
Tip: If an app isn’t listed, it may be using the system default; test by launching that app and observing if it appears in the list. - 5
Access Device properties for advanced tweaks
Click Device properties for your Output or Input to set properties like balance, enhancements, and sample rate. These controls can improve compatibility with specific hardware and software.
Tip: Confirm the sample rate matches what your speakers support to avoid distortion. - 6
Open the classic Sound Control Panel
In Settings > Sound, click More sound settings to open the legacy Sound window. Some apps rely on these classic controls for advanced enhancements or device-specific quirks.
Tip: The classic panel often provides extra tabs such as Enhancements and Spatial sound. - 7
Use Volume Mixer from the taskbar
Right-click the volume icon in the taskbar and choose Open Volume Mixer. This shows the volume for each running application, letting you adjust quickly without digging into Settings.
Tip: Make sure each app is actively producing sound to appear in the mixer. - 8
Run a quick playback test and finalize
Play a short audio clip or test video to verify all settings. If you notice latency or distortion, revisit sample rate, exclusive mode, and driver updates.
Tip: Document a named profile (e.g., 'Desk Setup') so you can restore it later with a single click. - 9
Test privacy and compatibility
Ensure microphone access is allowed in Privacy settings and that Windows updates aren’t blocking audio devices. Compatibility fixes often involve updating drivers or rolling back a recent update.
Tip: If problems persist, temporarily disable exclusive mode and check for driver updates from the device manufacturer.
Your Questions Answered
What is the Windows 11 sound mixer and how does it differ from the old Control Panel?
The Windows 11 sound mixer combines modern Settings controls with a legacy Sound Control Panel option. It lets you adjust system-wide outputs/inputs and per-app volumes, providing both quick access and deeper configuration when needed.
The Windows 11 sound mixer is a modern settings suite with a legacy panel option so you can adjust volume for each app and the whole system.
How do I access App volume and device preferences quickly?
Open Settings > System > Sound, then scroll to App volume and device preferences. From there you can adjust each app's volume and select which input and output devices it uses.
Go to Settings, System, Sound, and use App volume and device preferences for per-app control.
Can I use the classic Sound Control Panel in Windows 11?
Yes. In Settings > Sound, click More sound settings to open the legacy Sound window, which offers additional tabs such as Enhancements and Advanced device properties.
Yes, you can open the old Sound Control Panel from the Settings page for extra options.
What should I do if I don’t hear audio after changing settings?
Verify the correct output device is selected, check mute states, test with the volume mixer, and ensure device drivers are up to date. If problems persist, test with a different set of speakers or headphones.
If you don’t hear sound, check the device, mute status, and driver updates, then test with another audio device.
How can I test per-app volume changes effectively?
Play audio from each app while monitoring its specific volume slider in App volume and device preferences to confirm the app responds correctly to adjustments.
Play audio from each app and watch its slider to ensure it responds as expected.
Is there a keyboard shortcut to open sound settings quickly?
There isn’t a universal shortcut, but you can quickly open Settings with Win + I and then navigate to Sound, or use the taskbar volume icon for faster access.
No universal shortcut, but Win + I opens Settings and you can reach Sound fast via the volume icon.
Watch Video
Top Takeaways
- Locate sound controls quickly via Settings or the taskbar.
- Use App volume and device preferences for per-app tuning.
- Access legacy Sound Control Panel for advanced options.
- Test changes with live playback to confirm results.