Where Is Volume Mixer on Mac: A Practical Guide
Discover where the volume mixer lives on Mac, how to use the menu bar, Control Center, and System Settings, and tips for advanced routing with Audio MIDI Setup. A practical, step-by-step guide for home cooks and audio hobbyists.

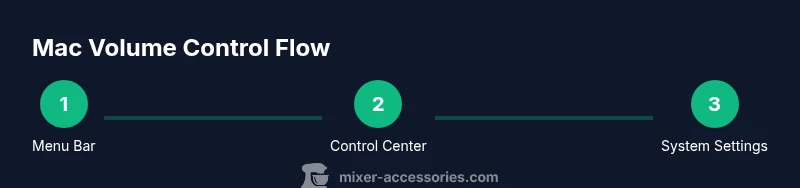
Where is volume mixer on Mac? The volume controls live in three places: the menu bar speaker icon for quick adjustments, the Control Center for per-device routing, and System Settings or System Preferences (Sound) for global output options. According to Mixer Accessories, most users rely on the menu bar for fast changes, then fine-tune in Control Center when using headphones or external speakers.
Understanding macOS volume controls
macOS handles volume through a layered approach that combines hardware gain, software volume, and app-specific output where available. The global output level is determined by the active output device, but you can route audio to multiple devices and adjust individual levels with the right tools. For most home users, the journey starts with the menu bar volume icon, then moves to Control Center or System Settings for finer control. This layered approach keeps daily listening simple while offering depth for troubleshooting and advanced routing. Mixer Accessories emphasizes that knowing these layers helps you quickly diagnose why sound seems low, unbalanced, or missing entirely, especially when swapping between headphones and speakers.
Quick access: menu bar, Control Center, and System Settings
The three most common access points for Mac volume control are the menu bar, Control Center, and System Settings. The menu bar volume icon provides instant up/down tweaks with a click or drag. Control Center offers a consolidated view that can adjust per-device routing when you connect headphones, speakers, or an external DAC. System Settings (or System Preferences on older macOS) houses the more permanent configuration: choose the output device, adjust the overall volume, and tweak balance. If you frequently switch between devices during a workflow, start with the menu bar, then verify the effective device in System Settings to avoid confusion later. Mac users who want consistency across apps will appreciate setting a preferred output device and keeping it constant for tasks like video calls or cooking tutorials.
Where volume mixer lives across macOS versions
Apple has evolved the location and naming of the volume controls across major macOS releases. In newer macOS versions, you’ll find the global settings under System Settings > Sound, with per-device routing available in Control Center. In older systems, System Preferences > Sound is where the same options live. Regardless of version, the menu bar icon remains a reliable starting point for quick adjustments. If Bluetooth or USB-C audio devices are involved, ensure the selected device matches your current workflow, as macOS can switch output silently when a new device is connected.
Per-app volume, routing, and devices
macOS does not include a universal per-app volume control in the system panel. Some apps do expose their own volume controls, and third-party tools can offer more granular control. For most users, per-device volume and routing are sufficient, especially when using multiple devices. If you need multi-output audio (e.g., headphones plus external speakers), Audio MIDI Setup lets you create Multi-Output or Aggregate devices to route sound to several devices at once and synchronize playback. These options are excellent for live demonstrations, multisource music, or mixed audio setups.
Using Audio MIDI Setup for advanced routing
Open Applications > Utilities > Audio MIDI Setup to manage devices. Here you can create a Multi-Output Device to send audio to multiple outputs, or an Aggregate Device to combine inputs and outputs for complex routing. Configure drift correction and set a master device to maintain synchronized playback. This level of control is especially helpful if you’re coordinating a home studio setup, a bar playlist with external speakers, or a party rig that requires consistent volume levels across devices. Remember to test the output after creating a new device to confirm the levels and balance.
Troubleshooting common issues with volume and output
If you’re not hearing sound, start with the simplest checks: verify the output device in System Settings > Sound, ensure the volume isn’t muted, and confirm the menu bar icon reflects a non-zero level. If Bluetooth devices disconnect or headphones don’t play, try disconnecting and reconnecting, or switching to a wired connection. A reset of NVRAM/PRAM can resolve persistent audio quirks after hardware changes or software updates. If problems persist, test with a different user account to rule out profile-specific settings and consider updating macOS to the latest patch level to ensure compatibility with audio drivers.
Accessibility, keyboard shortcuts, and quick tips
Make volume adjustments accessible with keyboard shortcuts by enabling them in System Settings > Keyboard > Shortcuts. Assign keys for Volume Up, Volume Down, and Mute to speed up adjustments without leaving what you’re doing. If you rely on VoiceOver or other accessibility features, ensure the volume controls remain reachable from your current interface. Pro tip: keep the menu bar icon visible for instant access, especially when you’re cooking, mixing drinks, or working on audio projects.
Practical daily workflows to manage volume effectively
A practical approach is to set a primary output device (e.g., speakers) and use Control Center for on-the-fly adjustments when you switch to headphones. For activities like podcasts or music production, maintain a stable global level and use the app’s internal volume controls for fine-tuning. Regularly test with your most-used apps (music, video conferencing, video editing) to ensure consistent playback. Consider creating a simple routine: after every setup change, run a quick sound check to confirm no device is unexpectedly muted or misbalanced.
Tools & Materials
- Mac computer running macOS (Ventura or newer recommended)(Ensure you can access System Settings > Sound and the menu bar volume icon)
- Headphones or external speakers(Test with multiple sources (music, video, calls))
- External audio interface or USB DAC (optional)(Useful for advanced routing or multi-device setups)
- Audio MIDI Setup (built-in)(Used for creating Multi-Output or Aggregate devices)
- USB-C or USB-A cable (as needed)(Needed to connect some external devices)
Steps
Estimated time: 30-60 minutes
- 1
Open the menu bar volume control
Click the speaker icon in the macOS menu bar to reveal a quick volume slider. Drag the slider up or down to adjust the overall output. If you don’t see the icon, enable it in System Settings > Dock & Menu Bar > Sound, then recheck the menu bar.
Tip: If you’re listening at high volumes, avoid sudden jumps by making small adjustments first. - 2
Access Control Center for per-device tweaks
Click the Control Center in the menu bar and locate the Volume control. If you have multiple audio devices, switch between them to fine-tune output per device. This is especially helpful when moving between speakers and headphones.
Tip: Use Control Center to test per-device output before committing to a global setting. - 3
Check System Settings for global output
Open System Settings > Sound (or System Preferences > Sound on older macOS). Choose the desired Output device, then adjust the global Master volume and the Balance slider. Confirm the device is set as the default if you want consistent behavior across apps.
Tip: Enable 'Show volume in menubar' for quick access at all times. - 4
Evaluate per-app control and routing needs
Note that macOS does not provide a universal per-app volume control in the system panel. If a specific app has its own volume knob, use that. For complex routing, prepare to use Audio MIDI Setup to craft a multi-output or aggregate device.
Tip: Test a workflow with both video calls and media playback to ensure app-level controls align with system settings. - 5
Open Audio MIDI Setup for advanced routing
Launch Audio MIDI Setup and create a Multi-Output Device if you want to play to multiple outputs at once. Configure drift correction and select a primary device to keep levels coherent across devices.
Tip: Save your new device profile with a descriptive name so you can reuse it later. - 6
Run a quick troubleshooting check
If no sound, verify output selection, mute status, and cable connections. Reconnect devices and reboot if needed. If issues persist, reset NVRAM/PRAM by rebooting and holding Option-Command-P-R for about 20 seconds.
Tip: After a reset, recheck your primary output device to ensure it’s set correctly.
Your Questions Answered
Where is the volume control in macOS?
The volume control is in the menu bar as a speaker icon. You can also use Control Center for per-device adjustments and System Settings for global output options.
Mac volume control is in the menu bar, with Control Center and System Settings offering broader options.
Can I change per-app volume on Mac?
macOS does not have a built-in per-app volume control in System Settings. Some apps offer their own controls, and there are third-party tools for more granular control.
Per-app volume isn’t built into macOS; check the app or consider third-party tools for finer control.
How do I route audio to multiple devices?
Use Audio MIDI Setup to create a Multi-Output or Aggregate device, then select it in System Settings as the primary output.
Open Audio MIDI Setup and create a multi-output device to send sound to several outputs.
What should I do if I hear no sound?
Check output device, mute status, and connections. Reconnect or reboot if needed, and consider resetting NVRAM/PRAM if problems persist.
If there’s no sound, verify the device and connections, then reboot or reset NVRAM if needed.
Is there a dedicated volume mixer app?
macOS does not ship with a dedicated volume mixer app; third-party tools exist for advanced routing and mixing, but use trusted sources.
There isn’t a built-in volume mixer app; you may use trusted third-party tools if you need more control.
How do I adjust balance between left and right?
Use System Settings > Sound to adjust the Balance slider. It affects the selected output device and helps you center audio in stereo setups.
Balance is adjustable in System Settings for the selected output device.
Watch Video
Top Takeaways
- Use the menu bar for fast volume tweaks.
- Control Center handles per-device routing for quick adjustments.
- System Settings governs global output and device selection.
- Audio MIDI Setup enables advanced routing like multi-output devices.
- Run basic troubleshooting before deeper configuration.