How to Get a Mixer Up in Logic Pro: A Practical Guide
Step-by-step instructions to connect, route, and monitor a mixer in Logic Pro for reliable live and recorded sound in a home studio.

You're aiming to get a mixer up and running in Logic Pro. Start by connecting your hardware to an audio interface, selecting that interface in Logic’s preferences, and routing each input to dedicated tracks. Enable monitoring, test signal levels, and save a template for quick future sessions. A steady setup routine yields reliable, repeatable results.
Understanding the Goal: What getting a mixer up in Logic means
For many hobbyists, 'getting a mixer up in Logic' means establishing a reliable signal path from hardware through the Mac and into Logic Pro, so you can record, monitor, and shape sound with minimal latency. According to Mixer Accessories, the core idea is to treat the mixer as a live front end that feeds Logic with clean inputs, while Logic handles DAW tasks like processing and mixing. The result is a flexible workflow that suits home cooks filming a podcast, bar DJs prepping live sets, and audio hobbyists exploring new tricks. Clarity at this stage saves you frustration later and helps you define a setup standard you can repeat session after session.
Quick Start: Essential connections and software setup
Before you power anything, gather your gear and confirm driver support. Connect your mixer to the audio interface using the appropriate cables (XLR or ¼" TRS) and ensure the interface is powered. On your computer, open Logic Pro and navigate to Logic > Preferences > Audio. Choose your audio interface as the Input and Output device. Set a sane sample rate (commonly 44.1kHz or 48kHz) that matches your interface and any other connected gear. Create a simple project with one stereo track to test the signal path and a second track for a demo recording. This creates a reliable baseline you can build on.
Routing inputs to Logic Pro: Getting signals into the DAW
With the hardware connected and Logic configured, set up individual input channels for each microphone or instrument. In Logic, create an audio track for each input and assign the track’s input to the corresponding interface channel. If you plan to process multiple signals together, route them to a bus for shared effects or compression. Label each track clearly (e.g., "Guitar Left", "Vox 1", "Room Mic") to avoid confusion later. This step is the core of making your mixer useful in Logic and sets the stage for clean, repeatable mixes.
Monitoring and test signal levels: Hearing and tracking the sound
Enable input monitoring on each track to hear the live signal through Logic and your monitors or headphones. Watch the meters as you speak or play; aim for peaks around -12 to -6 dBFS to allow headroom for processing. If you notice clipping, lower the input gain on the interface or on the mixer’s channel preamps. A quick zero-latency pass helps confirm that the signal path is stable. Document the levels you used during testing so you can reproduce them easily in future sessions.
Creating a reusable template: Speed up future sessions
Once your routing, monitoring, and basic processing are tested, save the setup as a Logic Pro template. Include your track layout, input routing, monitoring settings, and a basic effect chain (e.g., gentle compression, a touch of EQ). Templates reduce setup time and help you stay focused on the creative part of mixing. For home studios and bar setups, a template means you can start recording or performing with minimal prep.
Troubleshooting common issues: Common pitfalls and fixes
If you don’t hear anything, re-check cable connections and ensure the interface is selected in Logic. Check the mixer’s levels and confirm that phantom power is off unless needed. If the signal is quiet, verify that track inputs are correctly assigned and that the interface isn’t muted in the software mixer. Latency issues may require enabling low-latency mode or reducing project sample-rate overhead. When things still don’t work, restarting Logic and your hardware in a controlled order often resolves stubborn issues.
Practical tips for home cooks, bar enthusiasts, and audio hobbyists
The practical reality is that many users want quick, repeatable results without deep-dive configuration. Start with a clean signal path: one mic per track, minimal effects, and a clear gain structure. As you gain confidence, experiment with subgroup buses and simple parallel processing. Remember that organization is your best friend: consistent naming, color-coding, and saved templates save time and reduce errors during live sessions or quick recordings.
Advanced routing: Using sends, buses, and effects
Advanced users route signals to multiple destinations: feed a dry signal to a main bus for the final mix while sending a parallel effect signal to a separate bus (for subtle saturation or reverb). Use sends for quick, global effects without duplicating channels. This approach helps you sculpt the overall mix while keeping source tracks clean. Ensure your master output isn’t overloaded and that any bus effects are low-latency friendly for live situations.
Quick validation: Final check before a session
Do a quick run-through of all inputs, verifying that monitoring is active and levels stay within a safe range. Record a short test clip to listen back for phase, latency, and intelligibility. Check your loudness targets and ensure your monitoring environment mirrors the space where you’ll perform. A final glance at your template confirms you’re ready for an uninterrupted session.
Tools & Materials
- Audio interface(Prefer two or more inputs with Core Audio/ASIO support)
- Mixer(Analog or USB mixer with line-level outputs)
- Cables(1/4" TRS or XLR to connect mixer to interface)
- Mac or PC with Logic Pro(Latest compatible version)
- Headphones or studio monitors(For accurate monitoring and level checks)
- Adapters (optional)(TRS to XLR/adapter kits for compatibility)
- Additional mics or instruments (optional)(For testing multiple inputs)
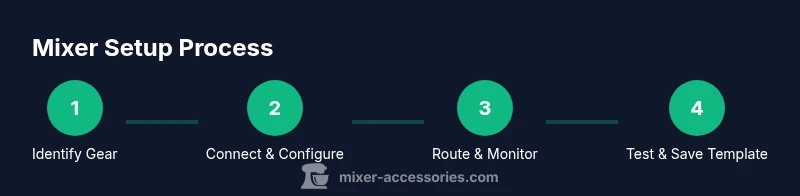
Steps
Estimated time: 30-45 minutes
- 1
Identify gear and install drivers
Inspect your mixer and interface, verify power and connection options, and install any required drivers or firmware. This ensures the computer recognizes the hardware reliably before you start routing in Logic.
Tip: Check the manufacturer’s website for the latest driver updates before plugging in. - 2
Connect hardware to interface and computer
Power off all devices, connect the mixer’s outputs to the interface inputs, then connect the interface to the computer. Power on the gear and confirm the device shows up in your OS audio settings.
Tip: Use high-quality cables and avoid daisy-chaining devices in a way that could create hum. - 3
Configure Logic Pro audio device
Launch Logic Pro, open Preferences > Audio, and select your interface as both input and output. Set a stable sample rate and buffer size appropriate for your project.
Tip: Start with a larger buffer size during debugging and reduce it when you’re ready for tracking. - 4
Create audio tracks for each channel
Add an audio track for every input you intend to use, and assign each track’s input to the corresponding interface channel. Label tracks clearly to avoid confusion.
Tip: Color-code tracks by signal type (vocals, instruments) for quick identification. - 5
Set up monitoring and routing
Enable input monitoring on each track as needed. If you plan to process groups, route signals to buses and route the buses to the main output.
Tip: Keep monitoring off on channels you don’t need to hear live to save CPU and reduce bleed. - 6
Create a basic template
Save a template including track layout, input routing, and a minimal effect chain so you can reuse the setup later without repeating steps.
Tip: Include a placeholder for your preferred vocal chain or instrument processing so you can start mixing immediately. - 7
Test with a real signal
Run a quick test with actual audio to verify signal integrity, latency, and monitoring. Adjust gain staging to avoid clipping and ensure clean dynamics.
Tip: Record a short sample clip to review timing, phase, and monitor accuracy. - 8
Finalize and document
Document the final routing, gain levels, and any special settings used. This makes it easy to recreate the session exactly in the future.
Tip: Create a simple one-page setup note to share with collaborators.
Your Questions Answered
Do I need an audio interface to use a mixer with Logic Pro?
Yes. In most setups, the mixer feeds into an audio interface, which then connects to the computer running Logic Pro. The interface provides the digital path from analog signals to Logic.
Yes. An audio interface is usually required to connect a mixer to Logic Pro.
How do I route multiple inputs from a mixer to Logic Pro?
Create separate audio tracks for each input channel and assign each track to the matching interface input. Use buses for grouped processing if needed.
Make a track for each input and route them to the correct interface inputs; use buses for groups.
What is the difference between monitoring and recording in Logic Pro when using a mixer?
Monitoring lets you hear inputs in real time, while recording captures the signal into your project for later mixing.
Monitoring is real-time listening; recording saves the signal into your project.
How can I save a mixer setup as a template in Logic Pro?
Create a project with your routing and basic effects, then save it as a template for future sessions.
Create a session with routing and save it as a template.
What should I do if Logic Pro doesn't detect my audio interface?
Check all cables, restart Logic, verify device permissions, and ensure drivers are up to date; try a different USB/Thunderbolt port.
Check cables and drivers, restart, and try another port.
Watch Video
Top Takeaways
- Connect hardware to the correct interface inputs.
- Configure Logic to use the interface as the audio device.
- Route inputs to tracks and enable monitoring.
- Save a reusable setup template for future sessions.