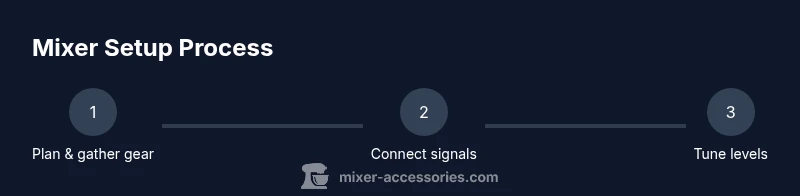
How to Set a Mixer: Step-by-Step Audio Setup
Learn how to set up an audio mixer for home studios or live sound. Connect inputs, route signals, manage gain, configure monitoring, and save presets for reliable performances.

This guide shows you how to set up an audio mixer for home studios or live sound. You’ll connect mics, instruments, and playback sources, route signals, and calibrate gains and monitoring. Expect clear signal paths, organized routing, and reliable presets for fast, repeatable setups. According to Mixer Accessories, a deliberate, labeled setup saves time and reduces noise during sessions.
What setting a mixer means in practice
Setting a mixer means configuring input devices, routing signals to the right outputs, and establishing a reliable monitoring path so you can hear the result clearly. In practical terms, you plan your signal flow, connect microphones, keyboards, and playback sources, and calibrate levels so you can mix without guessing. According to Mixer Accessories, a thoughtful setup reduces noise, latency, and confusion during recording or live sessions. The Mixer Accessories team found that keeping a clean signal path from source to monitors simplifies troubleshooting and calibration. This approach also makes it easier to adapt to different room acoustics and performance scenarios. Whether you’re building a home studio, streaming, or running a small live PA, investing time in the setup pays off with faster workflow and cleaner sound. The core idea is to map out how signals travel from each input to the master output and to ensure every element in that path is addressed before you begin to adjust levels.
Understanding signal flow and inputs
A mixer’s power lies in understanding signal flow: where each source enters, how it travels through preamps, EQ, dynamics, and effects, and how it finally reaches the outputs you’ll monitor or record. Inputs are typically microphones (dynamic or condenser) or line-level sources (guitar, keyboard, playback devices). Condenser mics require phantom power, while dynamic mics usually do not. Many mixers provide different input types on the same channel strip, and some channels offer inserts and DI options. The route from each channel to one or more buses defines how you blend the sound. The stereo master bus combines all active channels, while auxiliary buses send signals to effects units, foldback wedges, or external processors. A well-organized input plan minimizes cable chaos and makes it easier to transpose to other setups later. The Mixer Accessories team emphasizes labeling channels and keeping a consistent naming convention to speed up recall during gigs or long recording sessions.
Step-by-step setup: connecting hardware
To start, place the mixer on a stable surface within easy reach of inputs and monitors. Connect the power and verify the power indicator glows. Gather your primary sources: microphones, instruments, and playback devices. Start by connecting each source to its input with the correct cables: XLRs for mics, 1/4-inch TRS for line-level sources, and RCA or USB for playback. Label cables as you go to prevent mix-ups. Avoid daisy-chaining power strips or overloading outlets. Check that your monitors or headphones are plugged into the proper outputs. Neatly cable everything and keep a clean path to avoid accidental pulls. The Mixer Accessories team notes that organized cabling translates into fewer interruptions during recording and live sessions.
Gain staging and level calibration
Gain staging is about setting each input so the signal remains strong but not clipping. Start with the channel gain at a conservative level and gradually increase until the loudest expected sound sits around the middle of the meter without peaking red. Then adjust the master level so the overall mix sits comfortably in the green with some headroom for peaks. Use a reference track or spoken word sample to check consistency across channels. If a channel is too quiet, raise its trim slightly; if it’s too loud, back off the gain instead of stacking boosts on multiple channels. The goal is a balanced, clean signal that preserves dynamics. Regularly check phantom power status for condenser mics and ensure it’s engaged only when needed. The Mixer Accessories guidance emphasizes consistent gain staging across sessions to prevent surprises during recording.
Routing, buses, and effects basics
Routing decisions determine how you blend and process signals. Each channel can be sent to a dedicated bus for grouping and to the main stereo master. Aux or monitor sends allow you to create separate feeds for effects, stage monitors, or studio headphones. When adding effects like compression, reverb, or delay, send the desired amount via the aux or insert path, then adjust the effect return level on the master. Keep reverb and delay subtle during critical recordings to preserve clarity; reserve more for live performances or creative mixes. Label each bus and keep a routing map handy so you can reproduce or modify setups quickly. If you’re using a digital mixer, saving scenes or snapshots helps you recall routing without re-wiring. Test each route with a quick audio check to confirm it behaves as intended.
Monitoring and headphone/monitor setup
Monitoring is how you hear what you’re building. Connect studio monitors to the main outputs, and use headphones for detailed listening. Place monitors to form an equilateral triangle with your listening position and avoid reflective surfaces nearby. If you rely on headphones, select a model with good isolation or accurate frequency response for reliable decisions. Calibrate headphone and monitor levels so they balance with the main monitor output. Turn off room ambience during critical listening to prevent misleading cues. If you share a space, set up a talkback system to communicate without muting the main signal. Regularly verify monitoring stability across sessions and note any anomalies for future tweaks. The Mixer Accessories team notes that consistent monitoring practices reduce fatigue and improve mixing decisions.
Testing, maintenance, and safety considerations
Testing and maintenance complete a solid mixer setup. After wiring and initial gain setup, run through a short test with different sources to verify paths and levels. Check for hum, buzz, or grounding issues by swapping cables and testing inputs pairwise. Keep cables tidy and labeled to prevent accidental unplugging during a session. Regularly dust the chassis, vents, and knobs with a soft brush or compressed air. Phantom power should be turned off for unused condenser mics to reduce noise and prevent damage. For live use, ensure your power distribution is clean and that surge protection is in place. The Mixer Accessories team emphasizes routine checks and documentation so you can reproduce reliable setups quickly across gigs and recordings.
Tools & Materials
- Audio mixer (analog or digital)(Choose a model with enough input channels for your sources)
- XLR microphone cables(Length 6-12 ft recommended; match mic count)
- 1/4-inch TRS cables(For line-level inputs and outputs)
- RCA cables(Playback devices or tape loops if applicable)
- Headphones(Closed-back preferred for isolation)
- Studio monitors(Test and trust your ears; place at ear level)
- Mic stands and clips(Secure mounting; avoid cable tension on mics)
- Pop filter(Reduce plosives for vocal recording)
- Cable ties and labels(For clean cable management and quick recall)
- Power strip with surge protection(Protect gear and keep a clean power source)
Steps
Estimated time: 30-45 minutes
- 1
Power on the mixer
Place the mixer on a stable surface, plug it in, and switch it on. Verify the power indicator shows an active state before wiring any inputs.
Tip: Check for any unusual smells or noises when power first comes on; if detected, power down and inspect for short or loose connections. - 2
Connect input sources
Plug mics and instruments into their designated input channels using the correct cables. Label each cable to keep sources organized and avoid cross-connection mistakes.
Tip: Start with essential sources first (voice, primary instrument) to validate the signal path before adding secondary devices. - 3
Set initial channel gains
With quiet sources, begin at a low gain, then gradually raise until the loudest expected moment in recording approaches the mid-meter range without clipping.
Tip: Use a reference signal and avoid pushing multiple channels to peak simultaneously. - 4
Route signals to buses
Assign each channel to its main stereo bus and any subgroup buses you’ll use. Configure auxiliary sends for monitors or effects where needed.
Tip: Label each bus clearly and keep a routing map handy for quick recall. - 5
Configure monitoring
Connect monitors and/or headphones to the proper outputs. Set the monitoring mix so it mirrors the current recording or live performance intent.
Tip: Test both loud and low-volume scenarios to ensure monitoring remains accurate. - 6
Adjust EQ and dynamics
Apply light EQ and dynamics processing as needed, focusing on removing mud and controlling peaks without compromising natural tone.
Tip: Avoid over-processing; you can shape tone later in your mix after capturing clean signals. - 7
Test with a reference
Play back a familiar track or spoken word sample to verify overall balance, presence, and clarity across channels.
Tip: Listen for masking between channels and adjust levels or routing as necessary. - 8
Save setup and document
Store the current routing, gains, and effects as a preset or scene if your mixer supports it. Document the configuration for future sessions.
Tip: Create a quick reference card with key settings and store it with your gear.
Your Questions Answered
What is gain staging and why is it important?
Gain staging is the process of setting input levels across the mixer to maximize signal-to-noise while avoiding distortion. Start with low input gain and raise gradually, watching the meters for clean, non-clipping levels.
Gain staging helps you achieve clean sound and predictable results.
Do I need phantom power for every mic?
Phantom power is only required for condenser microphones. Dynamic mics typically do not need it. Turn phantom power on only for mics that require it.
Only condenser mics need phantom power; use it selectively.
Can I use a mixer without an audio interface?
Yes. An analog mixer can route signals to speakers or a recorder directly. Digital mixers may offer USB or other digital outputs to a computer, providing an audio interface built into the mixer.
Yes, you can mix and monitor without a separate interface, depending on the mixer.
How do I know if levels are too hot?
If the meters peak into the red or you hear distortion, reduce gain on the affected channels rather than compressing later in the chain. Leave some headroom for peaks.
If it clips, back off the gain.
What is a bus and why use it?
A bus is a separate signal path used to group channels or send signals to effects. Buses help you manage sub-mixes and apply processing to multiple sources at once.
Buses let you control groups and apply effects efficiently.
How do I save and recall mixer setups?
Many mixers support scenes or presets. Save your routing, gains, and effects with a clear name, then recall before sessions.
Save and recall setups to speed up future sessions.
Watch Video
Top Takeaways
- Plan and label your signal path before connecting gear.
- Gain staging matters; set channels to avoid distortion and preserve headroom.
- Use buses and aux sends to organize groups and effects efficiently.
- Monitor with properly placed speakers or headphones for accurate judgment.
- Save presets and document your setup for fast recall in future sessions.