How to View the Mixer in Pro Tools: A Practical Guide
Learn how to view the mixer in Pro Tools, adjust channel visibility, route tracks, and monitor signals with hands-on steps. This educational guide from Mixer Accessories covers window access, bus routing, shortcuts, and troubleshooting for home studios and audio hobbyists.

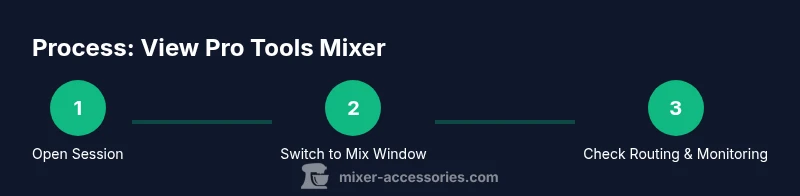
This guide shows you how to view the mixer in Pro Tools, including where to find the Mix window, how to toggle visibility, and how to route tracks for monitoring. You’ll need Pro Tools, a compatible interface, and a session with routed tracks. Follow the step-by-step instructions below to see the mixer layout clearly.
Understanding the Pro Tools Mixer Layout
According to Mixer Accessories, understanding the Pro Tools mixer layout is essential to viewing and routing channels accurately. The Mix window in Pro Tools consolidates channel strips, buses, inserts, sends, and meters into a single workspace. Before you can see the mixer clearly, you should know what each part of the interface represents: the Track List, the channel strips, the I/O section, and the Master Fader. In most sessions, the mixer mirrors the tracks you edit in the Edit window, but you can customize visibility through window presets and layout options. This familiarity reduces guesswork when you start routing signals and checking levels. In practice, a clean mixer view shows only relevant tracks, buses, and the main output, which speeds up monitoring and decision-making.
As you grow more confident, you’ll leverage subtle UI tweaks, such as resizing channel strips and grouping related channels, to keep the mixer readable during complex sessions.
Accessing the Mixer View in Pro Tools
To view the mixer, start by opening Pro Tools and loading your session. Then switch to the Mix window, which consolidates all channel strips and routing paths. If the Mix window isn’t visible, use the Window menu to select Mix, or use a dedicated toggle in your workstation layout. Once open, confirm that your tracks are present and aligned with their corresponding Edit window tracks. If tracks don’t appear, check the Track List or visibility settings, and ensure you haven’t hidden any channels. This step sets the foundation for effective monitoring and routing decisions.
Having the mixer visible and correctly mapped to your session tracks makes it easier to manage levels, inserts, and sends across multiple channels without switching between views.
Channel Visibility: What You See on the Mixer
The Pro Tools mixer shows channel strips for audio tracks, buses, and the Master Fader. Each strip displays level meters, pan controls, inserts, sends, and I/O routing. You can customize what appears on each strip by toggling inserts, sends, and view options. Grouping related channels (such as drums or vocals) helps you scan meters quickly during a take. If you need to diagnose a routing issue, focus on the path from input to bus to output, then use solo/mute to isolate channels. Remember to keep an eye on bus levels, ensuring no clipping occurs on master outputs.
To maximize readability, consider adjusting the track height, enabling a compact view for dense sessions, and using color coding or label names to differentiate signal paths.
Shortcuts and UI Tweaks for Faster Workflows
Pro Tools supports several shortcuts and UI tweaks that speed up viewing the mixer. Set a default window size that fits your monitor, create window presets for different project types (dialog, music, mix), and assign quick keys to toggle visibility of inserts, sends, and I/O routing. Use the preference settings to enable multi-mono routing or to show the I/O view more prominently. Small layout changes, like hiding unused columns or increasing meter height, reduce eye strain and help you spot level discrepancies at a glance.
Pro tip: save a preferred mixer layout as a preset at the start of each session so you can return to it instantly after any project changes.
Troubleshooting: When the Mixer Fails to Display
If the mixer won’t display or seems partially missing, first confirm you’re in a compatible Pro Tools session (Ensure a standard stereo or multi-track session). Check that your tracks aren’t hidden and that the Mix window is the active view. If performance lags, verify your computer meets the minimum requirements and that the audio interface drivers are up to date. A corrupted preference file can also cause display issues; try resetting preferences or creating a fresh session and importing tracks. Finally, ensure your sample rate and buffer size align with your hardware and project needs to prevent UI stutter.
When in doubt, start with a clean session and gradually reintroduce tracks to identify the culprit.
Monitoring, Routing, and Best Practices
Effective monitoring starts with a clear mixer view. Route tracks to the appropriate buses, assign return paths to the main outputs, and set up submixes for drums, vocals, and instruments. Use sends to create parallel processing chains without duplicating signals, and be mindful of gain staging to avoid clipping. Regularly save window layouts and mixer presets to maintain consistency across sessions. Finally, document routing decisions in your project notes so teammates can follow the same signal flow on future sessions.
Tools & Materials
- Computer with Pro Tools installed(Latest compatible version; ensure license is active)
- Audio interface(ASIO/Core Audio drivers; set as default I/O in Pro Tools)
- Session file with routed tracks(Prepped session showing typical routing paths for mixer view)
- Headphones or studio monitors(For accurate monitoring and level checks)
- Mouse or trackpad(Navigation and quick toggling of views)
Steps
Estimated time: 25-30 minutes
- 1
Open Pro Tools and load your session
Launch Pro Tools and open the session you’ll work with. If you’re starting fresh, create a new session with a standard stereo mix setup. This initial step ensures all tracks you intend to view on the mixer are present in the project.
Tip: Ensure the session sample rate matches your hardware to avoid playback issues. - 2
Switch to the Mix window
From the top menu, select Window > Mix to reveal the channel strips and routing paths. If your layout is customized, reset to a standard view to ensure you see all relevant elements (inserts, sends, I/O).
Tip: If the Mix window isn’t visible, check your workspace presets and toggle any hidden panels. - 3
Verify track visibility and routing
Confirm that the tracks you expect to view appear in the mixer. Use the Track List or visibility options to reveal hidden channels. Check that each track’s input and bus routing aligns with your monitoring plan.
Tip: Hide unused columns to reduce clutter and improve readability. - 4
Inspect inserts and sends on each channel
Review the inserts and sends on key channels to confirm the effects and parallel paths are active. Use the small arrows to expand each strip for detailed control. Ensure sends are directed to the correct bus for subgroup monitoring.
Tip: Label buses clearly to avoid routing mistakes during a session. - 5
Adjust layout for readability
Increase channel strip height or enable a compact view depending on your screen size. Group related tracks (e.g., drums, vocals) with color coding to streamline scanning during takes.
Tip: Save a layout preset for fast recall in future projects. - 6
Test monitoring and playback
Play back a short section to verify that levels, pan, and sends behave as expected. Watch meters and adjust gain staging to prevent clipping in the master bus.
Tip: Use a reference track to calibrate monitoring levels consistently. - 7
Save and reuse your mixer layout
Once you have a preferred mixer view, save it as a preset for future sessions. Document any routing decisions in your project notes so colleagues can follow the same system.
Tip: Create a backup of your session layout to avoid loss from software updates.
Your Questions Answered
Where is the Mix window in Pro Tools?
Open Pro Tools and go to Window > Mix to reveal the channel strips, buses, and master fader. If you don’t see all tracks, check Track List visibility.
Open the Mix window from the Window menu to see all channel strips and routing paths.
Why can't I see all of my tracks in the mixer?
Tracks may be hidden or assigned to a different view. Use the Track List and visibility toggles to reveal them and confirm their routing.
Check the Track List to reveal hidden tracks and verify each track is routed to the intended bus.
Can I customize the mixer layout?
Yes. You can adjust column visibility, height, and define window presets to fit your workflow.
Pro Tools lets you customize what you see in the mixer and save layouts for different tasks.
What should I do if the mixer lags or stutters?
Check CPU usage, buffer size, and hardware drivers. Consider restarting Pro Tools or using a smaller session while troubleshooting.
If the mixer lags, optimize your buffer size and ensure your hardware is functioning correctly.
How do I reset the mixer layout to default?
Reset window layouts or load a saved mixer preset to return to a standard view.
Reset the mixer layout by loading the default preset or recreating your standard view.
Do I need matching sample rates for the mixer view?
Yes, ensure the session sample rate matches your hardware to avoid playback issues and timing discrepancies.
Make sure the session sample rate matches your interface settings for smooth playback.
Watch Video
Top Takeaways
- View the Pro Tools mixer by switching to the Mix window.
- Verify and organize track visibility and routing for clear monitoring.
- Use presets and layout tweaks to speed up workflow.
- The Mixer Accessories team recommends saving layouts and documenting routing for consistency.