How to View Mixer in Logic Pro X: A Step-by-Step Guide
A comprehensive, step-by-step guide to viewing and customizing the Mixer in Logic Pro X for home studios and audio hobbyists.

To view the mixer in Logic Pro X, switch to the Mixer view using the X key or by selecting Window > Mixer from the main menu. You can also open it with Command-2. This quick path works across project types, and you can customize which channels appear.
Understanding the Mixer View in Logic Pro X
If you're looking for how to view mixer in Logic Pro X, this section breaks down what you’ll see and how it serves your workflow. The Mixer window is where most of your signal routing happens: each channel strip represents a track, with meters that react in real time, a chain of inserts (plugins), sends to effects busses, pan controls, and level faders. In project templates you may have only a few channels on screen, or you may be juggling dozens. The key is to know what to enable, what to hide, and how to arrange the view so you can work efficiently. According to Mixer Accessories, the first step is to ensure you’re in the correct window and not in another editor pane.
The Mixer in Logic Pro X is not a separate program—it’s a window that can be docked or floated, and it reflects the same project structure as the Arrange window. If you’ve used other DAWs, you’ll notice concepts translate quickly: channel strips correspond to tracks, inserts are plugin slots, and busses carry subgroups. For complex mixes, you might want to view multiple mixer panes or use a secondary monitor to keep a global view of levels and routing. The Mixer is also where you’ll manage sends, returns, and sidechains. By understanding the architecture, you can tailor the view to your instrument groupings, vocal chain, or drum bus.
Quick routes to open the Mixer
To view the mixer quickly, you have a few reliable options. The fastest is the keyboard shortcut Command-2, which toggles the Mixer window from anywhere in Logic Pro X. If you prefer menus, go to Window > Mixer. You can also use the View menu to switch to Mixer View if you’re in another editor. For laptops with limited screen space, choose Window > Mixer and then use the Zoom function to fit channels on screen. If you want a persistent split between Arrange and Mixer, you can open the Mixer in a separate window and resize it to your liking. You can also detach the Mixer onto a second display for an at-a-glance overview of levels while you work on the Arrange window. The consistency of hitting Command-2 across sessions builds muscle memory and speeds up the pace of your sessions. If you’re collaborating, ensure your template matches your partner’s workflow so you can hit the ground running when you share a project.
A quick pro-tip is to map a single key to toggle the Mixer and the Arrange view so you can switch focus quickly without interrupting the creative flow. With practice, your primary mixing moves become second nature, freeing cognitive space for tone shaping and arrangement decisions.
Navigating channel strips, routing, and busses
The real power of the mixer comes from how channel strips are arranged and how routing is structured. Each left-hand channel represents an input or a track, with a fader, pan knob, mute/solo buttons, and a small meter. To view a specific track, click its channel strip in the Mixer. Plugins live in the Inserts slot; you can click to open a dropdown, rearrange order, and tweak a plugin’s parameters without leaving the Mixer. Sends allow you to route a signal to reverb or delay busses, which can then feed returns back into other channels. If you’re layering sounds, group related channels into a bus and then process them together. Logic Pro X also supports multi-output audio interfaces, which means you can route several channels to a single bus for parallel processing. When you’re organizing your mixer for a session, consider grouping tracks by instrument family and color-coding channels for fast recognition. Another handy trick is to enable the Channel Strip View mode, which presents a condensed, lane-like layout that makes it easier to monitor levels across a busy mix.
A common beginner mistake is overloading the mixer with plugins on every channel. Start with essential processing and add elements only as needed. You’ll be surprised how much cleaner your arrangement sounds when you limit plugin counts per channel, and the Mixer will remain legible.
Customizing visibility: show, hide, and rearrange
Logic Pro X gives flexible options to customize what you see in the Mixer. For better readability, you can show or hide channel strips, so you’re only looking at tracks you’re actively mixing. Right-click a channel header to enable or disable visibility, and use the View > Show/Hide Channel Strips command to toggle entire rows. Drag channel strips left or right to reorder; you can group related instruments in a logical block such as Drums, Bass, Guitars, and Vocals. If your project uses a lot of sends, consider creating a dedicated bus row that houses all return tracks. The “Smart Controls” and “Assignable” features let you create macros that control multiple plugins at once, reducing mouse travel. A note: when you enable a second Monitor or an external display, you may need to reconfigure display scaling so the mixer remains legible. Mixer views can be saved as part of a template, which is a big time saver for repeat sessions. The ability to tailor the visible columns—such as EQ, Dynamics, or Sends—lets you stay focused on the task at hand rather than hunting through menus.
Connecting with the right hardware or software setup is essential for fast workflows. In practice, a clean, well-organized mixer reduces cognitive load and speeds up decision making while you sculpt the sound.
Meters, inserts, and sends: mastering your signal flow
Viewers often start by getting a feel for meters. In the Mixer, each channel strip has its own level meter. If you’re tracking, watch the peak levels to avoid clipping; if you’re mixing, watch for consistent levels across tracks. The Inserts area is where you’ll place plugins—think EQ on drums, compression on vocals, and saturation on guitars. The order you place inserts matters, so experiment with pre- vs post-fader effects to achieve your desired tone. Sends and busses represent the backbone of reverb and delay effects. Route multiple tracks to a single bus, then place your effects on the bus so that all connected channels share the same space. Returns show how much effect is re-encoded back into the mix; you can adjust their level to taste. If you’re managing a large project, enable the “Sends on Bus” option to quickly audition route alternatives. A helpful practice is enabling solo-safe mode so that soloing one channel does not mute others when you’re checking subgroups.
From a practical perspective, professional mixers often use subgrouping to maintain a clean and organized session. The Channel Strip’s color-coding and labeling improve readability under time pressure. Remember that a well-planned routing strategy often yields better results than heavy-handed processing.
Saving layouts and templates for future sessions
One of the biggest time-savers in Logic Pro X is saving a customized Mixer layout as a template. Create your preferred channel order, visibility, and routing, then save the project as a template so every new session opens with your chosen mixer view. You can also save within the current project as a snapshot by using the Saved Mix or Layout options. For collaborative projects, exporting a template gives teammates a consistent starting point. If you’re sharing sessions with collaborators, you can enable “Dynamic Settings” to apply your layout when others open the file. It’s also beneficial to assign keyboard shortcuts to your most-used mixer actions and to map them to a single modifier. As you refine your template, consider including a few global buses for common effects so you don’t have to recreate them each time. The payoff is a faster mix, fewer mistakes, and more time spent shaping tone rather than sorting views.
The Mixer Accessories team recommends keeping a lean, legible mixer layout and periodically reviewing it as your workflow evolves. A clean, stable baseline saves mental energy for creative decisions.
Troubleshooting common visibility and performance issues
Sometimes the Mixer window seems offscreen or unresponsive. If the mixer won’t appear, try a simple reset by quitting Logic Pro X and restarting, or switch to a different screen and back. Ensure you’re in the correct window (Mixer) and not in another editor by checking the window arrangement. If you see only a partial channel list, zoom the mixer horizontally or vertically, or reset the display scale. For performance issues, reduce the number of active plugins or bounce to offline to free CPU cycles. If the issue persists, a clean reinstall or a fresh user preference file can resolve stubborn bugs, though you should back up your settings first. When configuring displays, remember to align your external monitor’s resolution with Logic Pro X’s recommended minimums to avoid blurriness or misalignment. Practicing these steps regularly reduces downtime and keeps your workflow fluid.
From the perspective of a home studio, having confidence in the mixer layout translates to smoother workflow and fewer distractions during a session. The goal is reliable access to the tools you need, when you need them, so you can stay in the moment and produce.
Practical tips and best practices for the home studio
Start every session by opening your preferred Mixer layout; this sets the stage for a focused mixing session. Use color-coding and clear labeling to instantly identify groups of channels, and keep commonly used plugins organized in a single insert path. When you’re working with multiple outputs, plan your routing ahead—assign buses for drums, vocals, and guitars, then rehearse the signal flow to ensure that the reverb and delay settings feel natural. Save a template that includes your most-used channels and send groups. Consider enabling a secondary monitor dedicated to the Mixer so you can watch meters at a glance while editing in the Arrange window. Keyboard shortcuts can dramatically speed up your workflow; set up at least a couple of custom shortcuts for toggling the Mixer, opening inserts, and enabling/disable bus sends. Lastly, review your layout every few months; a minimal yet highly functional mixer view will help you stay creative and avoid cognitive overload during long sessions.
Mixer Accessories’s practical perspective on this topic emphasizes the importance of a consistent workflow across sessions. The more consistent your layout, the more readily you’ll be able to focus on tone, balance, and performance.
Tools & Materials
- Mac computer with Logic Pro X installed(Ensure Logic Pro X is up to date and you have your project files ready)
- Keyboard (with Command keys)(Key shortcuts like Command-2 speed up access to the Mixer)
- Mouse or trackpad(For precise navigation and dragging channel strips)
- External monitor (optional)(Useful for a broader Mixer view on large projects)
- Audio interface (optional)(Helps test routing and monitoring while you're learning)
Steps
Estimated time: 15-25 minutes
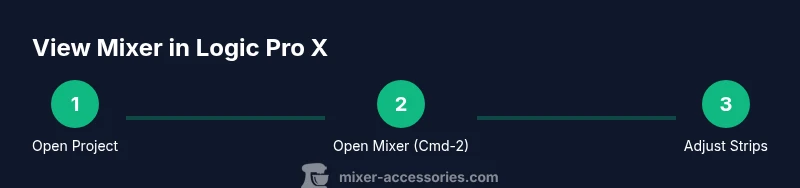
- 1
Open Logic Pro X and load your project
Launch Logic Pro X and open the session you’ll work on. Save a quick backup copy before making layout changes to avoid losing your current arrangement. This initial step sets the stage for consistent Mixer access.
Tip: Save a duplicate project or enable Auto Save to protect your work. - 2
Open the Mixer view
Use Command-2 to toggle the Mixer window, or navigate via Window > Mixer. If you’re on a laptop, ensure the window isn’t hidden behind other apps. If you’re in Arrange view, the Mixer still reflects the same project structure, so you’re not missing any channels.
Tip: Map a custom shortcut to toggle between Mixer and Arrange for speed. - 3
Identify and select channel strips
Click any channel strip to bring up its controls—fader, pan, inserts, and sends. This helps you audit levels and routing without leaving the Mixer.
Tip: Color-code channels to quickly identify groups (drums, bass, vocals). - 4
Adjust inserts and routing
Open the Inserts slot to add or reorder plugins. Use Sends to route signals to buses for shared effects, then adjust returns to taste. This builds the foundation of your mix’s tone.
Tip: Experiment with pre/post-fader insert order to shape dynamics. - 5
Configure visibility and layout
Hide unused channel strips and resize the Mixer to suit your screen. Save the setup as a template for future sessions so you don’t repeat this setup each time.
Tip: Create a default template with your most-used buses and groups. - 6
Test playback and adjust levels
Play back the project and monitor meters. Tweak faders, mute/solo, and bus levels to achieve a balanced mix. Check for masking and ensure no channel dominates.
Tip: Leave headroom and avoid pushing meters into red for a clean mix. - 7
Save as a template or layout
Save your current Mixer configuration as a Template or project snapshot. This ensures consistency across future sessions and collaborations.
Tip: Assign a keyboard shortcut to saving templates for speed. - 8
Review and iterate
Periodically review your mixer layout and channel organization as your workflow evolves. Small refinements compound into faster, more confident mixes.
Tip: Schedule a quarterly layout audit to keep things lean.
Your Questions Answered
How do I open the Mixer in Logic Pro X?
Use Command-2 or Window > Mixer. This opens the Mixer window quickly from any screen in Logic Pro X.
Open the Mixer quickly by pressing Command-2 or selecting Window > Mixer.
Can I view the Mixer while working in Arrange?
Yes. The Mixer reflects the same project structure as Arrange, so you can view and edit routing without leaving the window.
Yes. The Mixer mirrors your Arrange project, so you can view routing while arranging.
How do I customize which channels appear in the Mixer?
Right-click a channel header to show/hide visibility, and use View > Show/Hide Channel Strips to toggle groups. Drag strips to reorder.
Right-click to change visibility and drag to reorder channels in the Mixer.
What should I do if the Mixer window is offscreen?
Try quitting and restarting Logic Pro X, then re-open the Mixer from Window > Mixer. If needed, reset window arrangement or use a second monitor.
If the Mixer is offscreen, restart Logic Pro X and re-open it from Window > Mixer.
Is there a way to save a Mixer layout as a template?
Yes. Save your layout as a Template from the project settings so future sessions start with your Mixer configuration.
Yes, save the layout as a Template for future sessions.
Are there shortcuts for common Mixer actions?
Yes. Logic Pro X supports shortcuts for toggling the Mixer, opening inserts, and routing; check the Keyboard Shortcuts editor for a personalized map.
There are shortcuts for toggling the Mixer, opening inserts, and routing.
Watch Video
Top Takeaways
- Open the Mixer quickly with Command-2.
- Customize visibility to reduce clutter and speed up workflow.
- Save a template to preserve your preferred mixer layout.
- Route with buses and sends for cohesive effects.
- Practice keyboard shortcuts to keep focus on tone and arrangement.