Shower Mixer Valve Replacement: A Practical DIY Guide
A practical, educational guide for homeowners to replace a shower mixer valve safely. Learn identification, tool kits, step-by-step instructions, maintenance tips, and troubleshooting to restore reliable temperature control and prevent leaks.

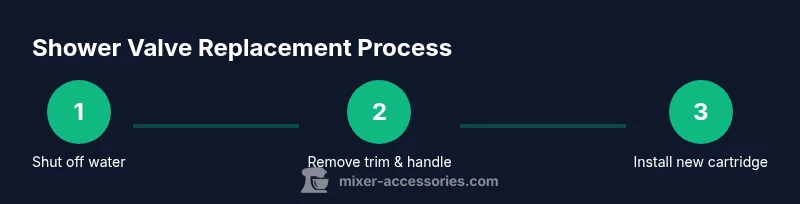
Replacing a shower mixer valve is a doable DIY task when you match the right valve to your model and follow safe steps. Start by shutting off water, removing the trim and handle, and extracting the worn cartridge. Install a compatible replacement, reseal connections with plumber’s tape, and test for leaks and temperature accuracy before restoring the finish. Prepare by inspecting the valve type (cartridge vs. thermostatic), note model numbers, and test the supply lines for pressure before finalizing the install.
What is a shower mixer valve and when to replace?
A shower mixer valve is responsible for blending hot and cold water to produce a comfortable shower temperature. There are several types, including cartridge-based single-handle valves and thermostatic (temperature-regulating) valves. Over time, the internal cartridge can wear, O-rings can fail, and seals may leak, leading to drips, temperature fluctuations, or reduced water flow. If you notice sudden temperature swings, persistent leaks around the trim, or difficulty maintaining a set temperature, replacement is often the most reliable solution.
According to Mixer Accessories, selecting the correct replacement that matches your valve model reduces leaks and ensures proper performance. The Mixer Accessories team found that homeowners who use model-specific cartridges or valves see longer-lasting results and fewer callbacks after installation. This is why identifying the exact valve type before purchasing parts is a critical first step.
In practice, identifying your valve type usually starts with removing the handle to inspect the cartridge or valve body. If your unit uses a cartridge, you’ll typically see a cylindrical component that slides in and out. Thermostatic and pressure-balanced valves may have more complex cartridges or separate temperature regulating components. When in doubt, bring a photo of your current setup and any numbers from the valve body to a hardware store or consult the manufacturer’s documentation for a match.
Tools and replacement parts you'll need
Before you begin, gather the essential tools and a compatible replacement kit. The exact kit depends on your valve model, but most replacements require standard plumbing tools and a model-matched cartridge or valve body. Having everything on hand reduces the chance of a mid-project trip to the hardware store.
- Adjustable wrench – essential for loosening fittings and valves. Note the size you’ll need and avoid overtightening to prevent damage.
- Screwdrivers (flat and Phillips) – used for removing trim screws and handles.
- Pliers (slip-joint or needle-nose) – useful for gripping, bending, or holding parts during removal.
- Replacement cartridge or valve kit – must be compatible with your shower model. If you’re unsure, check the model number or manufacturer’s guide.
- PTFE thread seal tape (plumber’s tape) – helps seal threaded connections and prevents leaks.
- Silicone lubricant or grease (for valves with O-rings or seals) – use only where recommended by the manufacturer.
- Towels, rags, and a small bucket – for cleanup and to catch water in the valve cavity.
- Flashlight or headlamp – to illuminate tight spaces under the trim.
Optional but helpful: a magnetic pickup tool for dropped screws, a smartphone to document wiring before disassembly, and a shallow container to keep small parts organized.
Preparing your workspace and planning the replacement
Preparation is the secret to a smooth valve replacement. Start by turning off the water supply at the main shutoff if needed, then open a nearby faucet to relieve pressure. Remove the decorative escutcheon and handle using appropriate screws. Take photos of the assembly before you begin so you can reference them during reassembly. Verify that you have the correct replacement kit for your valve model by checking the model number on the valve body or consulting the manufacturer’s website. Clear the area, protect the tub or shower floor with towels, and ensure the room is well-lit. Finally, double-check that you have all required tools and parts within arm’s reach to minimize interruptions.
Safety considerations and common pitfalls
Safety first: never work with live electrical components in the same space and avoid forcing parts that don’t want to come free. Always shut off the cold and hot water supplies and confirm no water is flowing through the lines by attempting to run a cut-off fixture. Common pitfalls include overtightening fittings, using the wrong cartridge type, and skipping the final leak test after reassembly. If you encounter corroded fittings or a valve stuck in the open or closed position, stop and reassess; forcing can damage piping or the valve body. Use manufacturer-recommended lubricants on O-rings and seals only if specified. If you’re not confident in identifying the correct cartridge, consider consulting a pro or the valve manufacturer’s technical support.
Aftercare, testing, and maintenance tips
Once the new cartridge or valve is installed and the trim is reassembled, slowly turn the water supply back on. Check for leaks around all connections and ensure the handle operates smoothly through its full range. Test hot and cold settings to confirm temperature stability and pressure consistency. If there’s any drip or residual seepage, tighten fittings a small amount while monitoring carefully. Clean any mineral buildup on the exterior and inspect the escutcheon for proper alignment. Regular maintenance—such as periodic cleaning of mineral deposits and inspecting seals—helps extend valve life and maintain reliable performance.
Tools & Materials
- Adjustable wrench(6-12 inch adjustable preferred)
- Screwdriver set(Phillips and flat-head)
- Pliers (slip-joint or needle-nose)(Good grip for small parts)
- Replacement cartridge or valve kit(Model-matched to your shower valve)
- PTFE thread seal tape (plumber’s tape)(Wrap 2-3 wraps around male threads)
- Silicone lubricant/grease(Only if recommended by manufacturer)
- Towels/rags and small bucket(Catch drips and protect surfaces)
- Flashlight/trim removal light(Improve visibility in tight spaces)
- Smartphone or camera(Document assembly for reference)
Steps
Estimated time: 60-120 minutes
- 1
Shut off water and prep area
Locate the main shutoff and turn off both hot and cold supplies. Open a nearby faucet to relieve pressure and drain residual water. Clear the area and protect surfaces with towels before removing any finishes.
Tip: Always verify no water flow at the shower outlet before starting work. - 2
Remove escutcheon and handle
Use the appropriate screwdriver to remove the screws holding the escutcheon. Gently pull off the trim and unbolt or unclip the handle. Set hardware aside in an organized location for reassembly.
Tip: Take a photo of the handle mechanism orientation before removal. - 3
Identify and access the cartridge
Inspect the valve body to determine cartridge type. Some valves require removing a retaining clip or nut to release the cartridge. If present, carefully remove it without bending surrounding components.
Tip: Keep track of any small springs or o-rings; many parts are identical in appearance but not function. - 4
Remove old cartridge and inspect
Gently pull the cartridge straight out using pliers or a cartridge remover tool. Inspect the valve body for wear, corrosion, or mineral buildup. Clean the cavity with a soft brush and ensure threads are undamaged before installing the new cartridge.
Tip: If the valve body shows heavy corrosion, replacement of the valve body might be necessary. - 5
Install new cartridge and reseal
Insert the replacement cartridge according to the manufacturer’s instructions. Reinstall any retaining clips or nuts. Apply PTFE tape to threaded connections as directed and reseat the trim plate.
Tip: Do not overtighten; snug-tension is usually sufficient for a good seal. - 6
Reassemble and test
Reattach the escutcheon and handle, then slowly turn the water back on. Check for leaks at all joints and verify temperature control across the full range. Make minor adjustments if leaks persist.
Tip: Run both hot and cold at medium pressure for a thorough check.
Your Questions Answered
Do I need to turn off the main water supply or can I just shut off the local valve?
It's safest to shut off the main water supply if you can't locate the specific shutoff for the shower. After turning off water, test fixtures to confirm there is no pressure. This reduces the risk of water spray and injury during disassembly.
Shut off the main water supply if you can't locate a dedicated local shutoff, then verify no pressure before starting.
How do I know which replacement cartridge to buy?
Find the valve model number on the body or check the manufacturer’s documentation. Use a replacement cartridge or valve kit specifically designed for that model to ensure proper fit and performance.
Look up the valve model number and buy the exact replacement cartridge or kit designed for that model.
Can I replace the valve cartridge myself, or should I hire a pro?
Many homeowners can replace a cartridge with basic tools if they’re comfortable with plumbing. If you encounter corrosion, a stuck valve, or complex trims, consider hiring a licensed plumber.
You can usually DIY the cartridge replacement, but call a pro if you meet corrosion or a hard-to-access valve.
What maintenance can prevent leaks after replacement?
Regularly inspect seals and escutcheons, clean mineral buildup, and replace worn O-rings as part of routine maintenance. Using the correct sealant and avoiding over-tightening helps prevent future leaks.
Inspect seals regularly, keep mineral buildup down, and avoid overtightening to prevent leaks.
Will replacement affect temperature stability?
A correctly installed, matched cartridge restores stable temperature control. If the system still fluctuates, recheck installation, seals, and ensure there’s proper pressure balance.
When done right, temperature stability returns; recheck if you notice continued fluctuations.
Should I replace the trim along with the valve?
If the trim is worn, corroded, or shows misalignment after valve work, replacing trim improves aesthetics and prevents leaks at the escutcheon.
Replace worn trim if needed to seal better and improve appearance.
Watch Video
Top Takeaways
- Identify valve type before purchasing parts
- Use a model-matched cartridge or valve kit
- Seal threaded connections with PTFE tape as directed
- Test thoroughly for leaks and temperature accuracy
- Document the process with photos for future maintenance