Replace a Shower Mixer Valve: Step-by-Step Guide
Learn how to replace a shower mixer valve with a practical, safe, and thorough step-by-step guide. Includes tools, tips, and common mistakes to avoid for a leak-free shower.

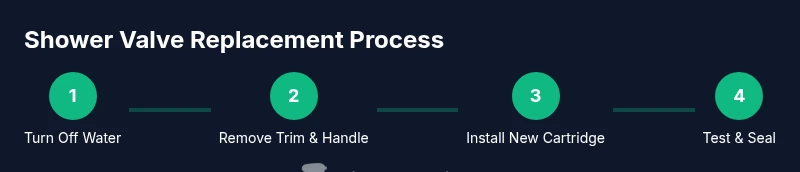
This guide helps you replace a shower mixer valve with a safe, step-by-step process. You’ll learn to shut off water, remove trim, replace the cartridge or valve, and test for leaks. Use the right tools to avoid damage and ensure a lasting seal.
Why replacing a shower mixer valve matters
A worn or leaking shower mixer valve can lead to inconsistent temperatures, sudden hot-water surges, and higher water bills. Replacing a faulty valve restores predictable performance and prevents long-term damage to tile, cabinetry, and drywall. According to Mixer Accessories, a properly executed replacement reduces hot-to-cold crossover and minimizes the risk of scalding from temperature spikes. When you replace mixer valve in shower with the correct cartridge or valve kit, you’ll enjoy reliable operation and fewer repairs over time.
Valves come in several styles, but most residential showers use a single-handle mixing mechanism. In cartridge-type valves, a replaceable cartridge does the actual mixing; in older or heavier setups, you may encounter a stem-and-seat arrangement. Before buying parts, identify your valve type by removing the handle and trimming plate to inspect the valve body. Keep in mind that incorrect parts can worsen leaks or cause leaks around threads. If you’re unsure, photograph the valve from multiple angles and note model numbers on the cartridge or valve body. This initial assessment is essential to a confident, efficient replacement.
Replacing a mixer valve is a common DIY project for confident homeowners, but it’s also where many mistakes occur. Take your time to verify compatibility with your shower system and to protect surrounding surfaces from water. A successful replacement should feel solid, with smooth handle motion and a leak-free seal around the trim. If you encounter corrosion, damaged pipes, or hidden leaks behind the wall, stop and consult a pro.
Tools & Materials
- Adjustable wrench(3/8 in to 1-1/2 in jaw capacity)
- Flathead screwdriver(For handle screws)
- Phillips screwdriver(For set screws)
- Pliers (needle-nose)(For removing clips or retainers)
- Bucket(Catch water and drips during disassembly)
- Towels or rags(Dry area and protect surfaces)
- Replacement shower valve cartridge/valve kit(Match model and valve type)
- Plumber's tape (Teflon tape)(Seal threaded connections)
- Flashlight(Good lighting for dark corners)
- Penetrating oil (optional)(Loosen corroded fittings)
Steps
Estimated time: 60-90 minutes
- 1
Shut off water and prep
Turn off the main water supply and verify no water is flowing to the shower. Relieve any remaining pressure by running the hot water for a minute. Protect the floor and nearby surfaces with towels, and gather all tools within reach.
Tip: Take a quick photo of the valve and trim before disassembly to aid reassembly. - 2
Remove handle and trim plate
Use the appropriate screwdriver to remove the handle and then the trim plate or escutcheon. Keep the screws in a labeled container. If the handle is secured with a hidden set screw, locate and loosen it first.
Tip: If screws are tight, apply a small amount of penetrating oil and wait 3–5 minutes before attempting again. - 3
Identify valve type and prepare to access
Look inside the valve bore to determine whether you have a cartridge, compression, or stem-and-seat design. Photograph the orientation for correct reassembly and check for any model numbers on the cartridge.
Tip: Matching the exact cartridge size and orientation is critical to a leak-free result. - 4
Remove old cartridge/valve assembly
Carefully extract the old cartridge or valve body from the housing. Note the position of any retaining clips or nuts and clean the bore to remove mineral deposits before installing the new part.
Tip: Do not force a tight cartridge; if it binds, recheck alignment and measurement. - 5
Install new cartridge/valve and reassemble
Insert the replacement cartridge or valve assembly in the same orientation as the old one. Refit any retaining clips, nuts, and the trim plate. Reconnect any supply lines with proper sealant and tighten to snug-fit—avoid overtightening.
Tip: Wrap threads with plumber’s tape evenly in the direction of thread rotation. - 6
Test for leaks and adjust temperature
Turn the water back on and slowly open the supply to the shower. Check all connections for leaks and operate the handle through its full range to verify temperature control. If leaks appear, tighten fittings slightly and reseat the cartridge as needed.
Tip: If you notice colored water or persistent leaks, shut off water again and recheck seating and seals.
Your Questions Answered
Can I replace a shower mixer valve without professional help?
Yes, if you have basic plumbing skills and the correct parts. If the valve is behind a wall or shows heavy corrosion, consider a professional.
Yes, you can DIY if you have basic plumbing skills and the right parts; otherwise call a pro for hidden damage.
What tools do I need for replacing a shower mixer valve?
Essential tools include an adjustable wrench, two screwdrivers (flat and Phillips), pliers, a bucket, towels, and the replacement cartridge or valve kit. Gaskets and plumber’s tape are also handy.
You’ll need basic hand tools and the valve kit to replace the mixer valve.
How do I identify the type of valve I have?
Remove the handle and trim plate to inspect the valve body. Look for cartridge presence, screws, and the way the components are arranged; documentation or model numbers on the cartridge help you order the correct part.
Open the trim to see if it’s cartridge, compression, or stem-and-seat.
What common mistakes should I avoid?
Not turning off the water, using the wrong cartridge size, overtightening fittings, and damaging pipes behind the wall. Double-check compatibility before purchase.
Avoid turning on water before parts are properly installed and seated.
When should I hire a plumber?
If you encounter corroded pipes, hidden leaks, or uncertain valve compatibility, hire a plumber to prevent water damage and ensure a proper seal.
If you’re unsure or see corrosion, it’s safer to call a plumber.
Watch Video
Top Takeaways
- Identify valve type before purchasing parts
- Shut off water and relieve pressure before starting
- Use the correct cartridge/valve kit for your model
- Test for leaks and secure trim after reassembly