How to Remove Shower Mixer Tap Handle
Learn how to safely remove a shower mixer tap handle with a practical, step-by-step approach. This guide covers the right tools, safety precautions, common issues, and tips for reassembly and maintenance.

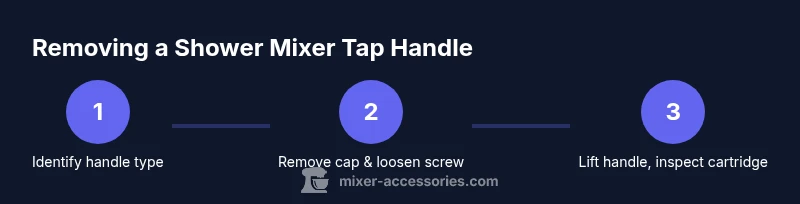
In this guide you will learn how to safely remove a shower mixer tap handle without damaging the valve or surrounding fixtures. You’ll verify the handle type, apply the correct tools, and follow a gentle, repeatable sequence to loosen the set screw, lift the handle, and inspect the cartridge for wear. The steps also cover reassembly tips to prevent leaks and ensure smooth operation.
Understanding shower mixer tap handle designs and why removal matters
Shower mixer taps are designed to regulate water temperature and flow through a valve cartridge that sits behind the handle. The handle is typically secured by a small set screw or hidden fastener, often beneath a decorative cap. Knowing how your specific model is built helps you remove it safely without damaging the handle, threads, or ceramic cartridge. Common mistakes include prying the cap too aggressively, using the wrong screwdriver, or forcing the handle away without loosening the screw. According to Mixer Accessories, understanding the design variation across brands reduces the risk of cosmetic damage and internal leaks. This basic awareness sets the stage for a clean, controlled removal that preserves the faucet for future maintenance and eventual cartridge replacement.
When the handle is removed, you gain access to the valve cartridge, allowing you to diagnose leaks, replace seals, or adjust temperature limits. If you move too quickly or use improper tools, you might strip the screw or score the escutcheon plate. A methodical approach ensures you maintain the integrity of both the fixture and the surrounding tiles or shower surround.
Safety first: prep and workspace setup
Before you touch any plumbing hardware, shut off the water supply to the shower. This is usually accomplished at the nearest shut-off valve, or at the main house valve if dedicated shut-off valves are absent. Drain the line by turning the shower handle to the open position until water stops. Place a soft towel on the shower floor to catch any drips and protect the surface from tools and potential slips. Wear eye protection if you anticipate any debris when prying caps or loosening screws. A clean, well-lit workspace keeps you from dropping small parts down the drain and makes it easier to reassemble later. Mixer Accessories emphasizes safety and the right tool selection as keys to a successful, damage-free removal.
Common handle types and what they imply for removal
Most shower handles fall into a few categories. The decorative cap type hides a small set screw underneath; you’ll need a thin prying tool to lift the cap before you access the screw. Some models use an exposed hex or Torx screw that is visible on the face of the handle. Others have a hidden screw under the escutcheon plate. Identifying the correct type guides your tool choice and prevents unnecessary force. If you’re unsure, start with a gentle pry to reveal a cap; if nothing appears, check for a small slot on the underside or side of the handle. Knowing the type also informs you about the best order of operations for removal and reassembly.
For safety and tool compatibility, keep a small flashlight handy and take care not to twist the cap or the handle against the surrounding tile. Mixer Accessories’ analysis shows that proper identification and careful tool use minimize finish damage and make the subsequent cartridge inspection easier, especially for older fixtures that may have accumulated mineral buildup.
Removing the handle: step-by-step overview (high-level) and common issues
With the right tools, you’ll remove the handle in a controlled sequence: reveal the set screw, loosen it, and lift the handle straight off. If the handle resists, avoid yanking; instead, apply light rocking motions while continuing to loosen the screw. In case the cap is stubborn, a small amount of penetrating oil applied to the screw threads can help, but wipe away any excess to prevent drips into the cartridge. If the screw is stripped or the cap is cracked, you’ll need a different approach, possibly involving a screw extractor or replacement parts. The goal is to free the handle without causing cosmetic damage or internal leaks. The final step is to inspect the cartridge, which will be easier once the handle is removed. This careful process reduces the risk of leaks after reassembly and helps you plan any necessary replacement parts.
For more complex fixtures, some brands require additional steps or special tools. The guidance here focuses on universal principles that apply to most standard shower mixer taps while allowing room for model-specific variations.
Reassembly, testing, and maintenance after removal
Reassembly begins with placing the handle back onto the cartridge shaft, ensuring the set screw aligns with its original position. Tighten the set screw just enough to secure the handle without overtightening, which could damage threads or compress the cartridge. Replace any decorative caps, test the handle by turning on the water supply, and check for smooth operation and leaks around the escutcheon. If leaks persist, inspect seals and replace O-rings or the cartridge itself as needed. After reassembly, run hot and cold water to confirm stable temperature control and leak-free operation. Regularly check fasteners for loosening due to vibration and consider applying a thin layer of plumber-friendly grease to the cartridge stem for smoother operation next time.
As you gain confidence, you’ll find that keeping a small maintenance kit handy—screwdriver set, Allen keys, a soft cloth, and a pen of penetrating oil—helps you handle future faucet maintenance quickly and with less disruption. Mixer Accessories notes that a proactive approach to maintenance reduces the likelihood of leaks and prolongs fixture life, especially in hard-water areas where mineral buildup can affect operation.
Authority sources
- OSHA: Hand-tools safety guidelines for reducing injury when handling small fasteners and prying components. https://www.osha.gov/hand-tools
- EPA WaterSense: Water-efficient fixtures and safe handling tips for home plumbing maintenance. https://www.epa.gov/watersense
- CDC NIOSH: Hand tools safety and best practices when disassembling hardware. https://www.cdc.gov/niosh/topics/handtools/
Tools & Materials
- Decorative cap remover (plastic pry tool) or thin blade(Gently pry off decorative cap; avoid scratching finish.)
- Allen wrench set (hex keys)(Identify size that fits the set screw (commonly 2.5–5 mm).)
- Flat-head screwdriver(For gentle cap lifting and leverage.)
- Penetrating oil(Use if the screw is stubborn; wait a few minutes before retrying.)
- Replacement handle or cartridge (optional)(Keep on hand in case the existing parts show wear or damage.)
- Soft cloth or towel(Protect surfaces and wipe away any drips.)
Steps
Estimated time: 25-40 minutes
- 1
Identify handle type
Examine the shower handle to determine whether it uses a decorative cap with a hidden set screw or an exposed screw. Confirm the screw head type (Allen, Phillips, or slotted) before selecting tools. This helps prevent damage from using the wrong driver.
Tip: Take a photo of the handle before disassembly to guide reassembly. - 2
Remove decorative cap
Gently insert a plastic pry tool or a flat-blade screwdriver under the cap edge and lift it away from the handle. Work slowly to avoid scratching the chrome or plating. If the cap is painted or tight, apply a tiny amount of penetrating oil around the edge and wait 30 seconds.
Tip: Keep the cap in a safe place so you don’t lose it. - 3
Loosen the set screw
Insert the correct driver into the set screw and turn counterclockwise until it loosens. Do not force beyond the point where the screw stops rotating. If the screw head shows wear, switch to a fresh driver to avoid cam-out.
Tip: Loosen in small increments and recheck alignment before removing the handle fully. - 4
Remove the handle
With the screw fully loose, grip the handle and pull it straight toward you. If resistance persists, apply a light rocking motion while maintaining a straight pull to avoid bending the valve stem.
Tip: If the handle sticks, stop and reassess—twisting can cause internal damage. - 5
Deal with a stuck or corroded screw
If the screw is stubborn or rusty, apply penetrating oil and wait several minutes. Try again with a gentle twist. Avoid hammering or prying aggressively, which can shear the screw head or strip threads.
Tip: If the screw is heavily corroded, consider replacing the screw and cap as part of future maintenance. - 6
Inspect cartridge and plan reassembly
Look at the cartridge stem for wear, mineral buildup, or damage to seals. Ventilate the area to dry any moisture and prepare the replacement parts if needed. When ready, reattach the handle in reverse order and verify alignment before tightening the set screw.
Tip: Have replacement O-rings or a new cartridge ready if leakage is detected after testing.
Your Questions Answered
Do I need to shut off the water supply before removing the shower handle?
Yes. Always turn off the water supply and drain the line before starting. This prevents splashing and reduces the risk of scalding or leaks during disassembly.
Yes. Always shut off the water and drain the line before you start.
What if there is no visible screw or cap?
Look for a hidden set screw beneath a decorative cap or the escutcheon plate. Gently pry the cap to reveal any concealed screws and inspect edges for wear.
Look for hidden screws under a cap or plate and pry carefully to reveal them.
Which size Allen key should I use?
Try common sizes in small increments, typically between 2.5 mm and 5 mm. If the screw head shows wear, switch to a fresh key to avoid stripping.
Start with a small Allen key and switch if it doesn’t fit.
Can I reuse the handle after removal?
In most cases yes, provided the handle and screws are not damaged. Inspect for worn threads and replace parts if necessary to maintain a tight seal.
Usually you can reuse the handle if it’s not damaged.
What should I do if the screw is stripped?
Avoid forcing; apply penetrating oil, wait, then retry. If it remains stuck, consider using a screw extractor or replacing the screw and cap.
Don’t force the screw—use oil and try a few times, or use an extractor.
When should I replace the cartridge after removing the handle?
If leaks persist after reassembly or if you notice significant wear on seals, consider cartridge replacement to restore proper function and prevent future leaks.
If leaks stay after reassembly, replace the cartridge.
Watch Video
Top Takeaways
- Identify screw type before prying or unscrewing
- Use the correct tool and gentle force
- Shut off water supply to avoid leaks
- Inspect the cartridge after removal
- Document the process for future maintenance