Repair Shower Mixer Valve: Step-by-Step Guide
A practical, beginner-friendly guide to repairing a shower mixer valve, covering diagnosis, cartridge replacement, safety tips, and maintenance to prevent leaks.

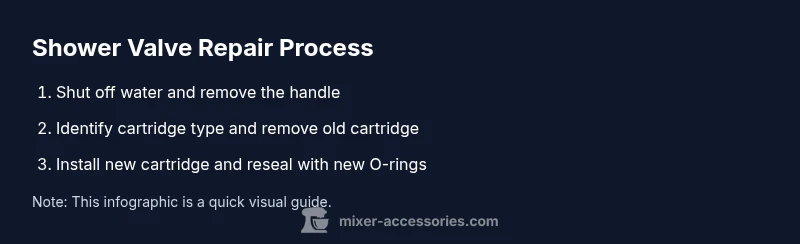
Goal: you will repair a shower mixer valve by diagnosing leaks, selecting the correct cartridge, and safely reassembling the valve. You’ll need basic plumbing tools, replacement parts compatible with your valve, and protective gear. This guide walks you through identification, disassembly, cartridge replacement, reassembly, and leak testing to restore full flow and prevent future drips.
Understanding the shower valve anatomy
Understanding how a shower mixer valve works is the foundation of a successful repair. A typical unit blends hot and cold water through a cartridge inside the valve body, translating your handle movement into a controlled mix. When the cartridge wears or the seals degrade, you may see leaks, inconsistent temperature, or reduced water flow. According to Mixer Accessories, a well-maintained shower mixer valve reduces water waste and prevents drips. Get to know the main components: the handle, escutcheon plate, valve cartridge, seats, O-rings, and the valve body. Note that cartridges are not always interchangeable between brands or models, so confirm compatibility before purchasing a replacement. Take time to observe how your valve behaves during operation—this helps you isolate the fault quickly. With a clear map of the anatomy, you’ll diagnose issues confidently and plan a precise repair rather than guessing.
Diagnosing the leak: where to start
Leaks often originate from multiple sources. A dripping spout could point to a worn cartridge or seat, while a slow leak around the escutcheon may indicate a degraded gasket or seal. Start by turning off the water supply and relieving pressure by opening the faucet. Inspect the handle and trim for looseness—if the handle wobbles, a loose fixing screw might be the culprit. Remove the escutcheon and inspect the cartridge area for mineral buildup, corrosion, or torn O-rings. A telltale sign is water seeping from the cartridge area when the valve is at mid-range temperatures. If drips persist after tightening screws, the cartridge or seals are the likely culprits. Maintain a simple log of what you observe—this will guide part selection and reduce guesswork. Mixer Accessories analysis shows that early diagnostics speed up repairs and minimize unnecessary parts purchases.
Choosing the right cartridge for your shower valve
Cartridge choice is the single most important step in a successful repair. Identify the brand and model number printed on the cartridge or valve body, then source a compatible cartridge with the same flow rate and temperature range. If you cannot read the markings, measure cartridge diameter and note the stem profile. Be aware that some cartridges include integrated seals, while others separate O-rings and gaskets. For many DIY repairs, it’s safer to bring the old cartridge to a plumbing supplier or check the manufacturer’s site for cross-reference charts. When in doubt, choose a cartridge that matches the valve family (e.g., ceramic disc, ball-type, or cartridge-type) and avoid mixing brands. A correctly matched cartridge provides reliable sealing, consistent temperature control, and fewer future leaks, saving time and money in the long run.
Tools and safety considerations
Before you begin, assemble a basic tool kit tailored to valve work. You’ll need an adjustable wrench, screwdrivers, pliers, PTFE tape, a replacement cartridge, and a set of O-rings or seals specific to your valve model. Always wear eye protection and gloves when working with plumbing fittings. Turn off the cold and hot water supplies to avoid scalds, then relieve pressure by running the shower for a few seconds. Keep towels handy to catch water drips and a bucket nearby for any spills. If you encounter corroded fittings or hidden plumbing behind drywall, pause and consider professional help. Safety-first practices protect you and your home from accidental damage and costly mistakes.
Step-by-step disassembly and inspection
Disassembly should be deliberate and organized. Start by removing the handle set screw, then slide off the handle and escutcheon. Inspect the trim plate and surround for wear or damage. Gently remove the retaining clip or nut holding the cartridge in place, using the appropriate tool. Carefully pull the cartridge straight out and inspect the seats for pitting, corrosion, or mineral buildup. Clean the valve body with a soft brush or cloth, taking care not to damage inner components. If you find damaged seats, you may need to replace them along with the cartridge. Take reference photos during disassembly to guide reassembly and ensure the correct orientation of the cartridge.
Replacing the cartridge and resealing
With the old cartridge removed, compare it to the new one to confirm compatibility. Lightly lubricate the new O-rings with silicone grease if recommended by the manufacturer, then insert the cartridge in the correct orientation. Replace any worn seals and install a fresh ferrule or clip to secure the cartridge. Reconnect the valve stem and ensure the stem engages smoothly with the handle. Before closing the wall, wrap thread areas with PTFE tape if needed and reassemble the trim plate and handle. A proper seal around the cartridge prevents leaks at the source and keeps the temperature control accurate.
Reassembly, testing, and adjustments
Reassemble the escutcheon, handle, and trim in the reverse order of disassembly. Turn the water supply back on slowly to avoid a surge that could dislodge seals. Check for leaks around the escutcheon, cartridge area, and inlet connections. Test hot and cold water separately, then cycle through the full range to confirm stable temperature and flow. If you notice a drip, tighten fittings gradually and verify the O-rings are seated correctly. If leaks persist after reassembly, reassess the cartridge fit or consider replacing seats. Patience during testing helps identify subtle issues that cause drips over time.
Common mistakes and troubleshooting
Common missteps include using the wrong cartridge, over-tightening fittings, or neglecting to replace O-rings. Always verify compatibility before purchase, and avoid forcing a cartridge into a misaligned stem. When mineral buildup is present, clean the valve core and seats gently; harsh scraping can damage seats and worsen leaks. If water leaks after reassembly, re-check the seals, ensure the cartridge is fully seated, and inspect hoses and inlets for cracks. If you’re unsure about a behind-wall issue, schedule a professional inspection to avoid water damage and improper repairs.
Maintenance tips to prevent future leaks
Preventing leaks begins with regular maintenance. Inspect the valve area annually for signs of wear, and replace O-rings with compatible seals before they fail. Use a dedicated valve grease and avoid mixing incompatible compounds that could degrade seals. Keep the water pressure steady to reduce stress on the cartridge and seals. Consider installing an inline filter to minimize mineral buildup. Finally, document your valve model and part numbers so future repairs can be performed quickly and accurately. Regular care extends valve life and keeps showers reliable.
Tools & Materials
- Adjustable wrench(Adjustable to fit valve nuts (usually 8-12 mm/14-18 mm range).)
- Screwdrivers (flathead and Phillips)(For handle screws and trim plates.)
- Replacement cartridge compatible with valve model(Match the brand and model; bring old cartridge if possible.)
- O-rings and seals set(Include all seals that come with the cartridge.)
- Pliers(For stubborn clips or retaining rings.)
- Plumber's tape (PTFE)(Wrap threads on inlet connections.)
- Silicone sealant(For exterior escutcheon sealing if needed.)
- Shop towels or rags(Keep workspace clean and catch drips.)
- Bucket(Catch water during disassembly.)
- Valve grease / plumber's grease(Lightly coat cartridge O-rings if recommended.)
Steps
Estimated time: 60-120 minutes
- 1
Shut off water
Turn off both hot and cold water supplies to the shower. Open the faucet to relieve pressure and drain residual water from the line. This prevents sudden sprays and makes disassembly safer.
Tip: If there’s no local shut-off, use the home’s main valve and keep a bucket ready for excess water. - 2
Remove handle
Use the appropriate screwdriver to remove the handle's set screw, then slide the handle off. If the screw is recessed, use a magnetic driver to avoid dropping it behind the vanity.
Tip: Store the screw in a labeled container so you don’t lose it. - 3
Remove escutcheon
Detach the escutcheon plate by loosening any visible screws or removing a decorative clip. Slip the plate away to expose the valve stem and cartridge nut.
Tip: Take a photo of the orientation before removing the plate for accurate reassembly. - 4
Identify cartridge type
Inspect the exposed cartridge for markings and measure its diameter. Compare with manufacturer cross-reference charts to ensure you select the correct replacement.
Tip: If markings are faint, photograph and zoom later to check details. - 5
Remove old cartridge
Carefully pull the cartridge straight out using your fingers or a cartridge puller. Avoid twisting, which can damage the valve body or seats.
Tip: If it’s stubborn, apply a small amount of lubricating oil around the cartridge edge and wait a minute. - 6
Inspect seats and seals
Look for pitting, corrosion, or mineral buildup on the seats. Clean with a soft brush; replace seats if damage is present. Inspect O-rings for cracks or tears.
Tip: Do not reuse damaged seats or O-rings; preemptive replacement saves future leaks. - 7
Install new cartridge
Lubricate new O-rings with silicone grease if recommended. Insert the cartridge in the correct orientation and secure with the retaining clip or nut.
Tip: Ensure the stem aligns with the handle so operation is smooth. - 8
Reassemble and test
Reattach the escutcheon and handle, turn the water back on slowly, and test hot/cold balance. Check for leaks around the escutcheon and cartridge area at multiple temperatures.
Tip: If you see leaks, reseat the cartridge and reseal joints before you conclude the job.
Your Questions Answered
What tools do I need to repair a shower mixer valve?
A basic toolkit plus replacement cartridge, O-rings, and PTFE tape. You’ll also need a screwdriver, adjustable wrench, and towels to catch drips. Always follow manufacturer instructions for your valve model.
You’ll need a basic toolkit and a compatible cartridge along with replacement O-rings, and don’t forget towels to catch drips.
Can I replace the cartridge myself, or do I need a plumber?
Many homeowners can replace a cartridge with the right part and careful following of instructions. If you encounter hidden pipes, severe corrosion, or water behind walls, consider professional help.
Cartridge replacement is often doable yourself, but call a pro if you see hidden plumbing or heavy corrosion.
How do I know which cartridge to buy?
Identify the valve brand and model or bring the old cartridge to a supplier. Use cross-reference charts provided by manufacturers to ensure compatibility with your shower valve.
Know your valve brand and model, or bring the old cartridge to ensure you buy the right part.
What if leaks persist after replacement?
Recheck O-rings and seating, then verify correct cartridge orientation. If leaks persist, the issue may be with seats, wall plumbing, or connections beyond the valve.
If leaks persist, double-check seals and cartridge orientation, and consider whether seats or wall plumbing need attention.
Is it safe to work on a shower valve with hot water?
Turn off the water supply first and avoid contact with hot surfaces. Use insulated tools when handling hot pipes and verify the water is cool before touching components.
Always shut off water and be mindful of hot surfaces; use insulated tools if necessary.
How often should I perform maintenance on a shower valve?
Inspect every 6–12 months for signs of wear on O-rings and seals. Replace worn parts promptly to prevent leaks and extend valve life.
Check seals and O-rings annually and replace worn parts as needed.
Watch Video
Top Takeaways
- Identify the valve type before ordering a cartridge
- Replace worn O-rings and seals to prevent leaks
- Test thoroughly after reassembly and adjust as needed
- Keep tools and parts organized during the repair
- Maintenance reduces future leak risk