How to Learn Mixing and Mastering: A Practical Guide
Learn a structured, step-by-step approach to mastering mixing and mastering skills with practical workflows, project ideas, and expert tips for home studios and hobbyists.

To learn mixing and mastering, follow a structured, progressive plan: study core concepts, practice with guided projects, and develop a repeatable workflow. Start with a solid DAW, a basic plugin set (EQ, compression, saturation), and critical listening habits; then compare your work against reference tracks and iteratively refine. This keeps learning tangible and avoids overwhelm.
Understanding what you are learning
According to Mixer Accessories, learning mixing and mastering is a structured skill that blends theory with practical application. The Mixer Accessories team found that progress accelerates when you follow a deliberate, progressive plan rather than random experimentation. In 2026, this approach remains essential for home studios and hobbyists who want tangible results without burning out. This guide explains what you’ll learn, why it matters, and how to build confidence through steady practice.
Core concepts you must master for mixing and mastering
A solid footing in signal flow, frequency balance, dynamics, and loudness is your foundation. Start with signal flow: understand where the sound travels from source to fader to bus to master. Then master EQ to sculpt tonality, compression to control dynamics, and saturation to add character. Pair these with a reliable monitoring chain and critical listening habits to make decisions with confidence. Remember to keep your goals clear: balance, clarity, and musicality. These concepts translate across genres, whether you’re mixing a rock track, a hip‑hop beat, or a podcast.
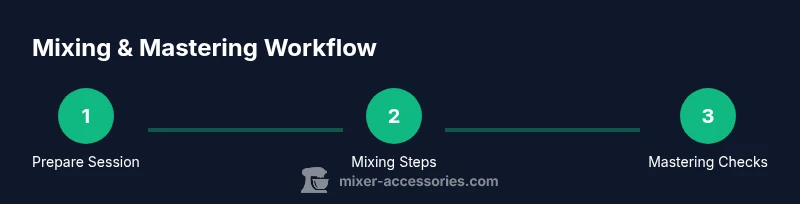
Structured learning path: from beginner to pro
A staged plan keeps learning manageable and measurable. In the beginner phase, focus on clean editing, basic EQ, and a simple rough mix. Move to intermediate by building a workflow: rough mix, balance drums, apply parallel compression, tune vocal processing, and begin mastering basics. Finally, in the advanced phase, practice stem mixing, loudness matching, multiband dynamics, and creative saturation. Use monthly milestones and weekly practice projects, and adjust based on your listening environment. The key is repetition with variety: work on drums, bass, vocals, and ambience in different genres. This structured path helps you stay motivated and see steady progression.
Practical practice routines and project ideas
Daily practice should be short but focused. Spend 20–30 minutes on a single technique, then shift to a longer project on weekends. Start with a 2‑track drum loop and build a full mix: add bass, guitar, vocal paths, and space using reverb and delay. For mastering practice, take a finished mix and experiment with loudness, tonal balance, and stereo width without sacrificing bass integrity. Create a simple project folder with stems and reference tracks to compare your results. Rotate projects weekly to cover different genres and instrumentation, ensuring you’re applying the concepts from blocks 1–3.
Essential gear, software, and plugin strategy
Choose a dependable DAW as your foundation and learn its workflow inside out. Pair it with essential plugins: equalization, compression, saturation, and metering. Don’t overbuy: start with stock plugins or affordable ones before expanding. For monitoring, use transparent headphones or studio monitors and calibrate your room if possible. Keep reference tracks handy and organize your plugin chain in a consistent order across projects. A disciplined plugin strategy prevents “plugin fatigue” and keeps your mix coherent.
Building a reliable mixing and mastering workflow
Your workflow is the backbone of consistent results. Start by organizing a project template: tracks grouped logically (drums, bass, instruments, vocals), bus routing for subgroups, and a mastering chain at the end. Draft a standard sequence: cleanup, balance, tonal shaping, dynamics, space, and loudness. For each track, set rough gain structure, then fine tune with subtractive EQ before additive boosts. Use reference tracks to steer decisions and avoid chasing trends. Maintain a versioned archive so you can compare progress over time.
Evaluating your progress with references
Critical listening is trained through regular comparison. Use well‑produced reference tracks in the same genre and create a listening checklist: tonal balance, stereo image, transients, and bass alignment. Switch between near‑field monitors and headphones to ensure translation. Note differences, then adjust. Remember, loudness should be perceived, not measured in isolation; focus on how the track feels in context. The goal is to achieve mix cohesion and a professional loudness standard without sacrificing musical integrity.
Common mistakes and how to avoid them
Overprocessing is the enemy of clarity. Avoid stacking dozens of plugins on a single bus and rely on a clean gain structure. Another pitfall is chasing loudness instead of balance; aim for headroom and musicality first. Neglecting room acoustics or proper monitoring leads to bad decisions. Always check your mix on multiple playback systems and take breaks to reset your ears. Finally, document your settings so you can reproduce or revert when needed.
Advanced paths and continuing education
As you grow, explore STEM-like measurement, loudness standards (LUFS), and multiband dynamics. Learn about convolution reverb, mid/side processing, and stereo imaging techniques to expand your sound. Take on collaborative projects, submit mixes for feedback, and study professional mixes across genres. Seek courses or mentors and stay curious. In 2026, the pace of software updates means you should refresh your toolkit periodically while maintaining a core, repeatable workflow.
Start now: a 4‑week starter plan
Week 1: fundamentals and basic editing, Week 2: intro to EQ and compression, Week 3: simple bus processing and a rough master, Week 4: reference track workflow and final tweaks. Each week, set small, measurable goals and record your progress. Use a single mix project and build a habit of weekly reflection. By the end of the month, you should have a completed track that demonstrates a coherent balance and a clear improvement trajectory.
Tools & Materials
- DAW software(Any widely used DAW (e.g., Ableton Live, Logic Pro, FL Studio, or Reaper))
- Audio interface(External interface with at least 2 inputs for recording and monitoring)
- Studio monitors or headphones(Flat frequency response preferred; consider a secondary pair for checking translation)
- Reference tracks(High-quality commercial references in your target genre)
- Plugin bundle (EQ, compressor, saturation)(Include metering and a limiter for final checks)
- Acoustic treatment/room correction tools(Absorption panels, bass traps, or room correction software)
- External hard drive(For project backups and archiving sessions)
- Quality cables and audio accessories(Reliable connectors; keep cables organized)
Steps
Estimated time: 6-8 weeks
- 1
Define your learning goals
Clarify what you want to achieve within 4–8 weeks. Identify genres you’ll study, and set measurable targets such as finishing a basic mix weekly or achieving a specific loudness target on a reference track.
Tip: Write down 3 concrete goals and revisit them every Sunday. - 2
Set up your project template
Create a blank project with a consistent routing structure: drums, bass, keys, guitars, vocals, and a master bus. Save a template to accelerate future sessions and maintain consistency across projects.
Tip: Include a pre-made bus for drums and a mastering chain to jump-start workflow. - 3
Learn signal flow and basic editing
Map the signal path from input to output. Practice cleaning up noise, trimming, and aligning timing before applying any effects. A clean start prevents masking issues later.
Tip: Disable plugins during initial cleanups to hear the raw signal clearly. - 4
Study EQ fundamentals and apply subtractive EQ first
Focus on removing problem frequencies before boosting desirable ones. Use narrow boosts sparingly and compare effects with and without the cut to assess impact.
Tip: Cut resonant peaks at problem frequencies before boosting other areas. - 5
Add compression and dynamic control
Apply gentle gain reduction to tame dynamics and preserve punch. Learn attack/release settings that preserve transients while controlling peaks.
Tip: Use a ducking or sidechain approach to keep the mix breathing. - 6
Build a rough mix and route buses
Balance levels across groups, route to buses, and set a rough tonal shape. Don’t chase perfection yet—focus on getting a cohesive foundation.
Tip: Keep headroom; aim for -6 to -3 dB on the master fader during roughs. - 7
Apply subtle mastering steps
Refer to your reference tracks; adjust loudness, tone, and a light stereo width. Ensure the track translates at shorter listening distances.
Tip: Avoid extreme limiting; aim for musical, not loud, results. - 8
Evaluate with references and iterate
Compare your mix to references in the same genre. Note deviations in tonal balance, dynamics, and stereo field, then adjust.
Tip: Switch listening environments to validate decisions. - 9
Plan ongoing practice and improvement
Set a recurring schedule to revisit mixes, learn new techniques, and broaden genre coverage. Documentation helps you reproduce progress.
Tip: Create a learning log: what you changed, why, and the outcome.
Your Questions Answered
What is the difference between mixing and mastering?
Mixing balances individual tracks within a song, while mastering prepares the final stereo track for distribution by adjusting loudness, tonal balance, and overall polish.
Mixing balances individual tracks; mastering polishes the final stereo track.
Do I need expensive plugins to start?
No. You can begin with stock or affordable plugins and focus on fundamentals. Upgrade later as your needs grow.
Start with built‑in or affordable tools; core skills come first.
How long does it take to learn mixing?
Learning is ongoing. A structured plan yields noticeable progress in weeks, with deeper mastery developing over months.
Expect progress in weeks; mastery grows over months.
Should I learn monitoring first?
Yes. Accurate monitoring is essential. Address room acoustics and develop reliable listening habits before heavy processing.
Yes—start with good monitoring before heavy plugins.
What is critical listening and how can I practice?
Critical listening means analyzing tonal balance, dynamics, and space with intention. Practice by comparing against references and noting differences.
It's focused, deliberate listening; compare with references.
Can I learn with free plugins?
Yes. Free or bundled plugins let you learn fundamentals; you can upgrade later, but core skills come from consistent practice.
Yes, free tools can help you learn.
Watch Video
Top Takeaways
- Define goals and track progress.
- Practice daily with diverse projects.
- Use reference tracks to calibrate your ears.
- Build a repeatable workflow for consistency.