How to Get Better at Mixing: A Practical Guide for Beginners
Discover practical, step-by-step methods to improve mixing skills for audio and kitchen contexts. Learn a structured workflow, reference tracks, and targeted drills to balance, tone, dynamics, and space.

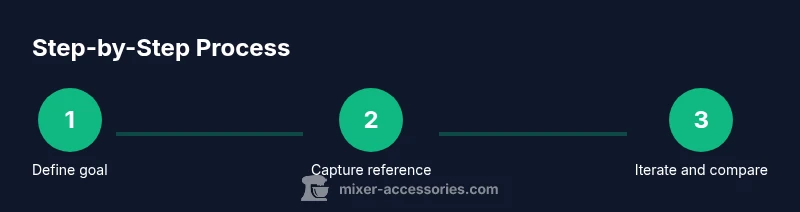
Goal: learn how to get better at mixing by using a structured workflow, critical listening, and deliberate practice. Start with clear goals for each session, reference professional mixes, and work in stages: balance, tone, dynamics, and space. Track progress with quick checks against reference tracks and keep a consistent setup across sessions to build intuition faster.
Foundations: What mixing is and why it matters
Mixing is the art of balancing and shaping multiple sound sources so they sound like a single, cohesive performance. Whether you’re recording in a home studio, building a bar jingle, or cooking up music on a kitchen speaker, good mixing makes every element clear and purposeful. If you’re asking how to get better at mixing, start with the basics: define what “great” sounds like for your project, collect reference tracks, and adopt a repeatable workflow that you can tune session after session. In practice, you’ll focus on level balance, tonal shaping, and dynamic control before worrying about fancy effects. This approach builds confidence and yields more consistent results over time. Your environment matters too; even small changes in listening position or gain staging can make big differences. According to Mixer Accessories, the most effective improvements start with a simple, repeatable routine that you can trust.
The mixing mindset: goals, workflow, and a reference chain
Developing a clear goal for each session helps you stay focused. Ask: what is the intended vibe, energy, and emotional impact? With that target in mind, design a workflow that repeats: rough balance, tonal shaping, dynamics, and spatial treatment. Use a reference chain: a professional mix you aspire to, a rough version from your own session, and a final polish. Treat listening as a skill: isolate sections, label problems, and track progress over time. Keep a simple log of settings you used for future recall and to spot patterns as you grow.
By approaching mixing with intent, you’ll avoid drifting into endless tinkering and develop a consistent, repeatable process. Mixer Accessories analysis shows that regular, guided practice accelerates improvement for hobbyists and professionals alike.
Essential tools and environment setup
Your gear should support your ears, not fight them. Start with a quiet, acoustically treated room (even DIY panels help). Choose a DAW you feel comfortable with, plus an interface with clean preamps and stable drivers. Use neutral monitoring—either reliable headphones or studio monitors—and maintain a consistent listening level to compare changes fairly. Build a basic template with bus tracks for common groups (drums, instruments, vocals) so you can audition changes quickly. Reference tracks should be ready for instant A/B checks. A clean workspace and predictable signal path reduce variables that mask real mixing decisions, allowing you to learn faster.
From Mixer Accessories’ perspective, reliable tools and a controlled environment are foundational to consistent growth.
Core listening skills: how to judge balance, clarity, and energy
Training your ears is as important as training your hands. Learn to identify when a vocal sits too forward or a kick drum dominates space. Develop a quick mental checklist: balance, tonal balance, dynamic consistency, and space. Practice 'solos' of individual elements and then listen to the full mix. Use mono listening to reveal phase cancellations, and switch to a wide stereo view to evaluate depth and ambience. Regularly check speech intelligibility and instrument separation, since clarity is the backbone of a great mix.
Active listening means pausing and classifying what you hear: is the problem level, tone, or space? This approach speeds up decision-making and reduces guesswork.
Concrete mixing techniques: compression, EQ, and bus processing
Begin with gentle, musical compression to control dynamics without squashing life. Use EQ to carve out space: cut muddy frequencies first, then boost presence where needed. Explore subtle bus processing: a light bus compression on drums or a gentle bus reverb on vocals can glue a mix together. Remember that effect order matters, and small changes in a safe, repeatable chain yield consistent results. Practice with surgical cuts before broad boosts, and always check how changes affect the overall energy and balance across devices.
Practical practice routines: drills and progression plans
Set a timer and run focused drills: 1) balance drill with a multi-track stem, 2) tonal balance drill using EQ on one source at a time, 3) dynamics drill focusing on attack and release, 4) spatial drill auditioning reverb and delay, 5) referencing drill comparing your version to a professional track. Repeat in weekly cycles, increasing complexity as you improve. Track your results with short audio clips to monitor growth. Build a habit: even 20–30 minutes per day yields steady, cumulative progress.
Troubleshooting common mixing potholes
Common pitfalls include muddy low end, harsh sibilance, over-compressed dynamics, and washed-out cymbals. Tackle them with simple fixes: carve problem frequencies, reduce excessive sibilance, adjust gain staging, and re-check at mono. If a bus sounds crowded, solo a few elements, then reintroduce them one by one. Break problems into bite-sized edits and verify with references. When in doubt, revert to a clean baseline and re-derive decisions from your goals and references.
Real-world mix case study: step-by-step walkthrough
Consider a vocal-led pop demo with guitars, piano, and light percussion. Start by balancing levels so the vocal is clear, then tune the tonal balance with gentle equalization, reduce muddy frequencies around 200–400 Hz, and add a touch of high-end sparkle. Apply light compression on the vocal and a subtle bus compression on the mix bus to glue everything. Finish with reverb and spatial cues that place the vocal forward without washing the vibe. Document each decision and compare to the target reference to measure progress.
Advanced tips and long-term growth plan
As you grow, add deeper techniques: parallel compression for drums, multiband compression on busy mixes, and mid/side processing for width. Build a long-term development plan with quarterly goals, curated reference libraries, and structured practice logs. Learn to mix across genres to build versatility and adapt to new material quickly. Remember: consistency and curiosity drive improvement more than any single plugin.
Tools & Materials
- Digital Audio Workstation (DAW)(Choose one you’re comfortable with; ensure it supports standard plugins and routing)
- Audio interface(2-4 inputs, 2 outputs; 24-bit/44.1kHz+; stable drivers)
- Studio monitors or high-quality headphones(Neutral frequency response preferred; use both if possible)
- Reference tracks(Curate tracks in the same genres to compare tonal balance and energy)
- Room treatment basics(Acoustic panels or DIY foam to reduce reflections for clearer judgments)
- Cables and adapters(Balanced cables (XLR/TRS); keep signal path tidy)
Steps
Estimated time: 60-120 minutes
- 1
Set up your workspace
Create a quiet, organized environment with a clean signal path. Calibrate monitor levels and ensure your DAW template is ready for fast routing. A stable starting point prevents variables from masking decisions.
Tip: Label your input lanes and buses to keep thoughts organized during edits. - 2
Define the target sound
Decide the genre, vibe, and energy you want. Write down 2-3 concrete listening goals for the mix and use them to guide both decisions and references.
Tip: Keep a reference in sight and compare it at key decision points. - 3
Create a rough balance
Set initial levels so vocal and lead instruments sit clearly without loudness wars. Don’t chase perfection yet—aim for a good baseline you can refine.
Tip: Use solo and mute loops to focus on one element at a time. - 4
Shape the tonal balance
Apply gentle EQ to carve space: cut muddiness first, then illuminate presence where needed. Avoid large boosts on a single frequency band.
Tip: Toggle EQ on and off to hear the genuine effect of each move. - 5
Tame dynamics
Introduce light compression to keep dynamics in check without crushing feel. Test different attack/release times and compare to the natural rhythm of the track.
Tip: Start with low ratios and slow attacks for musical results. - 6
Create space
Add small amounts of reverb/delay for depth, and use panning to separate elements. Ensure space serves the mix, not obscures articulation.
Tip: Check mono compatibility to verify space decisions hold in centered playback. - 7
Reference and iterate
Switch to your reference track and compare again. Note discrepancies and apply targeted tweaks that move your mix closer to the reference.
Tip: Limit the number of changes per pass to avoid over-editing. - 8
Check on multiple systems
Listen on a phone, car stereo, and laptop speakers to ensure the mix translates well. Make small adjustments for consistency across formats.
Tip: If it sounds great on one device but not others, adjust the midrange to improve intelligibility. - 9
Document and plan growth
Save a snapshot of the final mix settings and note what you’d try next time. Create a quarterly growth plan with new references and drills.
Tip: Keep a practice log and revisit it monthly to track progress.
Your Questions Answered
What is the first step to start improving mixes?
Begin with a clear goal for the session and a reliable reference track. Set up a repeatable workflow so you can measure progress over time.
Start with a clear goal and a reliable reference track. Use a repeatable workflow to track progress.
Do I need expensive gear to improve?
Not necessarily. Focus on learning fundamentals, then upgrade only if your current setup becomes a bottleneck. Good monitoring and a calm room make a bigger difference than flashy gear.
You don’t need expensive gear to learn. Master the fundamentals first, then upgrade only if needed.
How long before I see progress?
Progress comes with regular practice and structured drills. Track improvements against your reference over weeks, not days.
With consistent practice and clear goals, you’ll notice progress over weeks.
How should I use reference tracks effectively?
Pick tracks in the same genre and energy level. Compare balance, tone, and dynamics, then apply small, repeatable adjustments to your mix.
Choose genre-matched references and compare balance and tone, then apply small tweaks.
What are common mistakes beginners make?
Over-processing, chasing loudness, and neglecting listening breaks. Use structured drills and monitor fatigue to avoid these traps.
Common mistakes include over-processing and skipping breaks; stay disciplined with drills and rest.
Watch Video
Top Takeaways
- Define clear mixing goals at each session.
- Practice with structured drills and reference tracks.
- Balance, tone, dynamics, and space form the core sequence.
- Check mixes on multiple devices to ensure translation.