How to Adjust a Shower Mixer Valve: A Practical Guide
Learn how to adjust a shower mixer valve safely to stabilize temperature and flow. This educational guide covers valve types, prep safety, step-by-step adjustments, testing, and common troubleshooting for home plumbers and DIYers.

With this guide you will be able to adjust a shower mixer valve to improve temperature stability and flow. It covers identifying valve types, safely shutting off water, removing the handle and cartridge, setting the temperature stop, and reassembling with leak testing. Follow step-by-step actions and safety tips to avoid scalds or water damage.
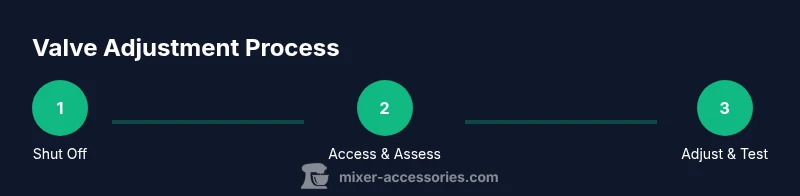
Understanding shower mixer valves and common symptoms
When you ask how to adjust a shower mixer valve, you’re aiming to restore stable heat delivery and consistent water flow. Common symptoms include sudden temperature spikes, a shower that goes too hot or too cold, reduced flow, or a persistent dripping at the control. The goal is to fine‑tune the control mechanism rather than replacing the entire valve. According to Mixer Accessories, most residential valves respond to precise adjustments to the temperature stop or cartridge, not wholesale valve replacement. Start by noting the valve family you’re dealing with (cartridge, ceramic disc, or pressure‑balanced) and the access point behind the handle. A quick photo of the handle orientation can prevent mix-ups during reassembly.
Safety and prep: shut off, drain, and prepare
Safety first: before touching any plumbing, shut off the water supply to both hot and cold lines, ideally at the dedicated shut-offs or the main supply. Relieve residual pressure by turning on a nearby faucet until the water stops. Gather towels, a tray for small parts, and a light source so you can clearly see screws and stop mechanisms. If you have a glass shelf or mirror near the shower, cover it to protect from drips. For extra protection, wear gloves and keep children and pets away from the work area. Mixer Accessories emphasizes completing prep steps to reduce the risk of scalds or sudden water bursts mid‑adjustment.
Identify valve type and access point
Identify whether you have a cartridge‑style valve, ceramic discs, or a pressure‑balanced unit. Check for a visible retaining nut, a set screw behind the handle, or a decorative escutcheon plate that slides off. Different valve families require different access methods: cartridge valves usually have a retaining nut; ceramic discs might use a clip or screw; pressure‑balanced units may include a stop screw. Having a clear image of your valve ahead of time helps you choose the right approach and prevents accidental damage. Mixer Accessories notes that knowing the valve family speeds up the adjustment process and reduces guesswork.
Access, adjustments, and limits (overview)
Once you’ve exposed the valve, the core adjustment typically involves either the temperature stop limit or the cartridge itself. If your valve uses a stop screw, you’ll adjust it to set the maximum hot temperature. If you have a cartridge, you may rotate or replace the cartridge to achieve a balanced mix. In all cases, work slowly, retighten screws gently, and verify alignment before reassembling. Always refer to the valve’s model indicators and avoid forcing any component. A cautious, methodical approach minimizes leaks and frame damage.
Reassembly, testing, and safety checks
After making adjustments, reassemble in reverse order, ensuring the escutcheon and handle sit flush. Turn the water back on gradually at the main shut-off and check for leaks around the handle, escutcheon, and cartridge nut. Test hot and cold to confirm stable temperature and adequate flow. If the temperature still fluctuates beyond a safe range, retreat to the initial settings and adjust slightly more conservatively. Document the changes you made for future reference and avoid sudden, large tweaks.
Tools & Materials
- Screwdriver set (Phillips and flat-head)(For handle and escutcheon screws)
- Allen keys (hex keys) set(For set screws behind the handle)
- Adjustable wrench(For cartridge nut and fittings)
- Bucket or tray(Catch drips and hold small parts)
- Towel or rag(Wipe surfaces and dry hands)
- Plumber's tape (PTFE tape)(Optional for thread sealing)
- Silicone grease or lubricant(Lightly lubricate O-rings if present)
- Gloves(Protect hands from sharp edges)
Steps
Estimated time: 30-60 minutes
- 1
Shut off water supply and relieve pressure
Turn off both hot and cold supplies at the nearest shut‑offs or the main. Open a nearby faucet to relieve residual pressure and avoid water bursts when you separate components.
Tip: Have a towel ready to wipe drips; label shut‑offs in case you need to shut off quickly in the future. - 2
Remove the handle
Locate the set screw behind the handle with a small screwdriver or hex key, then gently loosen and pull the handle away. If the handle is stubborn, do not pry; check for hidden screws or a cover cap.
Tip: Take a quick photo of the exact orientation before removal to ensure correct reassembly. - 3
Expose the valve body
Remove the escutcheon plate to reveal the valve body and any retaining nut or clip. If there’s a retaining nut, use the adjustable wrench to loosen it carefully. If you see a cartridge, inspect for a retaining clip or nut as your next step.
Tip: Keep small parts in the tray to avoid losing them in the drain. - 4
Identify and access the adjustment point
Determine whether you’ll adjust the temperature stop screw or the cartridge. For a stop screw, locate the adjustment screw and note its current position. For a cartridge, you may need to rotate or swap the cartridge to alter mix balance.
Tip: Work in small increments; even a quarter turn can change temperature noticeably. - 5
Make a careful adjustment
If adjusting a stop screw, turn it slowly in small increments and test. If changing a cartridge, reseat it properly and replace any retaining clip or nut with even pressure. Do not overtighten any fittings.
Tip: Keep track of the number of turns or position references to reproduce successful settings. - 6
Reassemble in reverse order
Replace the cartridge or screw, reinstall the escutcheon, and reseat the handle. Ensure the stop or cartridge is aligned with the handle’s position.
Tip: Make sure the handle sits flush and the set screw is snug but not over-tightened. - 7
Restore water and test
Turn on the hot and cold supplies gradually. Test the mix at several positions and confirm there are no leaks around the valve area. Check both hottest and coolest limits to ensure safety.
Tip: Run the water for 1–2 minutes to verify consistency and watch for drips. - 8
Fine-tune if needed
If temperature fluctuates, repeat steps 4–7 with smaller adjustments. Some valves require several pass‑throughs to settle to the desired balance.
Tip: Document settings and photos for the next time you service the valve.
Your Questions Answered
Do I need to replace the entire shower valve to adjust temperature?
Not usually. Many common valves can be adjusted by modifying the stop or cartridge. Replacement is only needed if the internal components are worn or damaged beyond adjustment.
Usually you can adjust the stop or cartridge rather than replacing the whole valve.
How can I tell if my valve is cartridge-based or ceramic disc?
Inspect the handle area for a cartridge retainer or clip. Cartridges are common in many modern valves, while ceramic disc valves have distinct round discs visible behind the trim. Manufacturer diagrams or a quick online lookup by model help confirm.
Look for a cartridge retainer or clip behind the handle to identify the type.
What tools do I need to adjust a shower valve?
A screwdriver set, Allen keys, and an adjustable wrench are typically needed, plus a tray to hold small parts and a towel for cleanups.
You’ll usually use a screwdriver, hex keys, and a wrench.
What if there’s a leak after I adjust the valve?
If a leak appears, recheck the retaining nuts and gaskets, reseat the cartridge, and ensure all connections are tight but not overtightened. If persists, you may need to replace worn seals.
Tighten fittings gently and reseat gaskets; replace worn seals if needed.
Is it safe for a DIYer to adjust a shower mixer valve?
Yes, with proper shut-offs, good lighting, and careful disassembly. Avoid working with live electricals nearby and wear gloves if desired.
Yes, with proper precautions and careful steps.
How long does this process typically take?
Most adjustments take 30–60 minutes, depending on valve type and accessibility. Complex setups may require additional time.
Most people finish in about an hour or less.
Watch Video
Top Takeaways
- Identify valve type before disassembly
- Shut off water and relieve pressure always
- Adjust in small increments and test thoroughly
- Reassemble carefully to prevent leaks