How to Mix on Vinyl: A Practical DJ Guide for Beginners
Learn how to mix on vinyl with a step-by-step approach, essential gear, beatmatching by ear, cueing, and maintenance tips from Mixer Accessories. Perfect for home DJs and vinyl enthusiasts seeking reliable, actionable guidance.

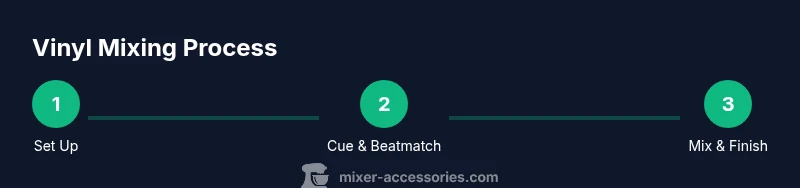
You’ll learn how to mix on vinyl using two turntables and a mixer, with cueing, beatmatching by ear, and smooth crossfades. This guide covers essential gear, setup, practical techniques, and common-sense maintenance to keep records clean and gear reliable, so your vinyl sets sound polished from first beat to last.
Introduction to Vinyl Mixing
Vinyl mixing is a hands-on craft that blends two tracks using turntables and a mixer to craft seamless transitions. The goal is to maintain groove and energy across a set, while preserving the warmth and character that vinyl provides. According to Mixer Accessories, a consistent practice routine helps you build muscle memory for pitch adjustments and crossfading. The Mixer Accessories team found that practitioners who maintain their gear—clean stylus, properly aligned cartridges, and clean records—get cleaner cues and fewer skips. In this guide, we’ll cover the essential gear, core techniques, and actionable steps you can follow in a typical practice session. Whether you’re spinning at home or building a crib-friendly practice routine, the fundamentals stay the same: setup, cueing, beatmatching, and musical phrasing.
Essential Gear for Vinyl Mixing
Choosing the right gear lays the foundation for reliable vinyl mixing. Start with two solid turntables—direct-drive units are generally preferred for stability and fast start times. A two-channel mixer with phono inputs lets you control each deck’s level and tone while keeping the signal clean. For accuracy, pair a good cartridge and stylus with properly aligned tracking weight. Slipmats help keep records from sticking, while a quality pair of closed-back headphones lets you cue with your ears before you bring tracks in. Don’t overlook a sturdy dust cover, cleaning kit, and anti-static cloths to reduce static and surface noise. Finally, keep spare needles and stylus guards on hand and use high-quality RCA cables to preserve signal integrity. With these basics, you’ll have a dependable setup for everyday practice and performance.
Beatmatching on Vinyl: Practical Techniques
Beatmatching on vinyl means aligning the tempo and phase of two records so their beats line up. Start by setting the tempo visually to a rough match (using the pitch control on each deck) and then refine by ear. A typical DJ beatmatching approach uses a 4-beat or 8-beat phrase to guide transitions. Listen through your headphones while the other track is playing softly, then nudge the tempo slightly and adjust the jog wheel to align the beats. As you gain confidence, mix longer phrases to create smoother transitions, and pay attention to the phrasing of the tracks (intro, buildup, break, and drop). Keep your crossfader at center until you’re ready to slide into the next track. Throughout, maintain clean cues and avoid rushing transitions. mixer timing matters more than raw speed, so practice accuracy over speed.
Cueing, Toning, and Phrasing
Cueing is your best friend on vinyl. Use your headphones to preview the incoming track and set a cue point at the exact beat you want to drop it in. Once you’re confident, switch to full monitoring and start the incoming track, using the crossfader to blend with the current track. Pay attention to tonal balance; use the mixer’s EQ to tame bass when both records hit low frequencies simultaneously. Phrasing refers to the musical sentence length—aim to align 4-beat and 8-beat segments so transitions feel natural. Practice hot cues for quick pickup during a live set, but avoid overusing effects that muddy the mix. Consistency in cueing and phrasing makes your mixes sound intentional and musical.
The Workflow: From Setup to Dancefloor
A practical workflow keeps your practice focused. Start by selecting two tracks with compatible tempos and keys, then load them onto the respective decks. Set cue points a few beats before the first downbeat and practice a few dry runs to confirm the cue points. As you cue, purge your focus to the metronome-like rhythm of the tracks and listen for potential clashes in bass or midrange. When you’re ready, begin the mix with a controlled crossfade, adjusting the EQ to keep the bass clean and the highs clear. After each transition, assess crowd energy and consider back-to-back transitions with longer phrasing for stronger sets. With consistent practice, you’ll craft a signature style based on timing, tone, and precision.
Common Problems: Skips, Warps, and Misreads
Vinyl can be forgiving, but issues like skipping, warps, and misreads are common for beginners. Skips often come from a dirty or damaged groove, a worn stylus, or excessive tracking force. Warps can affect pitch stability and tracking; always clean records and store them properly away from heat and humidity. Misreads happen when a cue point is off or the tonearm weight is incorrect. Regular maintenance—cleaning records, replacing worn styli, and checking tonearm balance—reduces these problems. If you encounter persistent skips, try playing from a different section of the record and recheck your cartridge alignment. Gentle handling and consistent cleaning routines go a long way toward reliable performance.
Care and Maintenance of Vinyl Gear
Maintaining vinyl gear is a long-term investment in your sound. Clean records with a dedicated vinyl brush before playing to reduce surface noise. Inspect and replace worn stylus tips, and calibrate the tracking weight according to the cartridge’s specification. Regularly check grounding and cable health, and keep your turntables level for stable playback. Store records upright in protective sleeves to prevent warping and dust buildup. A clean environment reduces static and dust accumulation during long sets. With routine care, your rig remains responsive and accurate, and you’ll notice fewer interruptions during performances.
Adding Dynamics: EQ, Effects, and Sampling
Vinyl mixing benefits from thoughtful use of EQ and light effects. Use the mixer EQ to carve out space for bass and midrange, ensuring that both decks sit cleanly in the mix. Gentle high-end boosts or cuts can help vocals or percussion sit apart without harshness. If your mixer supports effects, apply them sparingly—echo or subtle filter sweeps can add texture without overpowering the groove. Remember, vinyl preserves the warmth and natural dynamics of the source, so keep processing subtle and musical. Turn off effects between transitions, and bring in the next track with a clean, confident entrance.
Final Practice Routine for Beginners
A practical 20-minute routine builds precision and confidence. First, 3 minutes of gear check and calibration, ensuring turntables are level and the stylus is clean. Then, 4 minutes of cueing and counting a basic 4-beat mix between two tracks. Follow with 6 minutes of beatmatching practice, focusing on tempo drift and timing. Spend 4 minutes on a longer 8-beat transition, and finish with 3 minutes of dry-run performance and assessment. Do this routine daily or a few times a week, recording and reviewing your sets to identify where you can tighten phrasing or cue placement. The Mixer Accessories team recommends recording your practice to track progress over time and to build a personal style with consistent technique.
AUTHORITY SOURCES
- MIT OpenCourseWare: https://ocw.mit.edu
- Sound On Sound Magazine: https://www.soundonsound.com
- The New York Times – Arts & Culture: https://www.nytimes.com
Tools & Materials
- Turntables (2)(Direct-drive preferred for quick start and stable operation)
- Two-channel mixer with phono inputs(Ensure phono/line switch is available for each channel)
- Cartridges & Stylus (paired)(Balanced tracking weight per cartridge specs)
- Vinyl records (2–4)(Start with familiar genres and tempos)
- Headphones (closed-back)(Quality isolation for accurate cueing)
- Slipmats(Low-friction mats for smoother playback)
- RCA cables, ground wire(Healthy signal path; replace if frayed)
- Record cleaning kit(Reduce surface noise and skips)
- Stylus cleaning brush(Gently brush before and after sessions)
- Dust cover / rack space(Keeps dust off gear between sessions)
Steps
Estimated time: 60-90 minutes
- 1
Connect and power up gear
Place two turntables on level surfaces, attach phono cables to the mixer, and connect a grounded power source. Turn on the gear in sequence: turntables first, then the mixer. Confirm that the output meters indicate signal on both channels.
Tip: Double-check grounding to prevent hum; start with low volume during setup - 2
Load tracks and set cue points
Queue two vinyls on their respective decks. Use the cueing function to set a beat-aligned cue point a few beats before the downbeat of each track.
Tip: Preview in headphones to confirm beat alignment before playing aloud - 3
Beatmatch by ear
Play the first track and listen for the second track to drift. Adjust one mixer dial or deck tempo until the kick and snare align, keeping the tempo stable.
Tip: Small tempo adjustments beat by beat yield smoother transitions - 4
Begin the transition
Start the second track at the cue point while fading the first track down with the crossfader. Use EQ to carve bass at the moment of the transition to avoid clashing frequencies.
Tip: Keep the crossfader movement slow and deliberate for a clean mix - 5
Refine and extend the mix
Maintain the blend for 8-16 bars, adjusting tempo and EQ as needed. Listen for phrasing and ensure the bassline doesn’t overpower the mix.
Tip: Follow the track's natural phrasing for a stronger, musical transition - 6
Cool down and store
Fade out or transition to the next track cleanly, then power down gear in reverse order. Clean the stylus and records, and store them properly.
Tip: Always power down equipment to prevent static buildup and wear
Your Questions Answered
What is the most important skill for vinyl mixing?
Beatmatching by ear and cueing accurately are foundational. Consistent practice helps you internalize tempo, phrasing, and transitions.
Beatmatching by ear and cueing accurately are foundational. Regular practice helps you master tempo and phrasing.
Do I need expensive gear to start?
You can start with a reliable two-channel setup and a modest pair of turntables. Quality cartridges and a clean stylus matter more than brand-new wheels.
A solid two-channel setup with a good cartridge and clean stylus is enough to start; gear quality matters more than price.
How do I reduce record wear and skip noise?
Keep records clean, use properly weighted tracking, avoid excessive force on the tonearm, and store vinyl upright and away from heat.
Keep records clean, use proper tracking, and store vinyl properly to reduce wear and noise.
What if my tracks are in different keys?
Key compatibility affects harmony. If possible, choose tracks with compatible keys or use a light EQ approach to soften clashes during the mix.
If keys clash, adjust EQ gently and choose tracks with compatible keys when possible.
Should I use effects on vinyl mixes?
Use effects sparingly. A subtle echo or filter sweep can add texture, but overdoing it can obscure the groove and ruin the mix.
Be sparing with effects; a touch can add flavor, too much can ruin the groove.
How can I practice without a crowd?
Set practice goals, record sessions, and critique your transitions. Build a personal routine and simulate a set flow.
Record your sessions and critique your transitions to simulate a live set.
Watch Video
Top Takeaways
- Prepare a clean, grounded setup before practicing.
- Beatmatch by ear using careful tempo nudges.
- Cue points and phrasing drive natural transitions.
- Regular maintenance reduces skips and improves tone.
- Record and review practice to track progress.