How to Use a DJ Mixer for Beginners
Master how to use a dj mixer for beginners with a practical, step-by-step guide. Learn setup, cueing, beatmatching, and safe practice to build confident, repeatable mixes.

According to Mixer Accessories, this guide shows how to use a dj mixer for beginners, covering connecting sources, setting gain, cueing, and a simple 8-bar transition. You'll practice with two channels, headphones, and monitors, building a solid foundation for your first mixes. By the end, you’ll be ready to perform a basic, confident blend.
What a DJ mixer does and who it's for
A DJ mixer is the central hub of a performance setup. It routes audio from multiple sources—such as turntables, CDJs, or a digital controller—into a single or multi-channel output. The mixer lets you control each source's volume, EQ, and, in some models, effects, while also providing a crossfader to blend tracks smoothly. For beginners, a two-channel mixer is typically enough to learn cueing, transitions, and gain staging. As you gain experience, you can expand to multiple channels, better EQ, and more advanced effects. The key concepts to start with are keeping levels balanced, cueing with headphones, and coordinating tempo between tracks.
In practice, your mixer is the tool that makes two separate songs sound like one, giving you control over where the audience hears each element. Remember to focus on clean cueing, steady tempo, and gentle transitions before chasing big effects. This approach reduces frustration and builds confidence as you practice with real mixes.
Essential gear and safety basics
Before you begin, assemble a basic, safe setup. At minimum you’ll need a DJ mixer, two sources (turntables, CDJs, or a controller), headphones, and speakers or monitors. Cables should include at least RCA or balanced options to connect sources to channels and the mixer to the output. A power strip and cable management are essential to prevent tangles and accidental unplugging.
Safety matters too. Keep volumes at reasonable levels, especially in shared spaces, to protect hearing. Avoid running cords across walkways, and ensure outlets are grounded. If you’re using older audio gear, consider a ground loop isolator to reduce hum. A tidy workspace will prevent accidental cable pulls and misrouted signals, which derail your practice.
Branding note: a clean, reliable setup minimizes troubleshooting time and keeps your focus on skills like cueing and beatmatching. This is where the fundamentals start to feel natural, and your confidence grows as you learn to control the sonic balance across sources.
Quick-start setup: connecting your sources
Start with the mixer powered off. Connect each audio source to its designated input channel using line-level cables. If you’re using two sources, assign Source A to Channel 1 and Source B to Channel 2. Route the mixer’s master output to your speakers or monitors using the appropriate cable (RCA or balanced XLR). Next, plug in your headphones and enable cueing for one of the channels. Turn on the mixer and slowly raise the gain for each channel while monitoring in headphones to avoid distortion. Finally, set the master output level to a comfortable listening level and verify that both channels respond independently during solo checks.
Helpful tip: label your cables and sources so you can quickly identify what belongs to which channel during a live set or practice session.
Basic mixing workflow: cueing, beatmatching, and levels
With both sources connected, you’ll practice the core workflow: cue, blend, and level. Use headphones to cue the next track while the current track plays to the room. Adjust each channel’s gain so the meters peak around the upper range without clipping. Use the EQ controls on each channel to carve out space for each track—cutting lows on the incoming track while preserving the bass in the playing track helps avoid muddiness. The crossfader lets you transition smoothly between sources; a gentle, gradual move often sounds more natural than a sudden cut. A simple 8-bar beatmatching drill reinforces tempo alignment and cue timing.
Practice note: keep your hands relaxed and avoid abrupt fader movements. Small, controlled adjustments yield more musical results than large, reactive changes.
Common mistakes and how to avoid them
Common beginners’ mistakes include fighting with the tempo, overdriving gains, and neglecting cueing. To avoid these, practice gain staging: set each channel’s gain so their peak meters align, then keep the master level at or below the point where it starts to distort. Always cue the next track in headphones before bringing it into the mix to prevent awkward drops. Another pitfall is reliance on effects to cover errors—focus on clean transitions first, then layer in effects.
If you hear a harsh crackle or clipping, back off the master or channel gain and inspect cables for damage. A consistent practice routine, paired with a few trusted tracks, helps you hear what a good transition should feel like rather than chasing loudness.
Practice structure: drills you can run
Structured practice builds muscle memory and timing. Start with 10 minutes of purely cueing exercises: practice finding the cue point, setting a cue point, and matching the tempo of a new track. Then spend 15 minutes on a basic 8-bar transition between two tracks with minimal EQ changes. Add 10 minutes of beatmatching drills where you adjust tempo with the tempo slider or beat grids. End with 15 minutes of full mixes, focusing on musical phrasing, phrasing alignment, and crowd-friendly sweeps. Short, focused sessions under consistent conditions yield the best long-term results.
Expanding your setup: next steps and tips for beginners
As you gain confidence, consider adding a dedicated monitor or two for improved feedback during practice, and upgrade to a slightly more capable mixer with additional channels and effects. A basic controller can consolidate sources and simplify the cueing workflow, especially when learning digital DJ workflows. If you frequently practice or perform, invest in a good pair of closed-back headphones for isolation, and use a small, portable mixer case to protect gear during transport. Keep building your library with varied tempos and genres to expand your mixing vocabulary.
Troubleshooting quick-reference
If signals aren’t routing correctly, double-check input/output routing on the mixer and confirm that each cable is fully seated. If you hear no sound from the master, verify that the master output is connected to speakers and that the speakers are powered. If cueing doesn’t work, ensure you’ve enabled cue on the correct channel and that headphones are listening through the cue signal rather than the master. For hum or noise, inspect grounding and consider using shorter cables or avoiding power strips close to audio gear.
Tools & Materials
- DJ mixer (2-channel is enough for beginners)(Essential for learning the basics; ensure it has at least two channels and a master output.)
- Two audio sources (turntables, CDJs, or a controller)(One source per channel; ensure compatibility with line inputs.)
- Headphones (closed-back preferred)(For accurate cueing without bleeding into the room.)
- Speakers or studio monitors(For room playback; choose powered speakers if you don’t have an amp.)
- RCA or balanced cables(Have a spare set to swap if cables fail.)
- Power strip and cable organizer(Keep cables tidy and reduce tripping hazards.)
- Laptop or smartphone with DJ software (optional)(Useful if you practice with digital sources or library management.)
Steps
Estimated time: 60-90 minutes
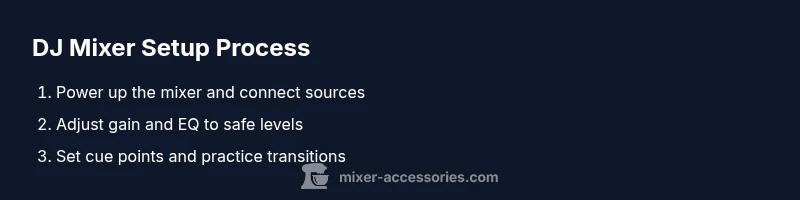
- 1
Power up and check levels
Plug in the mixer, turn it on, and verify that the channel meters respond as you move each fader. Set each channel gain to a safe baseline so you don’t distort when you start playing sound. Check the master meter too to ensure it responds as you vary the output.
Tip: Always start with headphones on and keep the master level conservative to avoid unexpected loud sounds. - 2
Connect your sources to the mixer
Insert each audio source into its designated input on the mixer (one per channel). If using turntables, ensure you’re in line-level mode; with controllers, select the appropriate inputs. Confirm that each source can be heard in its channel while you preview with headphones.
Tip: Label the cables to quickly identify which source is on which channel. - 3
Route audio to your monitors or speakers
Connect the mixer’s main output to your speakers or monitors using the correct cables. Power on speakers, then slowly raise the master level and listen for balance and tone. Make sure there’s no unwanted hum before you proceed.
Tip: Keep the main speaker volume modest during early practice to prevent ear fatigue. - 4
Enable cueing and set cue points
Listen to one track in headphones while the other plays through the room. Set a cue point on the incoming track and practice playing it from the cue without revealing it to the audience yet. This forms the basis for smooth transitions.
Tip: Use a consistent cue point position (e.g., 8 or 16 bars into the track) to build muscle memory. - 5
Set gain and EQ for clean sound
Tune each channel’s gain so the meters peak without clipping. Use the bass, mid, and treble EQ to carve space for each track, avoiding mud in the mix. A clean, balanced EQ makes transitions sound intentional rather than rushed.
Tip: Small, precise EQ changes beat large, abrupt boosts. - 6
Practice a basic beatmatching drill
Choose two tracks with similar BPMs and practice aligning their tempos visually or by ear. Adjust one deck’s tempo until the beats line up and the transition sounds natural. This drill trains your sense of timing and helps you avoid lags in the mix.
Tip: Mute or shorten intro sections to focus on the critical beat alignment. - 7
Mix two tracks with an 8-bar transition
With cueing active, bring in the second track as the first approaches the end of its 8-bar phrase. Use the crossfader to glide between tracks while maintaining a consistent level and clean EQ. Listen for phrasing and energy to ensure the mix feels musical.
Tip: Aim for a smooth, gradual crossfade rather than a hard cut. - 8
Review, save, and plan your next practice
After your session, note any trouble spots (gaps in cueing, mismatch in tempo, or EQ clashes). Save your settings in the mixer or take notes to replicate good transitions later. Schedule the next practice with a focused drill to improve weaker areas.
Tip: Keep a simple practice log to track progress over weeks.
Your Questions Answered
What is the main function of a DJ mixer?
A DJ mixer routes audio from multiple sources, controls per-channel levels and EQ, and blends tracks using the crossfader. It is the central tool for creating smooth transitions between songs.
A DJ mixer routes and balances your audio from multiple sources, helping you blend tracks smoothly.
Do I need a professional setup to start learning?
No. Start with a basic two-channel mixer, headphones, and speakers. As you gain confidence, you can add more channels, effects, and a dedicated controller.
No—begin with a simple two-channel setup and upgrade as you get comfortable.
How can I avoid hum or noise in my setup?
Use balanced connections where possible, keep signal and power cables separate, and avoid grounding loops. If needed, try a ground loop eliminator.
Keep cables separate and use balanced connections to reduce hum.
What is beatmatching, and should I master it now?
Beatmatching is syncing the tempo of two tracks so they blend. Beginners can start with tempo alignment and rely on visual cues or auto-sync features if available.
Beatmatching helps you blend tracks smoothly; start with basic tempo matching and refine over time.
Why is my master level too high or too low?
If the sound clips, reduce the master or channel gains and check for peak levels. Use EQ to shape the sound instead of cranking volume.
If it sounds harsh, lower the master gain and recheck the channel gains.
Should I always use headphones when mixing?
Yes. Use headphones to cue and prepare the next track before bringing it into the mix, ensuring a clean start for the audience.
Headphones are essential for cueing before you drop the track.
Watch Video
Top Takeaways
- Connect sources correctly and balance gains.
- Cue with headphones before playing to the room.
- Keep transitions musical with careful tempo and EQ control.
- Use the crossfader smoothly for clean blends.
- Avoid clipping by managing master and channel gains.
- Practice regularly to build confident, repeatable routines.