How Long to Knead Sourdough with a Stand Mixer
Learn how long to knead sourdough dough in a stand mixer, including hydration, gluten development, and practical tips to avoid overworking dough. A clear, expert walkthrough for home bakers using mixers.

Knead sourdough in a stand mixer on low speed for about 6-8 minutes until the dough becomes smooth and passes the gluten windowpane test. Adjust times based on hydration and dough stiffness: stiffer dough may finish closer to 8 minutes, while wetter dough may require a minute or two less. Stop when the dough holds its shape and feels elastic, then proceed to bulk fermentation.
Why Stand Mixers Are Helpful for Sourdough Kneading
Using a stand mixer to knead sourdough offers consistent gluten development and saves manual effort, which is especially valuable for beginners who want reliable results. A dough hook can mimic kneading motions while maintaining a steady tempo, helping to avoid overworking delicate dough or underdeveloping gluten. According to Mixer Accessories, the right mixer speed and a proper kneading duration can streamline the process without sacrificing texture or flavor. Home bakers also gain the advantage of repeatability—once you dial in hydration and weight, you can reproduce loaf after loaf with similar crumb and crust qualities. Remember, mixers don’t replace your senses; they amplify them: watch the dough’s feel, listen for friction sounds, and test with the windowpane method as you go.
How Long to Knead Sourdough in a Stand Mixer
The typical kneading window for sourdough dough in a stand mixer is roughly 6-8 minutes on a low speed. Hydration and dough stiffness influence this timing: wetter doughs (around 70%+ hydration) may take toward the lower end of the window, while stiffer doughs (below 60% hydration) may need a touch longer. For very hydrated doughs, you might want to pause halfway, give the dough a brief rest (10-20 minutes), and resume kneading to finish gluten development. Start by kneading gently to bring ingredients together, then increase to a steady pace once the dough comes together. Vinelike elasticity will develop as gluten strands form, and you’ll notice the dough becoming smooth and slightly tacky rather than sticky.
Autolyse, Mixing, and Salt: Timing Impacts
Autolyse (flour and water only) allows gluten to start forming before the dough sees salt and starter. If you incorporate salt and levain too early, you may hinder initial hydration and gluten alignment. After autolyse (typically 20-60 minutes), add the levain and salt and knead on low. The run time during kneading helps round out hydration, redistribute ingredients, and align gluten strands for stronger structure. Remember that hydration levels can change during kneading; if the dough seems dry, drizzle a small amount of water and knead a little longer.
Gluten Development Tests and When to Stop
The gluten windowpane test is your guide to finished kneading: stretch a small piece of dough until it becomes translucent without tearing. If it tears easily, continue kneading in short bursts of 30 seconds until the dough passes the test. For wetter doughs, you may see a slight tearing initially but should still be able to gently stretch into a thin sheet. Use the feel of the dough—should be smooth, supple, and elastic—as a secondary indicator. Overkneading can make dough stiff and difficult to shape, so monitor both the test and texture.
Hydration Levels and Dough Feel
Hydration affects how long you knead. Lower hydration doughs (around 60%) may need closer to 8 minutes, while higher hydration doughs (70% or above) can develop gluten faster but stay looser and stickier for longer. If your dough remains very sticky after several minutes, rest it for 10-20 minutes, then resume kneading in short bursts. In general, aim for a dough that holds its shape, feels pleasantly tacky but not sticky, and shows a translucent windowpane when stretched.
Common Pitfalls and How to Avoid
Overkneading can toughen crumb and drain extensibility, especially if you keep the mixer running after the gluten has formed. Overheating the motor is another risk, so use the lowest effective speed and check the dough frequently. Underhydrated dough may feel dry and crumbly; if this happens, add water gradually and re-knead. Conversely, overhydration can lead to a slack dough that lacks structure. If you notice excessive slack, a brief rest followed by a few minutes of kneading can help regain balance.
Cleaning, Maintenance, and Care After Kneading
Allow the mixer to cool before disassembling the hook attachments to prevent scalding the motor. Wipe down the hook and bowl with a damp cloth; wash with warm, soapy water if needed. Dry thoroughly to prevent rust and motor wear. Periodically check the dough hook for wear, and ensure the mixer head is properly aligned for safe operation. A quick wipe-down after each bake helps keep your kitchen and gear in good condition for long-term use.
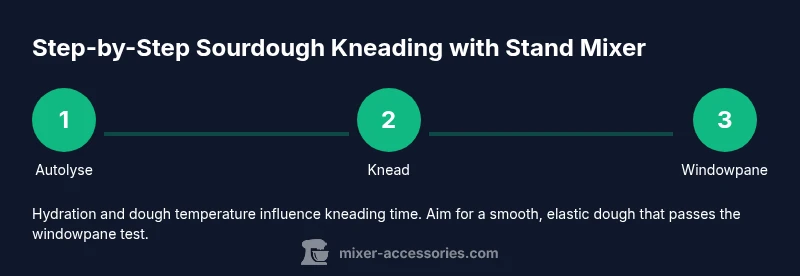
Getting Started: A Simple Framework for Stand Mixer Sourdough
Begin with a defined framework: autolyse, add levain and salt, knead on low for 6-8 minutes, test with the windowpane, and then bulk ferment. This deterministic sequence reduces guesswork and yields more consistent loaves. Make a small batch first to calibrate your mixer’s speed, your dough’s hydration, and your kneading duration before scaling up to full-size loaves. With consistent practice, you’ll develop an intuitive sense for when the dough is ready.
Troubleshooting Quick Reference for Stand Mixer Kneading
If the dough resists windowpane development, consider a longer autolyse and a slight hydration increase, then resume kneading in short bursts. If the dough tears during windowpane testing, ease off kneading and allow a short rest. Record your batch parameters (flour type, hydration, starter activity) to refine timing for future loaves. Remember that starter vigor can affect dough behavior; adjust knead time accordingly.
Advanced Variations: Hydration, Whole Grain, and Temperature
Higher hydration doughs require careful kneading, often with shorter passes and more rest to prevent tearing. Whole-grain flours absorb more water and slow gluten development, so you may need to extend kneading by 1-2 minutes or increase autolyse time. If ambient temperature is warm, dough will proof faster, and you may want to shorten fermentation time to avoid over-proofing. Keep notes and adjust based on your environment and flour mix.
Tools & Materials
- Stand mixer with dough hook attachment(Essential for consistent gluten development; ensure hook is rated for doughs.)
- Large mixing bowl(Used for autolyse and mixing stage if needed)
- Digital kitchen scale(Precise hydration and flour weights improve consistency)
- Measuring cups and spoons(For adding water, salt, and starter in precise amounts)
- Dough scraper(Helpful for scraping dough and cleaning the bowl edge)
- Proofing container or banneton(For shaping and proofing the dough after kneading)
- Thermometer (instant-read)(Optional to monitor dough temperature if needed)
- Bench flour or parchment paper(Lightly flour or use parchment to prevent sticking during shaping)
Steps
Estimated time: 60-90 minutes
- 1
Gather ingredients and equipment
Weigh flour, water, salt, and starter. Set up the stand mixer with the dough hook and ensure the bowl is clean and dry. This prepares you for precise hydration and consistent kneading.
Tip: Double-check that your mixer is on a stable surface to avoid vibrations during kneading. - 2
Autolyse the flour and water
Combine flour and water in the bowl and mix just until no dry pockets remain. Let rest for 20-60 minutes to hydrate starches and boost gluten readiness.
Tip: Autolyse improves extensibility; avoid adding salt or starter during this stage. - 3
Add levain and salt
Add your starter and salt after autolyse. Mix on low speed just until ingredients come together, distributing the salt evenly without tearing the dough.
Tip: Dissolve salt in a small portion of water if needed to ensure even distribution. - 4
Knead on low until gluten develops
Switch to the dough hook and knead on low for 6-8 minutes. Stop early if the dough looks smooth and passes the windowpane test; continue if needed for additional development.
Tip: Keep eye on dough temperature; if it gets very warm, pause to cool the bowl briefly. - 5
Test gluten development
Gently stretch a small piece of dough to test elasticity. A thin, nearly translucent film indicates good gluten development; if it tears easily, continue kneading in short bursts.
Tip: If you rest the dough between kneads, allow 10-20 minute breaks to prevent over-tightening. - 6
Bulk fermentation and shaping
Transfer dough to a lightly oiled container for bulk fermentation. After the initial rise, gently shape and place in a proofing basket if desired, then proceed with final proofing before baking.
Tip: Maintain consistent temperature for predictable fermentation; a cooler environment slows rise and strengthens flavor.
Your Questions Answered
How long should I knead sourdough in a stand mixer?
Most home bakers knead on low for about 6-8 minutes until the dough is smooth and passes the gluten windowpane test. Hydration and dough stiffness will influence the exact time. Always test the gluten development and adjust as needed.
Most home bakers knead on low for about 6-8 minutes until the dough is smooth and passes the windowpane test. Hydration levels will change the timing, so use the windowpane as your guide.
Can I over-knead sourdough in a stand mixer?
Yes. Over-kneading can make dough tough and less extensible, reducing gas retention. Stop when the dough is smooth and elastic and passes the windowpane test.
Yes, you can over-knead. When the dough becomes very tight and tears easily, stop and let it rest.
What hydration level works best for mixer kneading?
A typical range is 60-70% hydration; drier doughs knead faster but feel stiffer, while wetter doughs are stickier and may need air-rests. Adjust kneading time based on dough feel.
Most doughs do well around 60 to 70 percent hydration; adjust time as the dough feels.
Should I autolyse before kneading in a mixer?
Yes. Autolyse hydrates flour and enhances extensibility, making kneading more efficient. Add salt and starter after autolyse.
Yes—autolyse helps with extensibility and makes kneading easier.
What if dough sticks to the bowl during kneading?
If dough clings to the bowl, stop and scrape, then resume kneading with a small amount of water or flour to balance hydration. Ensure you’re using the correct mixer speed.
If it sticks, pause, scrape, and adjust with a touch of water or flour.
Is a stand mixer suitable for sourdough at home?
Yes. A stand mixer is convenient for home bakers, offering consistent gluten development and hands-off kneading. Choose a mixer with a robust motor and a dough hook designed for bread doughs.
Yes, stand mixers work well for home sourdough with the right hook and mindful speed.
How do ambient temperature and starter activity affect kneading time?
Warmer temperatures and active starters speed fermentation and gluten development, which can slightly shorten kneading needs. Cooler environments may require longer kneading and fermentation.
Warm temps speed things up; cooler temps slow them. Adjust kneading and fermentation accordingly.
Can I knead whole-wheat or rye dough in a stand mixer?
Whole grains absorb more water and develop differently, often needing extra autolyse time and possibly longer kneading. Start with a moderate ratio and adjust based on dough feel.
Yes, but expect differences with whole grains; you may need more rest and hydration.
Watch Video
Top Takeaways
- Knead 6-8 minutes on low for typical sourdough dough.
- Hydration and dough stiffness affect kneading time.
- Windowpane test confirms gluten development before fermentation.
- Autolyse improves extensibility and flavor.