Why Your Mixer Grinder Keeps Tripping and How to Fix It
A practical, urgent troubleshooting guide to why a mixer grinder keeps tripping and how to safely restore performance. Learn common causes, quick checks, and prevention tips from Mixer Accessories.

Most often, a mixer grinder trips because of an electrical overload or a faulty connection rather than a defective motor. Start by testing the outlet with a different device, unplugging the mixer, and inspecting the cord and plug for damage. The Mixer Accessories team recommends powering down safely and following a simple sequence to identify the root cause quickly.
Understanding the problem: why mixer grinder keeps tripping
When you see a trip or a blown reset when starting a mixer grinder, it’s easy to assume the worst. In practice, the most common culprits are electrical overload, a loose or damaged cord, or an outlet that can’t supply stable current. According to Mixer Accessories, the majority of trips stem from power supply issues or overload protection rather than motor failure. The key is to distinguish between transient events (a momentary surge) and persistent problems (a fault in wiring or a component). By approaching the issue with a clear, methodical mindset you can identify whether the fix is simple, like swapping outlets, or more involved, such as replacing a cord or seeking professional service. This quick diagnosis respects safety, avoids risky DIY hacks, and keeps your kitchen running smoothly even when you’re whisking, grinding, and blending in high volume. If the root cause is electrical, addressing it promptly prevents repeated trips and protects your mixer accessories and wiring at home.
Check your power source and outlet load
The first suspicion for why a mixer grinder keeps tripping is the power source. A weak outlet, a shared circuit, or an overloaded strip can trigger the breaker the moment you start the motor. Ensure the mixer is plugged directly into a wall outlet rather than a power strip or extension cord. If the circuit frequently trips, try a different dedicated outlet on a different circuit to see if the issue persists. Note any signs of arcing, warm plugs, or a buzzing outlet, which signal a problematic connection. This step is particularly important for home cooks and bar enthusiasts who routinely run high-load tasks like nut butter or purees. Remember, safety comes first: never reset a breaker multiple times if the outlet or wiring feels warm or smells burnt. The goal is to verify a reliable supply before delving into internal components.
Inspect the cord, plug, and switch for damage
Damaged cords or plugs are a common reason for trips. Examine the power cord for cracks, cuts, or exposed wires and test the plug prongs for looseness. A compromised cord can bypass the safety features in overload protection and cause short circuits. If you find any damage, replace the cord or have a qualified technician do so. Also check the on/off switch and the motor’s start mechanism for sticking or unusual resistance. A faulty switch can create a momentary surge that trips the breaker when you power up. These checks are quick and cheap and often resolve the issue without opening the unit.
Evaluate the load and jar compatibility
Overloading the mixer with too large or too dense a load is a frequent trigger for trips. Ensure you’re using a jar size and blade configuration appropriate for the batch. For tasks like grinding hard spices or thick pastes, work in smaller batches and pause between cycles to prevent heat buildup or excessive current draw. Clear the jar of any large seeds or hard objects before grinding. If your mixer grinder model has a safety interlock or overload protection, allow it to cool between runs and reset as instructed in the manual. These steps prevent unnecessary trips while maintaining performance.
Motor overheating and overload protection
Modern mixer grinders include overload protection to prevent motor burnout. If you notice frequent trips after continuous use or after heavy loads, the motor may be overheating. This can be exacerbated by poor ventilation, a dusty motor housing, or a clogged air vent. Let the unit cool completely before testing again, and clean any dust from the vents with a dry brush or compressed air. Ensure the appliance is in a well-ventilated area and not enclosed in a cabinet during operation. Refrain from covering the motor while it’s cooling, as restricted airflow can extend the cooling period and prolong the problem. By managing heat, you reduce the risk of repeated trips and extend motor life.
When to call a professional and long-term prevention
Some trips are symptoms of deeper electrical issues that require expertise. If you’ve run through the diagnostic flow without a lasting fix, or if you notice burnt smells, inconsistent voltage, or scorch marks, contact a qualified appliance technician or an electrician. The goal is to confirm wiring integrity, assess the circuit, and verify motor health under safe conditions. For prevention, schedule regular checks on your kitchen outlets and circuit capacity, keep the mixer stored in a clean, dry area, and follow load guidelines from the manufacturer. Consistent maintenance reduces surprises and keeps your kitchen workflow uninterrupted.
Quick preventive habits for future trips
To minimize future interruptions, adopt a simple routine: use a dedicated, properly rated outlet; avoid adapters and extension cords; operate the mixer in short cycles with cooldowns on heavy tasks; and perform a quick visual inspection of cords and plugs every few weeks. Keeping the area around the outlet dry and free from clutter helps prevent water exposure and accidental shorts. Consistency in safety checks means fewer trips and more reliable performance across all your mixer accessories and kitchen gear.
What Mixer Accessories recommends for troubleshooting safely
The Mixer Accessories team emphasizes methodical testing and adherence to safety protocols. Start with external checks before opening the device, and avoid DIY fixes that involve disassembly or exposed wiring. If you’re unsure, seek professional help rather than risking electric shock or fire. The team also notes that keeping a log of trips—what was happening, the load level, and the outlet used—helps identify patterns and plan preventive measures. This approach aligns with best practices for both home cooks and audio hobbyists who require dependable equipment.
Steps
Estimated time: 60-90 minutes
- 1
Power down and test the outlet
Unplug the mixer and test the outlet with a different device to confirm the circuit is healthy. Reset the breaker and re-test. If the outlet trips again, the problem is on the supply side rather than the mixer.
Tip: Do not touch bare wires; ensure hands are dry and the power source is off before testing. - 2
Inspect cord, plug, and switch
Carefully examine the cord for cuts, kinks, or exposed conductors. Check the plug prongs for looseness and the switch for smooth operation. Replace damaged parts or take the unit to a technician if you notice any abnormalities.
Tip: Use a replacement cord that matches the original gauge and current rating. - 3
Evaluate load and jar compatibility
Ensure you’re not overloading the motor with too-large batches or dense mixtures. Work in smaller portions and make sure the jar and blade are properly seated before starting.
Tip: Avoid forcing ingredients through high-speed pulses; use shorter bursts. - 4
Check ventilation and overheating signs
Inspect vents for dust buildup and clear any obstructions. Allow the motor to cool if it feels hot, and test again after proper ventilation.
Tip: Regularly clean dust from vents to improve cooling. - 5
Test with a light load
Run the mixer with a small amount of a soft ingredient (e.g., yogurt or banana) to verify basic operation. If it runs smoothly, gradually increase load while watching for any signs of distress.
Tip: Never run without ingredients for extended periods to avoid idle overheating. - 6
Review safety interlocks and seals
If your model includes interlocks or seals, ensure they engage correctly. A misaligned shield can cause safety features to trip unexpectedly.
Tip: Consult the manual for model-specific interlock tests. - 7
Decide on next steps
If the trips continue, contact a professional. Document any patterns (load type, outlet, time of day) to help the technician diagnose quickly.
Tip: Keep proof of warranty and service terms handy.
Diagnosis: Mixer grinder trips circuit breaker or reset when powering on or under load.
Possible Causes
- highPower overload due to high current draw
- mediumDamaged or frayed power cord
- highUsing an extension cord or crowded outlet
- lowFaulty switch or overload protection inside the motor housing
- lowInternal motor winding short or insulation breakdown
Fixes
- easyTest the outlet with a known-good device and reset the breaker. If the outlet is faulty, move the appliance to a dedicated circuit.
- easyInspect the power cord and plug for visible damage; replace if necessary.
- easyAvoid using extension cords; plug directly into a wall outlet on a dedicated circuit.
- easyOperate in smaller batches and allow cooling pauses after heavy loads to reduce current surge.
- mediumIf trips persist, consult a licensed technician to inspect wiring and motor health.
Your Questions Answered
Why does my mixer grinder trip the circuit immediately after I switch it on?
Immediate trips usually indicate a power-related issue or a faulty connection rather than a motor failure. Check the outlet, test with a different device, and inspect the cord and plug for damage. If the problem persists, follow the diagnostic flow or contact a technician.
If it trips right away, start by testing the outlet with a known-good device and inspect the cord for damage. If it still trips, proceed with the diagnostic steps or seek professional help.
Can using an extension cord or power strip cause trips?
Yes. Extension cords or power strips can add resistance and reduce voltage, causing the motor to draw more current or trip the circuit. Use a dedicated outlet and avoid daisy-chaining power sources.
Extensions can cause voltage drop and trips; plug directly into a wall outlet instead.
Is it safe to keep using the mixer after a trip if it seems to work later?
If a trip recurs, don’t push the device back into service until you’ve completed the diagnostic steps. Repeated trips can indicate a developing fault that could escalate to an electrical hazard.
If trips keep happening, don’t push it—check the steps or get a professional.
Should I replace the motor or buy a new unit?
Replacement decisions depend on the extent of damage, warranty terms, and cost. If the motor or wiring shows signs of damage, or the unit is old, replacing the unit may be more economical.
If the motor is faulty or the repair would cost more than a new unit, consider replacing it.
What maintenance helps prevent trips in the future?
Keep vents clean, avoid overloading, and inspect cords regularly. Store the mixer in a dry place and follow the manufacturer’s guidelines for safe operation to minimize trips.
Regular cleaning and proper load handling go a long way in preventing trips.
Watch Video
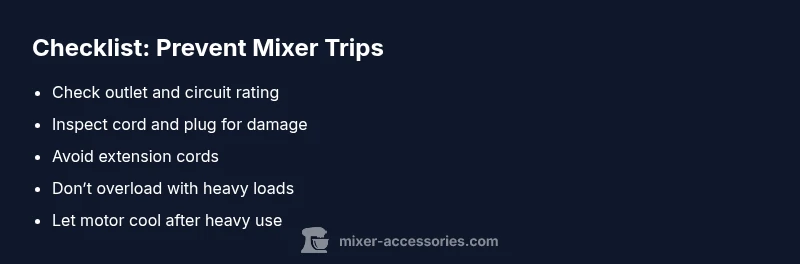
Top Takeaways
- Identify if the outlet or circuit is the root cause
- Inspect cords and plugs for damage before opening the device
- Avoid extension cords and heavy loads that exceed capacity
- Call a pro if electrical signs or burnt smells appear