If Mixer Grinder Is Not Working: A Practical Troubleshooting Guide
Urgent, practical steps to diagnose and fix a mixer grinder that won’t start. Power checks, safety tips, common faults, and when to call a pro.

If mixer grinder is not working, start with the simplest checks: ensure it’s plugged in, the outlet works, and the fuse or breaker hasn’t tripped. Then reset the overload protector and inspect the cord for damage. If the unit still won’t run, consult the diagnostic flow and step-by-step fixes below or call a professional.
Understanding why your mixer grinder isn’t working
When a high-use kitchen essential like a mixer grinder suddenly stalls, it’s easy to panic. In most homes, the problem isn’t a dead motor but a simple oversight or a safety feature doing its job. The key is to approach the issue systematically: confirm power, check safety interlocks, inspect the plug and cord, and assess the load. By breaking down the problem, you can often recover performance without expensive repairs. If mixer grinder is not working, you’ll find that many cold starts are solved by a quick reset or a clean container and blade inspection. This mindful approach helps home cooks, bar enthusiasts, and audio hobbyists troubleshoot confidently while avoiding electrical hazards.
Common causes of a non-working mixer grinder
There are several frequent culprits when a mixer grinder stops working. First, a simple power issue—outlet not supplying power, a damaged plug, or a tripped circuit breaker. Second, a blown fuse or a faulty overload protector can prevent the motor from starting. Third, foreign objects jammed in the blades or a lid that isn’t seated correctly can trigger safety interlocks. Finally, wear on the drive belt or motor brushes can reduce performance or stop rotation entirely. Understanding these common causes helps you prioritize checks and avoid unnecessary disassembly.
Safety first: power, cords, and overload protection
Before you tinker, unplug the unit and remove any cords from water or heat. Inspect the power cord for cuts, kinks, or exposed wires, and test the outlet with another device to confirm it’s live. If the mixer grinder uses an overload protection switch, allow it to cool for 10–15 minutes before trying again. Never bypass safety features to force a start; these protections prevent dangerous electrical faults. In many cases, a quick reset or cooldown resolves the issue without professional help.
Electrical checks you can perform safely
Start with the simplest electrical checks: confirm the plug is firmly inserted, the outlet is delivering power, and the switch feels normal when engaged. If you suspect a fault, unplug the device and inspect the power cord near the plug for fraying. A multimeter can verify continuity in the cord and switch, but if you don’t own one, a technician can perform this test with proper equipment. Remember: never test live circuits with bare hands, and avoid damp environments during inspection.
Mechanical checks: motor, gears, and drive
If the mixer grinder won’t turn when powered, it could be a mechanical snag rather than an electrical one. Look for a jammed blade or blocked jar rotation. Remove the jar and manually rotate the blade shaft to feel for any grinding resistance. Check the drive coupling between the motor and the blade assembly for wear or damage. A slipping belt or worn brushes can also prevent rotation, especially in older units. Do not force the mechanism; a gentle, methodical inspection is safer and more effective.
Inspect the jar, blades, and seals for wear
Sometimes the issue is as simple as dull blades or a misaligned jar. Remove the blade assembly and inspect for nicks, cracks, or bent blades. Ensure the jar seats fully and that the lid interlock is clean and free of residue. Food buildup at the blade hub or in the lid vent can create resistance. Clean all parts with warm, soapy water and dry completely before reassembly. A clean contact surface often restores smooth operation.
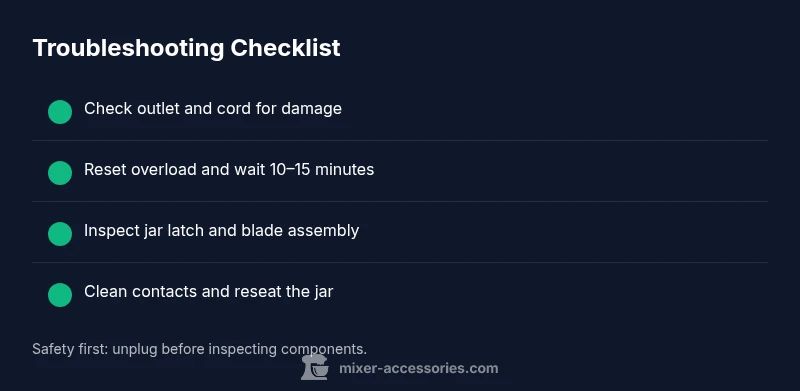
Quick troubleshooting checklist you can follow now
- Confirm outlet power with another device and plug firmly.
- Check for a tripped breaker or blown fuse; reset or replace as needed.
- Inspect the power cord and plug for damage; replace if frayed.
- Reset the overload protector after a cooldown.
- Remove and clean the jar, blades, and lid interlock; ensure proper seating.
- Test by running in short bursts with the lid locked.
- If the motor hums but doesn’t spin, stop and seek professional help to avoid further damage.
When to seek professional help and how to prepare
If you’ve completed the above checks and the mixer grinder still won’t run, it’s time to call a professional. Electrical faults, worn brushes, or a defective capacitor may require specialized tools and parts. Gather your model information, purchase date, and any prior service notes to speed up diagnostics. A qualified technician can confirm whether a component needs replacement or a motor rebuild, and they can ensure the unit remains compliant with safety standards.
Steps
Estimated time: 45-60 minutes
- 1
Power check and safety first
Unplug the grinder. Confirm the outlet works by testing another device. If the outlet is dead, fix the power source before proceeding.
Tip: Always unplug before handling electrical components. - 2
Reset and cooldown
If the overload protector tripped, let the unit cool for 10–15 minutes. Then reconnect and try a brief run with the lid secured.
Tip: Don’t bypass safety features; cooldown prevents motor damage. - 3
Inspect the cord and plug
Look for nicks, kinks, or exposed wires. If damaged, replace the cord with a compatible part from the brand or service center.
Tip: Damaged cords are a common hidden hazard. - 4
Check the jar and lid interlock
Remove the jar and clean the interlock area. Refit the jar, ensure it seats firmly, and lock the lid before testing.
Tip: A misaligned lid can prevent Safe Start mode from triggering. - 5
Inspect blades and drive assembly
With the jar off, rotate the blade to feel for resistance. Check the drive coupler for cracks or wear; replace if necessary.
Tip: A smooth blade rotation indicates the path is clear. - 6
Test in short bursts
Reassemble and run in short cycles (5–10 seconds) to observe motor response without overheating. Stop if unusual noises appear.
Tip: Gradual testing helps detect hidden faults early. - 7
Decide on professional help
If you hear buzzing without rotation or the motor stalls repeatedly, contact a trained technician for diagnosis and repair.
Tip: Professional service preserves safety and warranty.
Diagnosis: Mixer grinder won't start or spins intermittently
Possible Causes
- highPower issue (outlet, plug, or cord)
- highOverload protector engaged or needs cooldown
- mediumBlown fuse or tripped circuit breaker
- mediumJammed blades or misaligned jar
- lowWorn motor brushes or drive belt
Fixes
- easyTest outlet with another device; inspect plug for damage; replace cord if needed
- easyReset overload protector and wait 10-15 minutes before retrying
- easyCheck main fuse or circuit breaker; replace fuse or reset breaker
- easyRemove jar, clean blades and interlock; ensure jar seats correctly and lid is locked
- hardInspect drive belt and motor brushes; replace worn parts or consult a tech
Your Questions Answered
Why won't my mixer grinder start even though it’s plugged in?
Start by verifying the outlet, cord, and plug for damage. Test the outlet with another device and reset any tripped breakers. If power is reaching the unit but it still won’t start, the overload protector or switch could be the cause.
First check the outlet and cord for damage, then reset the breaker. If it still won’t start, the overload protector may be engaged.
What should I inspect first if the blades don’t spin?
Unplug the unit and inspect the jar interlock, blade assembly, and drive coupling for obstructions or wear. Clean and reseat components before testing again.
Check the interlock and blade assembly for obstructions, then reseat and test.
Is it safe to open the motor housing to troubleshoot?
Opening the motor housing can expose live parts and void warranties. If you suspect internal motor issues, contact a qualified technician.
Avoid opening the motor housing yourself; contact a pro for internal checks.
Can a worn belt or brushes cause a non-starting mixer grinder?
Yes. Worn drive components can prevent rotation or cause intermittent operation. Replacement is usually handled by a service professional.
Worn belts or brushes can stop the motor; get them replaced by a technician.
When should I replace my mixer grinder instead of repairing it?
If multiple internal faults persist or the cost of parts approaches or exceeds half the price of a new unit, replacement is often the wiser option.
If repairs pile up or cost too much, consider replacing the unit.
How can I prevent future failures?
Regular cleaning, avoiding overload, and following manufacturer guidelines for use and storage reduce common failures. Schedule occasional professional checkups if you rely on the unit heavily.
Keep it clean, don’t overload, and service periodically to prevent problems.
Watch Video
Top Takeaways
- Identify power issues before opening the unit.
- Safety features protect you; never bypass them.
- Most fixes are simple resets, cleaning, or seating checks.
- If the motor hums but won’t turn, seek professional help.
- Regular cleaning prevents many failures.