Where is the Mixer in Cubase? Your Complete MixConsole Guide
Learn where to find the mixer in Cubase, how the MixConsole is organized, and how to route tracks, balance levels, and save layouts with shortcuts. A practical, step-by-step guide for beginners and seasoned users alike.

Open the MixConsole to access Cubase’s built-in mixer. In Cubase, you’ll find it under Studio > MixConsole or by pressing F3. The MixConsole presents channel strips, inserts, sends, and bus routing in one centralized view, letting you balance levels, pan, and apply effects efficiently—whether you’re tracking, mixing, or mastering.
What the Cubase mixer is and why it matters
In Cubase, the mixer—accessible through the MixConsole—is the central hub for balancing, routing, and processing your audio and MIDI tracks. If you’re wondering, where is mixer in cubase, the answer is simple: it lives in the MixConsole window. This tool brings together faders, panning controls, inserts, sends, and bus routing in a single view, so you can hear how every element sits in the mix. Whether you’re arranging a recipe of drums, bass, synths, and vocals, the mixer helps you translate ideas into balanced sound. A strong mixing workflow reduces guesswork and speeds up decision-making, especially when you’re juggling multiple tracks or attempting a cohesive stereo image. The MixConsole also ties into Cubase’s routing and plugin architecture, so you can audition effects and automate levels on the fly.
From the home studio to a more complex setup, understanding the mixer’s role clarifies how your final sound will sit in the mix. The MixConsole is not just about loudness; it’s about tonal balance, spatial positioning, and how subtle changes to one element affect the whole. With consistent use, you’ll develop a mental map of where to adjust EQ, dynamics, and send levels as you work.
How the MixConsole is organized
The MixConsole in Cubase is organized into several key areas: channel strips, insert effects, sends, group/bus channels, and master bus. Each channel strip represents a track or bus, with controls for solo/mute, fader level, pan, and input/output routing. Inserts live on the top of the strip, letting you insert EQ, compression, saturation, and other processors in real time. Sends below the inserts provide parallel processing paths such as reverb or delay, enabling you to blend effects without overwhelming the dry signal. The left side of the console shows the signal flow from input to bus, while the right side focuses on output routing and master processing. In practice, where is mixer in cubase? It’s this central panel that becomes your primary workspace for shaping the overall tone, dynamics, and space of your project. Customizing which elements you see—fader sizes, color coding, and track order—helps you speed up your workflow and keep your ears focused on the music.
Understanding this layout is foundational. Once you can navigate channels, inserts, and sends, you gain the ability to audition effects quickly, route groups for parallel processing, and keep a clean, repeatable session structure. It also makes it easier to implement templates for different genres or session types, saving time on future projects.
Accessing MixConsole quickly
Accessing the MixConsole in Cubase is designed to be fast and reliable. The quickest route is to press F3, which toggles the MixConsole on your screen. If you prefer menus, go to Studio > MixConsole. Depending on your workspace, the MixConsole can dock to the side of the main window or float as a separate window. For projects with many tracks, you can open multiple MixConsole instances to view different stacks of tracks side-by-side. Learning these access methods early pays off in faster session starts and fewer interruptions during tracking or mixing.
If you’re collaborating, you can share a single project window with a co-producer and still have each person open their own MixConsole view to focus on their own tracks. Familiarity with these hotkeys and menus reduces the friction of jumping between recording, editing, and mixing tasks. The goal is to keep your hands on the keyboard and your ears on the sound.
Routing basics: sending tracks to buses
Routing is a core function of the MixConsole. Start by routing individual tracks to their respective input channels, then send them to buses for grouping or effects. To create a bus, add a new bus channel (or group) and route the track’s sends to that bus. This enables parallel processing, such as sending a drum bus to a separate reverb or a vocal bus to a delay chain. When you set up buses, consider labeling conventions (e.g., Drums, Guitars, Vocals) to make navigation intuitive. Remember to check phase compatibility and ensure your bus levels don’t introduce feedback loops or clipping.
With proper routing, you can achieve a clearer mix as tracks share common processors without duplicating signal paths. It also simplifies automation: you can automate a bus’s level or effect sends without touching every track separately. Practice routing a few test tracks to a reverb bus and a parallel compression bus to hear how the balance shifts as you tweak sends and returns.
Core tasks in the MixConsole
In daily mixing work, the essential tasks are balancing levels, panning, applying inserts, and managing sends. Start by calibrating faders to a rough balance, then adjust the pan positions to create a stable stereo image. Insert EQ and dynamics where needed to sculpt each sound, but avoid over-processing early in the mix. Use sends for reverb and delay to create space without washing out the direct signal. Finally, check your output routing and ensure meters show healthy, non-clipping levels across tracks and buses. As you practice, you’ll start to hear how subtle changes in fader movement and send levels influence the perceived depth and clarity of the mix.
A practical habit is to solo very different elements (drums, vocals, synths) while adjusting their level relationships. This helps you maintain separation and prevents masking, where one element obscures another. The MixConsole’s modular layout makes these adjustments faster once you’re oriented to where each control sits.
Customizing your mixer layout and workflow
Cubase invites customization to suit your workflow. You can resize channel strips, show or hide inserts and sends, and color-code tracks for quick visual identification. Create dedicated layouts for different project stages, such as tracking versus mixing, and save them as templates. Keyboard shortcuts become power tools: assign frequently used commands to keys you already use, like toggling the MixConsole, soloing a track, or toggling a bus. If your project grows, use the Group Editor to reorganize channels and keep related tracks together. A clean, consistent mixer setup reduces cognitive load and speeds up decision-making during sessions.
As you customize, document your preferred layout: what you show, which buses you use, and how you label tracks. A repeatable arrangement helps you ramp up new projects quickly and ensures others can follow your workflow if you collaborate.
Troubleshooting common issues with MixConsole
If MixConsole won’t open, start by checking that Cubase is up to date and that there are no conflicting window layouts. Reset the workspace or re-create a default workspace to restore the standard MixConsole view. If inserts or sends don’t respond, verify that the selected bus is active and that routing paths are correct. Sometimes, plugins may cause a temporary stall—try disabling a problematic plugin or loading a clean project to verify the issue.
Another frequent problem is excessive CPU usage when many plugins are loaded. In that case, consider freezing tracks or increasing audio buffer size in the VST Audio System settings. Regularly saving a project template with a working MixConsole setup can prevent these issues from derailing a session.
Best practices for beginners
Start with a simple, repeatable template for your Cubase projects. Create a couple of bus groups (Drums, Bass, Vocals, Other) and route tracks to them from the MixConsole. Keep fader levels conservative and let the mix evolve with EQ and dynamics rather than chasing loudness. Use a limited set of plugins in early stages to focus on balance, then gradually introduce more processing as you gain confidence. Practice saving and loading mixer layouts to speed up future sessions and maintain consistency across projects.
Tools & Materials
- Cubase with MixConsole support(Any recent version is fine)
- Computer or workstation(Stable performance and audio drivers)
- Audio interface (recommended)(For monitoring and recording with low latency)
- MIDI controller (optional)(Hands-on control for faders and knobs)
- Documentation/access to Steinberg resources(Official guides and forums)
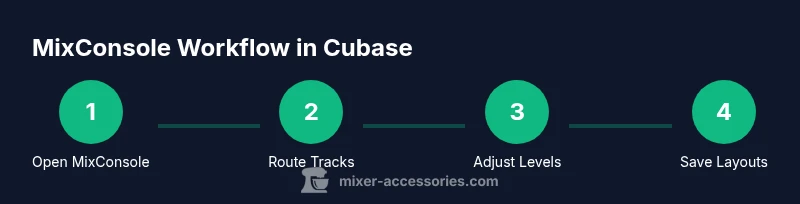
Steps
Estimated time: 25-40 minutes
- 1
Open MixConsole
Launch Cubase and press F3 or navigate to Studio > MixConsole to open the mixer. Decide whether you want a docked or floating window depending on your screen setup. This step gives you an immediate view of the current project’s channels and routing.
Tip: Tip: Use F3 for a fast toggle between your project view and the mixer. - 2
Identify channel strips and routing
Scan the left side of the MixConsole to identify input channels, group channels, and the master bus. Make a quick note of which tracks feed which buses so you can route them smoothly in later steps.
Tip: Tip: Use color coding to distinguish drums, guitars, keyboards, and vocals at a glance. - 3
Route tracks to buses
Create or select a bus channel and route the relevant tracks to that bus via the Send controls. This enables parallel processing and creates a clean path for group effects like compression or reverb.
Tip: Tip: Keep an eye on bus levels to avoid clipping on the master bus. - 4
Insert plugins on channels
Add EQ, compression, or saturation plugs to individual channel strips where needed. Start with gentle settings to preserve the natural tone and adjust while listening in context with the mix.
Tip: Tip: A/B compare with and without processing to ensure you’re improving the sound. - 5
Adjust faders, pan, and sends
Balance levels using faders, set stereo imaging with pan controls, and tweak send levels to create space. Regularly solo and audition groups to ensure clarity and separation.
Tip: Tip: Group tracks until you’re comfortable with the overall balance before focusing on micro-adjustments. - 6
Save and recall mixer layouts
Save your MixConsole layout as a template or scene so you can recall a consistent setup in future projects. This reduces setup time and keeps your workflow uniform across sessions.
Tip: Tip: Create separate templates for different genres or recording setups.
Your Questions Answered
Where is the mixer located in Cubase, and how do I open it quickly?
The mixer is accessed via the MixConsole. Open it quickly with the keyboard shortcut F3 or through Studio > MixConsole. You can dock it or keep it floating depending on your preferred workflow.
Open MixConsole with F3 or Studio > MixConsole. It’s the central hub for mixing in Cubase.
How do I route a track to a bus in the MixConsole?
Select the track, locate the sends area under the inserts, and choose or create the bus you want to route to. Adjust the send level to taste and verify that the bus is active.
Choose a bus in the sends area and adjust the send level.
Can I save and reuse a MixConsole layout?
Yes. Save your MixConsole setup as a template or scene so you can recall it in future projects. This helps maintain consistency and speeds up project setup.
Save your mixer setup as a template for future use.
What should I do if MixConsole won’t open?
Check for software updates, reset the workspace, and ensure no window conflicts block the MixConsole. If issues persist, try loading a fresh project to isolate the problem.
Update and reset the workspace, then test with a new project.
How can I customize the MixConsole for my workflow?
Use layout options to show or hide inserts, sends, and bus channels. Color-code tracks and set up custom shortcuts to streamline your routine.
Customize the mixer with views and shortcuts to speed up your work.
Is there a recommended starting point for beginners?
Start with a simple template: a few drums, bass, keys, and vocals routed to dedicated buses. Balance levels first, then add EQ and dynamics gradually.
Begin with a small, clean template and balance before adding processing.
Can I automate mixer parameters in Cubase?
Yes. You can automate fader levels, sends, and plug-in parameters over time to create dynamic changes within your mix.
Automate faders and send levels to shape the mix over time.
How do I audition effects without committing to them?
Use bypass or compare features on inserts to quickly hear the effect with and without processing, ensuring you’re making the right choice.
Bypass or compare effects to hear their impact clearly.
Watch Video
Top Takeaways
- Open MixConsole quickly with F3 for faster access.
- Route tracks to buses to enable clean parallel processing.
- Use inserts and sends judiciously to shape tone and space.
- Save mixer layouts to maintain consistency across sessions.
- Practice with templates to speed up future projects.