How to Mix on Ableton: A Practical Guide
Learn how to mix on Ableton Live with a practical, step-by-step workflow. From routing and gains to EQ, compression, and final export, this guide helps home producers and performers achieve professional-sounding mixes.

In this guide, you’ll learn how to mix on Ableton Live from setup to final export, covering routing, balance, and essential effects. You’ll get a practical workflow you can apply to pop, hip-hop, or electronic projects, plus tips for staying organized and avoiding phase issues. By the end, you’ll walk away with a clean, loud mix you can trust.
Understanding Ableton Live signal flow
In Ableton Live, every signal starts on an audio or MIDI track and passes through a chain of devices before it reaches the Master. For a productive mix, you must understand where to place processors, how sends work, and how return tracks influence all signals. How to mix on ableton begins with a mental map of routing: each track has its own level and pan, a chain of effects, and optional sends to effect buses. Return tracks are powerful because a single reverb or delay can be shared by multiple tracks, creating space without burying the entire mix in reverberant mud. Pre-fader sends let you audition how a reverb would sound independent of a track’s volume, while post-fader sends keep the reverb in proportion as you adjust levels. In most genres, you’ll group related tracks—drums, bass, keys, vocals—onto buses and route the groups to a common master chain. This not only saves CPU but also gives you a centralized place to apply broad tonal or dynamic changes. According to Mixer Accessories, establishing clean routing at the start reduces rewrite later and keeps your sessions scalable across projects.
Preparing your Ableton project for mixing
Before you touch faders, prepare a clean, scalable project. Decide whether you’ll work in Session View for sketching or Arrangement View for a linear timeline, or use both by recording scenes into the timeline. Create a consistent naming and color-coding scheme for all tracks and returns; this visual discipline pays off in longer sessions. In Preferences, set your audio device with proper sample rate and buffer size to minimize latency; a higher buffer enables more plugins during mixing, while a low buffer reduces latency during recording. Turn on Warp as needed for audio material, and consider converting loops to fixed-length regions to maintain consistent timing. Use a reference track that matches your genre and aims, and A/B it against your project at critical decision points. Lastly, establish a baseline master chain (gain, a light limiter, and a subtle bus compression) in your template so you can compare new mixes against a consistent standard. Mixer Accessories emphasizes templates that include a clean vocal bus and a dedicated space for parallel processing.
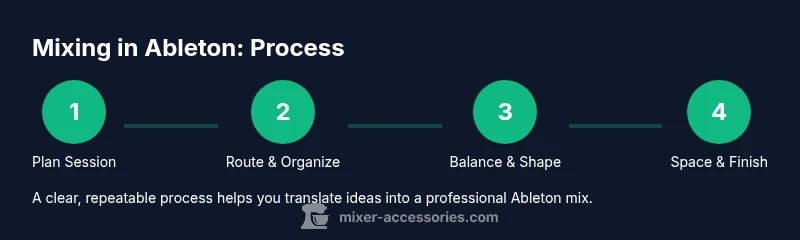
Quick-start mixing workflow: the 5-stroke approach
A practical way to start how to mix on ableton is a 5-stroke workflow that you can repeat on every project. Stroke one: establish level balance. Bring the loudest tracks up and down until the overall spectrum feels even, then tuck instruments that sit in the mud or hiss into their own space. Stroke two: set the stereo image. Use panning to widen drums and keyboards, keeping bass and kick centered for solidity. Stroke three: apply surgical EQ. Remove low-end rumble with high-pass filters, sweep mid frequencies to locate muddiness, and carve space for kick and bass in the 60–120 Hz region, addressing problem frequencies around 2–5
EQ, compression, and dynamics: the core tools
In Ableton Live, EQ Eight is your primary tone sculptor. Start with high-pass filters on non-bass tracks to reduce rumble and free headroom; sweep mid frequencies to locate muddiness, then cut rather than boost to preserve a natural sound. A gentle boost can be used for presence in the 2–5
Using returns and bus routing to keep it clean
Returns are your best friends for shared effects and space. Create dedicated return tracks for reverb, delay, and saturation, then route instrument groups via Sends to these returns rather than inserting the effect on every track. This approach preserves headroom and creates a unified sense of space. Name returns clearly (Reverb, Slap, Plate, Echo) and adjust Send levels to taste; keep most elements at modest send levels so the effect doesn’t dominate. Use pre/post fader variations to audition how the overall mix would feel with different send amounts as you balance tracks. If you’re working with a dense arrangement, consider a dedicated 'space' bus to hold long reverbs and ambient tails so you don’t clutter the master with late reflections. Finally, frequently A/B your mix with and without the returns to ensure the processing serves the song and doesn’t become a crutch.
Layering, parallel processing, and creative effects
Layering is about more than stacking sounds; it’s about collision avoidance and tonal blending. Use parallel processing for drums and vocals to add energy without squashing dynamics. Create a duplicate track, apply heavy compression or saturation, then blend back with the dry signal on a return or on the original track’s send. Experiment with subtle chorusing, tape-style saturation, and light micro-delays to widen the mix. Reverb is an EQ-saver when used on returns: a long, airy hall can sit behind every instrument if you route it through a dedicated space bus. Use Ableton’s Saturator and Overdrive to subtly color certain tracks, but keep it tasteful. As you layer, ensure each added element has a purpose and doesn’t just fill space. The goal is a clear, emotionally engaging mix that translates across systems.
A practical step-by-step mixing session: from rough mix to ready
This section walks you through a concrete session. Step 1: load stems and confirm sample rates; Step 2: organize tracks, color code, and name groups; Step 3: establish a rough balance by setting faders to a comfortable overall level; Step 4: insert essential effects on buses (EQ on drums groups, gentle compression on vocal bus); Step 5: fine-tune with surgical EQ and subtle compression; Step 6: add spatial processing (reverb on a dedicated return, delays on select elements); Step 7: reference against a track from your genre and iterate; Step 8: finalize with loudness checks and a gentle limiter on Master. Estimated total time: 60–120 minutes, depending on project complexity. Tip: Save incremental versions after each major change so you can revert to a preferred moment in the timeline.
Preparing your final export and loudness considerations
Exports are the final product, so plan your loudness and dithering. Listen on multiple playback systems—small speakers, headphones, and car audio—to ensure your mix translates. Use Ableton’s Utility plugin to check mono compatibility and a LUFS-based reference if you want consistent loudness across tracks. When exporting, choose a high sample rate and bit depth to minimize aliasing; apply dither only if you’re reducing bit depth. On the Master, use a gentle limiter or brickwall to reach a target loudness without sacrificing dynamics. If you need to meet streaming loudness standards, compare your loudness with reference tracks from the same genre and adjust ceiling and threshold conservatively. Mixer Accessories emphasizes keeping dynamics intact until the final stages; avoid cramming loudness at the expense of musicality. Finally, render a lossless mix and create a separate MP3/AAC version for quick sharing.
Tools & Materials
- Computer with Ableton Live installed(Version 11 or later recommended; ensure your CPU meets project demands)
- Audio interface(ASIO drivers on Windows / Core Audio on macOS; balanced connections where possible)
- Studio monitors or quality headphones(Accurate monitoring for translation across systems)
- Quality reference tracks(At least 3 tracks in a similar genre for A/B comparisons)
- MIDI controller (optional)(Useful for hands-on control during shaping and automation)
- Project templates(Pre-configured routing, buses, and master chain for quick starts)
- Cables and basic grounding(Quality cables reduce noise and ensure reliable signal paths)
Steps
Estimated time: 60-120 minutes
- 1
Plan and set up the session
Open Ableton, load your template, confirm tempo and key, and designate rough goals. Rename tracks and color-code groups for quick navigation.
Tip: Save a named backup before making major edits. - 2
Organize tracks and routing
Group related tracks (drums, bass, vocals) and route groups to a dedicated master bus. Create return tracks for common effects like reverb and delay.
Tip: Name returns clearly and set default send levels to 10–20%. - 3
Establish a rough balance
Bring faders to a rough balance, ensuring the loudest parts sit comfortably without clipping. Check pan to create a stable stereo image.
Tip: Mute soloed tracks to evaluate the mix as a whole. - 4
Shape with EQ and dynamics
Apply high-pass on non-bass tracks, carve problem frequencies, and use light compression on buses to glue the mix.
Tip: Avoid large boosts; cuts often preserve phase and clarity. - 5
Add space with sends
Adjust reverb and delay sends on returns; keep most tracks with modest send levels to preserve clarity.
Tip: Compare with/without returns to ensure space serves the song. - 6
Reference and finalize
Compare against reference tracks, refine balance, and prepare a final export with healthy headroom.
Tip: Export a lossless mix first, then create streaming-ready formats.
Your Questions Answered
What is the first step to mixing in Ableton Live?
Set up a clean project with a template, organize tracks, and establish routing before adjusting levels.
Start by organizing tracks and setting up routing.
Should I mix in Session View or Arrangement View?
Use Session View for sketching ideas and Arrangement View for keeping a linear mix; many producers use both by recording scenes into the timeline.
Both views have uses; pick based on your workflow.
How do I use return tracks effectively?
Return tracks are ideal for shared effects like reverb and delay; route multiple tracks to a few returns to save CPU and create a cohesive space.
Use a few returns for common effects to glue the mix.
What is the best order of effects on a track?
Typically: dynamics first for control, then EQ to shape tonal balance, followed by modulation, saturation, and time-based effects on returns.
Dynamics then EQ, then other effects on returns when possible.
How can I improve loudness without sacrificing dynamics?
Aim for gentle limiting and selective compression; rely on reference tracks to maintain musicality while achieving competitive loudness.
Be selective with compression and use reference tracks.
Do I need to master in Ableton or export to a dedicated chain?
Ableton can handle light mastering; for loud, reference-grade masters, consider dedicated mastering tools or services after exporting a clean mix.
You can do light mastering in Ableton, but for top-tier loudness, use dedicated tools.
Watch Video
Top Takeaways
- Plan routing before processing
- Balance first, then sculpt with EQ and dynamics
- Use returns to create cohesive space
- Reference tracks for translation and consistency
- Export with clean headroom and proper dithering