Why Is My Mixer Tap Not Mixing? Troubleshooting Guide
Urgent, practical troubleshooting guide to diagnose and fix a mixer tap that won’t mix hot and cold. Learn step-by-step checks, common causes, and safe, home-friendly fixes from the Mixer Accessories team.

Most often, a mixer tap stops mixing due to mineral buildup or a worn cartridge. Quick fix: shut off supply, remove the handle, and flush the cartridge with clean water to clear debris. If mixing still fails, inspect cartridge seals and consider replacement; a faulty cartridge is the most common long-term cause.
Why is my mixer tap not mixing? Understanding the symptom
If you turn on a kitchen mixer tap and the water comes out at the same temperature on both sides, but you can't get a true mix between hot and cold, you’re facing a common fault. The symptom is often caused by mineral buildup inside the cartridge or a worn cartridge seal that prevents precise metering of hot and cold flows. According to Mixer Accessories, modern mixer taps rely on a compact cartridge that meters water with fine tolerances; even small deposits or degraded O-rings can disrupt balance. The Mixer Accessories team found that in most homes the remedy is not a huge overhaul but a cartridge cleaning or replacement. In this guide you’ll learn how to test for debris, verify seals, and decide when a cartridge replacement is the most reliable fix. You’ll also see when a misadjusted hot/cold balance or a damaged valve body could be the culprit. Safety first: shut off water, relieve pressure, and protect the sink before taking anything apart.
Common root causes for not mixing
There are several reasons a mixer tap stops properly mixing. The top three culprits are mineral buildup inside the cartridge, which reduces its metering precision; worn O-rings or seals, which let one side dominate; and a damaged or misaligned cartridge limiter, which prevents even distribution of hot and cold water. Less common but possible issues include air trapped in the supply lines, low water pressure, or a clogged aerator at the spout. If you have a two-handle faucet, misadjustment of the handles or a stuck spindle can also cause uneven mixing. Understanding these causes helps you diagnose quickly and choose the right fix rather than guessing.
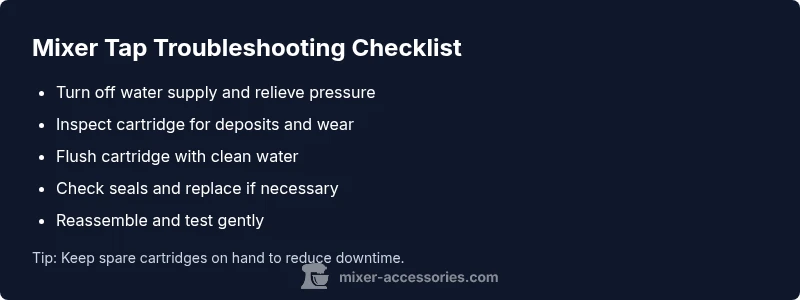
Safety checks before you start
Before you touch the faucet, turn off the main water supply and open a hot or cold tap to release residual pressure. Have a bucket, towels, and protective gloves ready. If you must remove the handle, keep track of small screws and springs so they don’t roll into the drain. Bleeding pressure and working with a dry cartridge reduces the risk of splashback. Never force a cartridge or hardware; if components look damaged or corroded, stop and seek professional help.
Quick at-home checks to diagnose
- Inspect the handle and cap for looseness; a loose cap can misalign the cartridge. - Remove the handle, inspect the retaining nut and spindle for wear. - Check the cartridge for sediment, scale, or mineral deposits and clean with a vinegar solution or appropriate cleaner. - Test hot and cold separately by running water through each side while isolated from the other; observe if one side remains stubborn or unbalanced. - If you feel resistance in both hot and cold paths, the issue is likely deeper in the valve body or supply lines.
Diagnostic flow: symptom to solution (structured checks)
Starting with your symptom (no mixing or uneven mix) works best in a structured flow. Step 1: shut off water and drain lines. Step 2: test hot and cold paths separately. Step 3: inspect the cartridge for debris or wear. Step 4: if deposits are present, clean or replace the cartridge; if the movement remains stiff, inspect seals and O-rings. Step 5: reassemble, turn on water slowly, and test. If the flow still fails, the problem may be the valve body or supply lines, requiring professional service.
Deep-dive fix for the most common cause: cartridge replacement
Replacing the cartridge is the most common repair when debris cleaning doesn’t help. Gather tools: screwdriver, adjustable wrench, replacement cartridge compatible with your faucet model, plumbers tape, rag. 1) Turn off supply; 2) Remove lever/handle; 3) Remove retaining clip; 4) Gently lift cartridge; 5) Soak in vinegar to loosen mineral; 6) Clean seats; 7) Install new cartridge and seals; 8) Reassemble and test. If the faucet remains stiff after replacement, inspect the valve body.
Safety tips and common mistakes
- Never force fittings or over-tighten connections; this can crack housings or damage seals. - Use manufacturer-approved replacement parts to ensure proper fit and meters. - If you feel uncertain about model compatibility, pause and consult a professional to avoid costly mistakes.
Preventive maintenance to avoid future issues
Regular maintenance saves time and money. Wipe the cartridge area dry after use, replace seals on a schedule aligned with your faucet’s warranty, and flush the lines annually to remove mineral buildup. Keep a small spare parts kit with O-rings and an extra cartridge so you’re ready for quick fixes. Address any signs of leaks or drips promptly to prevent larger problems later.
Steps
Estimated time: 30-60 minutes
- 1
Shut off water and prep
Turn off the water supply to the faucet and relieve residual pressure by opening a tap. Place towels to catch drips and gather tools. This keeps cleanup minimal and prevents splashes during disassembly.
Tip: Label screws and keep small parts in a tray so nothing is lost. - 2
Remove handle and access cartridge
Remove the decorative cap, unscrew the handle set screw, and lift off the handle. Use an adjustable wrench to remove the retaining nut and gently pull out the cartridge for inspection.
Tip: Take photos during disassembly to help with reassembly. - 3
Inspect and clean or replace
Look for mineral deposits on the cartridge or seals. Clean with vinegar solution or replace with a compatible cartridge if deposits persist or seals look worn.
Tip: Avoid harsh cleaners that can damage plastics. - 4
Reassemble and test
Reinstall the cartridge with new seals, replace the handle, and gradually restore water supply. Run both hot and cold paths to confirm even mixing.
Tip: Test slowly to detect leaks before finishing. - 5
If issues persist
If mixing remains poor after cartridge and seals replacement, the problem may lie in the valve body or supply lines. This usually requires professional service.
Tip: Don’t force components; professional help can prevent further damage. - 6
Document and reset
Record model and parts used for future maintenance and warranty. Keep a small maintenance log for your faucet to simplify future fixes.
Tip: Set reminders for annual flushing and part checks.
Diagnosis: Mixer tap won't mix or is uneven between hot and cold
Possible Causes
- highMineral buildup in cartridge
- highWorn or damaged cartridge seals
- lowAir in supply lines
- lowValve body damage or misalignment
Fixes
- easyClean or replace the cartridge; flush lines
- easyReplace worn seals or O-rings
- mediumBleed air from lines and verify water pressure
- hardConsult a professional for valve body repair
Your Questions Answered
What is the first thing I should check when my mixer tap stops mixing?
Start by ensuring the water supply is on and the cartridge isn’t clogged. Inspect the handle and cartridge for debris and stiffness, then test hot and cold paths separately.
Check the water supply and cartridge first; if it’s clogged or stiff, you may need to clean or replace parts.
Can a clogged aerator cause mixing issues?
A clogged aerator mainly affects flow at the spout, which can feel like poor mixing. Clean the aerator screens to restore proper flow.
Yes, a clogged aerator can affect flow; cleaning the aerator may help.
Should I replace the cartridge myself?
You can replace the cartridge if you have the correct model and tools. Follow the manufacturer’s instructions and use compatible parts.
DIY replacement is possible if you have the right cartridge and tools.
Is professional help necessary?
If you can’t access the cartridge, or you suspect valve body damage, it’s best to call a professional. Leaks or hidden damage can escalate quickly.
Sometimes a pro is needed for valve or pipe issues.
How long does cartridge replacement take?
A typical replacement takes about 30-60 minutes, depending on faucet model and accessibility.
Usually under an hour.
Watch Video
Top Takeaways
- Identify symptom early and check cartridge first
- Shut off water before any disassembly
- Cartridge wear and mineral buildup are the top fixable causes
- Replace seals or cartridge if cleaning doesn’t solve the issue