What to Do If a Mixer Isn’t Working: Troubleshooting Guide
A practical, urgent guide to diagnosing and fixing a mixer that won't turn on. Follow this step-by-step troubleshooting for kitchen and audio mixers.

Most mixer issues come from power, jams, or a worn switch. Start with the basics: ensure the unit is plugged in, test a known-good outlet, and verify the speed control isn't blocked. If it still won’t run, use the diagnostic flow below to identify the root cause and apply the fix. According to Mixer Accessories, power and jam-related problems are the most common culprits.
Common Causes Behind a Non-Working Mixer
When a mixer stops turning on or loses power during operation, the problem is rarely mysterious. In most cases, the issue boils down to power supply, a blade jam, or a faulty control switch. According to Mixer Accessories, the two most frequent culprits are power-related faults (outlet, cord, or circuit breaker) and mechanical jams preventing the motor from turning. If the unit hums but won’t spin, that points toward an electrical or control issue rather than a seized motor. Other potential causes include an overloaded motor protection switch, a blown fuse in some models, or damaged wiring. This section walks through each potential reason with clear signs to watch for so you can decide quickly which fix to try first. By recognizing these patterns, home cooks and bar enthusiasts can reduce downtime and protect their appliances.
Safety First: Power, Cords, and Overheating
Never operate a mixer with a damaged cord or after a spill. Unplug the unit before any inspection and wait for blades to come to a complete stop. If the unit has overheated, allow at least 10-15 minutes to cool before testing again. Check the outlet by plugging in another device to confirm power; if the outlet is dead, switch to a known-good outlet instead. For kitchen mixers, avoid running the motor with a bowl dry or empty, as that can trigger overload protection. If a reset is available on your model, follow the manufacturer’s procedure to resume operation after cooling. Caution yourself to never bypass thermal protections.
Quick Visual Checks You Can Do in Minutes
These checks take minutes and often solve the problem without opening the appliance:
- Confirm the plug is firmly inserted and test the outlet with another device.
- Inspect the power cord for cuts, kinks, or exposed wires; replace if damaged.
- Ensure the bowl, attachments, and blades are properly seated and not obstructing rotation.
- Verify the speed control moves smoothly through the full range and isn’t stuck on a single setting.
- Look for overheating indicators or red lights on the base if applicable.
If any sign looks unusual, stop and evaluate further rather than forcing a restart. This is where many basic fixes are found, saving time and preventing damage.
Diagnostic Flow: Symptom-to-Diagnosis Path
A structured path helps pinpoint the root cause quickly. Start by noting the symptom, then compare against common causes and apply the corresponding fixes. Use this as your mental map while you read the step-by-step fixes that follow. This approach minimizes guesswork and reduces the chance of overlooking a simple problem that can be resolved with a minor adjustment.
Most Common Fixes and How to Perform Them
If a jam is the issue, unlock jammed attachments, remove the bowl, and clear the obstruction before testing again. For power-related faults, test the outlet and cord, and reset the circuit breaker if needed. If the motor overheated, allow a cooldown period and retry with a lighter load. In cases of worn switches or faulty capacitors, replacement by a professional is recommended. Always unplug before attempting any fix, and verify the unit operates normally after each individual change to isolate the root cause.
Maintenance and Prevention to Avoid Future Breakdowns
Preventive care reduces downtime and extends the life of your mixer. Clean attachments and the bowl after every use, dry all components thoroughly, and store the mixer away from heat and moisture. Inspect the power cord periodically for signs of wear, replace damaged parts promptly, and avoid overloading the motor with heavy doughs or dense mixtures repeatedly. Lubricate if the manufacturer recommends, and consult your manual for model-specific maintenance schedules. Consistent care also makes troubleshooting faster when issues do arise.
How to Test After Repair and Safety Checks
After performing any fix, reassemble the mixer and test with a small batch to verify operation. Listen for smooth motor sound, steady rotation, and consistent speed changes across the control range. If you notice unusual noises, overheating, or a failure to complete the cycle, stop immediately and re-evaluate. Document any symptoms and fixes attempted to inform future troubleshooting or service visits.
Steps
Estimated time: 45-60 minutes
- 1
Power check and safety
Unplug the mixer. Inspect the cord for visible damage and test the outlet with another device. If the outlet is dead, switch to a known-good outlet or reset the circuit breaker, then test the mixer again.
Tip: Safety first: never test with wet hands or a damaged cord. - 2
Clear any jam
Remove attachments and bowl; rotate the blade by hand to detect resistance. If a jam is present, clear obstructions gently and re-seat the bowl and attachments before reassembling.
Tip: Use non-metal tools to avoid scratching blade edges. - 3
Check the switch and settings
Turn the mixer through its range of speeds while it’s unplugged to feel for a sticking or loose switch. If the switch is stiff or wobbly, it may need replacement.
Tip: Don’t force a stuck switch; service is safer. - 4
Test power again
Plug back in and test at a known-good outlet. If the mixer still won’t start, try a different power cord if available. Note whether the motor hums or remains silent.
Tip: Note any unusual noises which can indicate motor issues. - 5
Thermal overload and cooling
If the motor overheated, allow a cool-down period of 10–15 minutes before retrying. Some models auto-reset; if not, consult the manual about reset procedures.
Tip: Overheating can occur with heavy loads or dry running; avoid repeating this. - 6
Final test and professional help
If no fix works, schedule professional service to inspect wiring, switch, or motor. Don’t attempt internal repairs on high-power motors beyond your skill.
Tip: Having symptoms documented helps a tech diagnose faster.
Diagnosis: Mixer won't start or stops during operation
Possible Causes
- highPower issue (outlet, cord, or breaker)
- mediumBlade jam or motor overload
- lowWorn or faulty switch/capacitor
Fixes
- easyTest outlet with another device and reset the circuit breaker
- easyUnplug and clear any jam from blades; re-seat attachments and bowl
- easyInspect the power cord and plug for damage; replace if frayed or damaged
- mediumIf the switch or capacitor seems faulty, consult a professional for replacement
Your Questions Answered
What should I check first when my mixer won't turn on?
Begin with power: ensure it's plugged in, test a known-good outlet, and try another device on the same outlet. Check the power switch and any overload indicator. If it still won't start, proceed with the diagnostic flow.
Start with power and outlet checks, then move to the diagnostic flow if it still doesn't work.
My mixer hums but blades won’t turn—what now?
A motor hum usually signals a jam or overload. Remove attachments, clear any obstruction, and reset the unit. If the hum persists, test the switch and consider professional inspection for motor or capacitor faults.
If it hums, check for jams and then test the switch; consider pro help if it continues.
How do I reset a thermal overload on a stand mixer?
Let the unit cool completely, then unplug and wait before retrying. Some models auto-reset; if not, consult the manual or service.
Allow it to cool and reset; check the manual for auto-reset behavior.
When should I replace the power cord or switch?
Replace damaged cords or loose switches. Avoid DIY wiring on high-power motors unless you are qualified.
If the cord or switch shows damage, replace it and seek a professional if needed.
Is it safe to use a mixer after a spill?
No. Power off and unplug; wait for components to dry before inspecting. If moisture entered the housing, consult a tech.
Don’t power up after a spill until you’ve checked for moisture and safe operation.
Watch Video
Top Takeaways
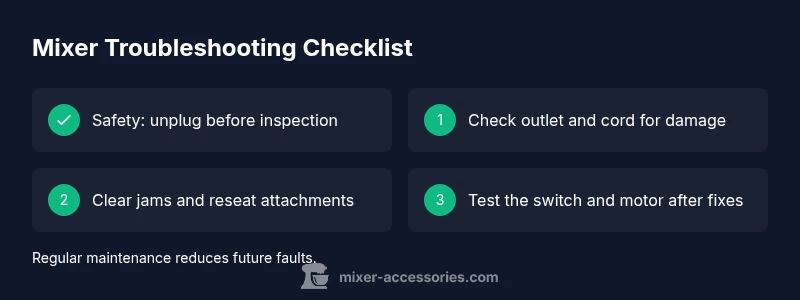
- Start with power and outlet checks
- Clear jams before testing switches
- Test after each fix and document symptoms
- Schedule professional service for electrical concerns