How to Remove Cartridge from a Mixer Tap: A DIY Guide
Learn how to safely remove the cartridge from a mixer tap, diagnose leaks, and replace it with a new cartridge. This practical, step-by-step guide covers tools, safety, and reassembly for DIY home repair.

What is a cartridge in a mixer tap?
A cartridge is the internal valve that controls water flow and temperature in many modern mixer taps. It sits inside the faucet body and moves with the handle to regulate hot and cold water. When a cartridge wears, cracks form, or O-rings degrade, you can see leaks, a stiff handle, or inconsistent temperature. If you’re asking how to remove cartridge from mixer tap, you’re preparing to inspect wear, verify model compatibility, and replace the part if needed. Understanding cartridge design helps you choose the correct replacement and avoid damage to seats, seals, or the faucet body. This knowledge is essential for preserving water efficiency and preventing future leaks.
Safety first: plan and protect
Before you begin, turn off the water supply and relieve pressure to avoid a spray when dismantling the faucet. Place a towel or small basin under the work area to catch any drips. If your home uses a central shutoff valve, shut it off there for more reliable control. Avoid using force on plastic components, and never twist servos or seals beyond their natural range, which can cause cracks or leaks.
Tools and materials you’ll need
Gathering the right tools saves time and prevents damage. You’ll need an adjustable wrench, a set of screwdrivers, a cartridge puller or needle-nose pliers, a replacement cartridge, plumber’s tape, o-ring lubricant or silicone grease, and rags or towels. If your faucet uses a set screw, an appropriately sized Allen key is essential. Having a small dustpan and a gentle cleaner for mineral buildup helps keep the bore clean during inspection.
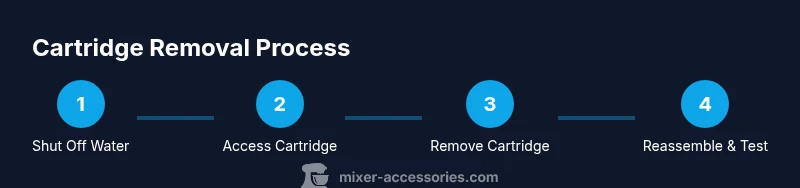
Step-by-step: Step 1 — Shut off water and relieve pressure
Start by turning off both the hot and cold water supplies to the faucet. Open the mixer tap to release any residual pressure in the line. This reduces the risk of splashing and helps you see the cartridge clearly. If your supply lines are stubborn, close the main shutoff valve for extra assurance. In this stage, you’re setting a safe baseline before you touch delicate components.
Step-by-step: Step 2 — Access the cartridge (remove handle and bonnet)
Remove the decorative cap on the handle to reveal the screw head. Use the appropriate screwdriver to loosen and lift out the handle, then locate and loosen the bonnet nut or retaining clip that holds the cartridge in place. Keep small parts grouped in a tray so you don’t lose them. If your faucet has a temperature limit stop, note its position for accurate reassembly.
Step-by-step: Step 3 — Extract the cartridge with care
With the cartridge accessible, insert the cartridge puller or gentle pliers into the housing and apply even upward pressure. Do not twist; apply straight, steady force to lift the cartridge without scratching the bore. If the cartridge grips stubbornly, apply a small amount of penetrating oil around the collar and wait a few minutes before retrying. Stop if you feel resistance that could indicate damage.
Step-by-step: Step 4 — Inspect, clean, and decide on replacement
Inspect the cartridge for visible cracks, hardening, or deformities. Check O-rings and seats for wear or mineral buildup. Wipe the bore clean with a soft cloth; avoid abrasive cleaners. If wear is evident or the cartridge doesn’t seat smoothly, replace it with a model that matches your faucet’s make and year. Always verify compatibility with your faucet brand.
Step-by-step: Step 5 — Reassemble the faucet
Install a new or cleaned cartridge, then replace the bonnet, handle, and decorative cap in reverse order. Apply plumber’s tape to threaded connections and a thin layer of silicone grease to O-rings for a smooth seal. Reconnect water supplies and turn on slowly to reduce water hammer. Test by moving the handle through its full range, adjusting temperature and flow.
Step-by-step: Step 6 — Test for leaks and adjust as needed
With water restored, run both hot and cold cycles to check for drips around seals and the cartridge collar. If a leak persists at the bonnet, tighten slightly but avoid overtightening, which can crack fittings. If temperature control is off, recheck the O-rings and seating depth, and ensure the cartridge is fully seated. Patience during testing helps you confirm a proper seal.
Common mistakes and troubleshooting tips
Common mistakes include forcing the cartridge, over-tightening fittings, or using incompatible replacement parts. Always confirm model compatibility before purchasing a cartridge. Mineral deposits can hide wear, so clean the bore thoroughly and inspect every O-ring. If you encounter persistent leaks after reassembly, revisit the cartridge installation sequence and reseat the cartridge for a better seal.
Cartridge compatibility and selection guidance
Cartridges vary by faucet brand, model, and lever design. When selecting a replacement, bring the faucet brand, model number, and bore height into the store or check the manufacturer’s website. If you can’t locate a direct match, look for a cartridge with the same valve type ( washerless or cartridge-type ) and similar dimensions. Correct fit ensures reliable operation and helps avoid future leaks.
Maintenance to extend cartridge life
Regularly inspect o-rings and seals, especially in areas with hard water. Wipe mineral buildup from the cartridge bore to prevent sticking and ensure smooth motion. Consider a brief annual inspection if your water is particularly mineral-rich. Using a water-softening system can reduce mineral deposits that shorten cartridge life. Keeping a spare replacement cartridge on hand can minimize downtime when leaks appear.
Final checks and pro tips
Once everything is reassembled, perform a final test by running both hot and cold water for several minutes. Listen for any subtle drips around joints and ensure the handle returns to neutral smoothly. For best results, document the cartridge model and date of service for future reference. For authoritative guidance on plumbing safety and best practices, consult official sources such as the EPA’s WaterSense program (https://www.epa.gov/watersense) and Cornell Cooperative Extension (https://extension.cornell.edu).