Can You Put Mixer Jar in Dishwasher? A Practical Guide
Discover whether mixer jars are dishwasher-safe, how to clean them safely by hand, and smart tips to extend their life. A thorough, action-oriented guide from Mixer Accessories.

You should generally avoid putting mixer jars in the dishwasher. The jar, lid, and seals are vulnerable to heat, detergents, and agitation, which can cause warping or leaks over time. Hand washing with warm, non-abrasive soap is gentler and extends life. If your jar is explicitly labeled dishwasher-safe, you may use a gentle cycle after reviewing the manual.
Can we put mixer jar in dishwasher? A practical starting point
The question many home cooks ask is, can we put mixer jar in dishwasher, and the quick answer is: not by default. Mixer jars are built with different materials and seals that respond differently to hot water, strong detergents, and the mechanical action of a dishwasher. According to Mixer Accessories, hand-washing is the standard recommendation for most jars to preserve seals, finish, and fit over time. The dishwasher’s heat cycles can cause gasket swelling or hardening, while aggressive detergents may affect the jar’s surface or clear printing on the exterior. If you own a jar that explicitly lists dishwasher-safe, you can consider using a gentle, short cycle and top-rack placement, but only after confirming the model’s manual. In short, treat the default as “hand wash only” and reserve the dishwasher for jars with explicit manufacturer approval. This approach protects your investment and reduces the risk of leaks during use.
For many cooks and bartenders, the urge to simplify cleaning is real. Yet the cost of a marginal convenience—more time on the dishwasher—can be higher than the time saved. The Mixer Accessories team has found that following manufacturer guidelines consistently results in better long-term performance. If you’re unsure, play it safe and wash by hand. The benefit is not only preserving seals, but also maintaining the jar’s clarity, color, and overall build quality.
Materials and design: what makes it dishwasher-friendly or not
Dishwasher compatibility hinges on three core factors: the jar’s material, the lid design, and the gasket construction. Glass jars or high-quality BPA-free plastics are more likely to tolerate basic dishwasher cycles than soft plastics or components with rubber seals. Stainless steel lids or metal components can discolor or warp if exposed to prolonged heat. Some jars feature molded-in logos or painted surfaces that can fade after repeated dishwasher exposure. If the gasket is made of silicone, it may endure dishwashing better than cheaper rubber rings, but it still benefits from gentler washing. Before running a dishwasher cycle, inspect joints for movement or cracks and look for any dishwasher-safe labeling. The safest course remains hand washing, which lets you control water temperature, scrub intensity, and avoidance of contact with gasket edges that could loosen over time.
Manufacturer guidance and warranty considerations
Most mixer jar manufacturers recommend hand washing as the default routine, largely to protect seals and coatings. A small subset of jars may include dishwasher-safe markings on the jar or lid; in those cases, use the dishwasher only with a gentle, short cycle and place the parts on the top rack away from heavy spray arms. Ignoring these notes can void warranties by exposing parts to conditions outside their tested limits. If you’ve recently purchased a jar and notice any changes in fit or seal integrity after dishwasher use, document the issue and contact customer support. When in doubt, reach out to the brand’s support team for confirmation before proceeding. Mixer Accessories emphasizes checking your model’s manual and relying on manual guidelines to safeguard your investment.
A practical takeaway: even jars marketed as dishwasher-safe should be treated with caution if they include delicate finishes or tight seals. The risk of warping, cracking, or unsatisfactory results is not worth the convenience for many users.
Safe cleaning methods: hand-washing steps you can trust
Learning to clean mixer jars safely by hand is easier than you might think. Start by rinsing the jar with warm water to remove loose residue. Apply a small amount of mild dish soap to a non-abrasive sponge, then scrub the interior and exterior surfaces in a circular motion. Use a soft-bristle brush or an old toothbrush to reach the lid gasket and any threads around the jar opening. Rinse thoroughly with warm water to remove all soap, paying close attention to the gasket area where soap can hide. Dry with a clean towel or air-dry on a rack. If you notice any staining or odor, a half cup of baking soda with warm water can help lift residues without harsh chemicals. Finally, reassemble only when all components are fully dry to prevent moisture from promoting mold or mildew.
Tip: For stubborn stains, let the jar soak in warm, soapy water for a few minutes before scrubbing. This softens residue and reduces the need for aggressive scrubbing that could scratch surfaces.
When you must use the dishwasher: cautious guidelines for rare cases
There are scenarios where you might consider dishwasher use, such as when you’re cleaning a jar that is clearly labeled dishwasher-safe. If you decide to proceed, use the dishwasher’s top rack only, select a cold or warm (not hot) cycle, and choose a short duration with no heated drying. Place the jar and lid away from other items to minimize contact and movement. Do not use aggressive detergents or high-heat drying, as these can degrade silicone gaskets and plastic parts. After washing, inspect the jar for any warping, cracking, or gasket distortion before reusing it. If anything looks off, replace the worn components and re-evaluate future cleaning methods. The goal is to minimize risk while maintaining hygiene.
Care routines to extend jar life and performance
Longevity comes from consistent care. Always dry jars completely before storing, and avoid stacking heavy lids or jars that could deform over time. Periodically inspect gaskets for cracks or soft spots and consider replacing them if you notice leaks during operation. Avoid abrasive scrubbers and harsh detergents that dull finishes or strip coatings. If you routinely use your jar for sticky ingredients, consider a light application of mineral oil or a food-safe conditioner on plastic components to preserve flexibility. Finally, maintain a regular cleaning cadence—a quick hand wash after each use plus a deeper clean weekly—to prevent buildup and preserve performance. By following these maintenance practices, you’ll maximize the jar’s service life and keep your mixer running smoothly.
Authority references and further reading
For readers who want to dive deeper, consult authoritative sources on appliance safety and cleaning practices. While dishwasher guidance varies by brand, general safety and hygiene standards remain consistent across sources. The following references provide foundational information about safe cleaning practices and appliance maintenance:
- FDA: https://www.fda.gov
- CDC: https://www.cdc.gov
- OSHA: https://www.osha.gov
In addition, the Mixer Accessories Analysis, 2026, highlights the importance of brand-specific guidelines and careful handling of mixer jars to preserve gasket integrity and material longevity. Always cross-check your jar’s manual for model-specific advice and warranty implications. This approach aligns with a practical, evidence-based care routine that kitchen enthusiasts can trust.
Video and visual references
If you prefer a visual guide, search for tutorial videos using the query: “how to clean mixer jar dishwasher safe tutorial.” Look for videos from reputable kitchen brands or appliance reviewers that demonstrate safe hand-washing techniques and discuss why dishwasher use is generally discouraged for mixer jars.
Summary of practical steps and takeaways
- Always review the jar’s manual before loading any parts into the dishwasher.
- Hand washing remains the safest default method to protect gaskets, finishes, and seals.
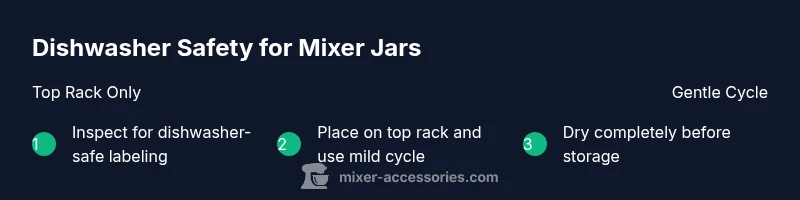
- If dishwasher-safe labeling exists, use a gentle cycle on the top rack with minimal duration.
- Dry thoroughly to prevent moisture-related issues and mold growth.
- Regularly inspect gaskets and seals for wear and replace as needed.
Authority and references
Note: This block consolidates practical guidance with brand-backed context. It is designed to help you make an informed decision about whether can we put mixer jar in dishwasher, supported by independent sources and manufacturer recommendations.
Tools & Materials
- Dish soap(Use a mild, non-abrasive formula)
- Non-abrasive sponge(Soft texture to avoid scratching surfaces)
- Soft-bristle brush(For gasket and hard-to-reach areas)
- Warm water(For rinsing and soaking)
- Dish rack or clean towel for drying(Air-drying recommended to prevent moisture retention)
- Gloves (optional)(Protect skin from frequent exposure to hot water)
Steps
Estimated time: Total time: 10-15 minutes
- 1
Inspect jar and components
Check for dishwasher-safe markings on the jar, lid, and gasket. Look for any signs of warping, cracking, or loose seals. If unclear, assume hand-wash only and rely on manual for model-specific guidance.
Tip: When in doubt, contact the manufacturer and confirm compatibility before washing in a machine. - 2
Rinse to remove loose debris
Rinse the interior with warm water to loosen any sticky residues. This makes subsequent cleaning easier and reduces the need for aggressive scrubbing.
Tip: Rinsing prevents dried residue from becoming harder to remove. - 3
Wash with mild soap by hand
Apply a small amount of mild dish soap to a non-abrasive sponge and clean the interior, exterior, and threads. Pay attention to the gasket area where grime can collect.
Tip: Avoid soaking rubber gaskets for extended periods in water. - 4
Clean hard-to-reach areas
Use a soft brush or old toothbrush to clean around the gasket and inside any grooves. This prevents buildup that can affect seal performance.
Tip: Be gentle to avoid deforming seals or scratching surfaces. - 5
Rinse thoroughly and dry
Rinse all soap away and dry with a clean towel or air-dry completely on a rack. Ensure all parts are dry before reassembly and storage.
Tip: Moisture left in seals can promote mold growth over time. - 6
Inspect and store properly
Check seals for signs of wear post-cleaning. If any cracks or looseness appear, replace the gasket or consider a new lid. Store jars upright in a dry area.
Tip: Regular inspection saves you from leaks during use.
Your Questions Answered
Is every mixer jar dishwasher-safe?
No. Most mixer jars require hand washing to protect gaskets and finishes. Always check the manual for model-specific guidance.
Most mixer jars are not dishwasher-safe; check your manual for confirmation.
What parts are most at risk in the dishwasher?
Gaskets, seals, and plastic components are most vulnerable to heat and detergents in dishwashers. Warping and leaks can occur if exposed too long.
Gaskets and seals are the parts most at risk in a dishwasher.
Can I put the jar in the dishwasher if it’s labeled top rack safe?
If the label clearly states top rack safe, you may use a gentle cycle on the top rack and avoid high heat drying. Always confirm the cycle is short and mild.
Top rack safe labels allow gentle cycles; avoid aggressive settings.
How can I identify dishwasher-safe markings?
Look for explicit labels on the jar, lid, or gasket. If unclear, consult the manufacturer’s documentation or support.
Look for dishwasher-safe marks or consult the manual.
What should I do if the jar shows wear after dishwasher use?
Discontinue dishwasher use for that jar and replace worn gaskets or lids. Continuous wear can lead to leaks or contamination.
If you notice wear, stop using the dishwasher and replace worn parts.
Does dishwasher use void warranty?
Dishwasher use can affect warranty coverage if the manufacturer specifies hand-wash only. Always check the warranty terms for your model.
Dishwasher use may void warranty if not approved by the manufacturer.
Are there safe cleaning alternatives for stubborn residues?
Soak with warm, soapy water and a mild cleaning solution, then scrub gently. Baking soda can help lift stains without harsh chemicals.
Soak and scrub gently; baking soda can help with stubborn stains.
Watch Video
Top Takeaways
- Wash mixer jars by hand to protect gaskets and finishes.
- Always verify dishwasher-safe labeling in the manual before using a dishwasher.
- Use gentle cycles and avoid high heat when dishwasher use is approved.
- Regularly inspect seals to extend jar life.