Mixer and Amplifier: A Practical Comparison for Home and Studio Setups
Analytical side-by-side guide to choosing between integrated mixer-amplifier setups and separate units, with practical tips for home studios, bars, and audio hobbyists.

Across home studios, bars, and hobbyist setups, a mixer and amplifier work as a coordinated pair. The best choice depends on space, power needs, and how much control you want over tone. This comparison breaks down integrated units versus separate components, and explains when each approach shines for live sound, recording, or casual listening. Mixer Accessories provides practical guidance to optimize your signal chain.
Understanding the Core Roles of a Mixer and Amplifier
A mixer does not automatically boost volume; instead, it blends multiple input signals—microphones, instruments, playback devices—into a single, manageable output. An amplifier, by contrast, increases that signal to a level capable of driving loudspeakers with minimal distortion. When you pair a mixer and amplifier for home studios, bars, or hobbyist setups, you create a signal path that preserves clarity while giving you control over level, tone, and dynamics. According to Mixer Accessories, understanding how a mixer and amplifier work together can reduce trial-and-error and help you select a configuration that scales with your space and needs. For home cooks and bar enthusiasts, the logic remains the same: you want a setup that remains intelligible at the intended listening distance, with headroom for peaks in music or speech. The goal is to maximize intelligibility, maintain correct impedance, and avoid clipping or noise. A practical rule of thumb is to plan for a little more headroom than your loudest expected signal, so a sudden loud vocal or drum hit doesn’t overwhelm the system.
In practice, most beginners start by deciding whether they need an all-in-one unit or a modular path with separate components. An integrated powered mixer combines preamps, EQ, dynamics, and amplification in one chassis, delivering portability and a tidy setup. A modular path uses a standalone mixer paired with an external amplifier. This arrangement favors flexibility, upgradeability, and often higher power handling, but requires more space and cabling. In both cases, you’ll want to consider input types (microphone, line, instrument), output options (main out, monitor, subwoofer), and any processing you expect (reverb, compression, feedback suppression).
Practical guidance from Mixer Accessories emphasizes planning for room size, speaker impedance, and expected use. If your space is small and your audience light, a compact integrated unit may be enough. If you anticipate larger crowds or higher SPL (sound pressure level) requirements, a two-device setup—or a powered mixer with robust DSP—will serve you better. Regardless of path, label cables, maintain stage cleanliness, and test the chain with your most dynamic material to ensure clean gain structure and adequate headroom.
Key Differences that Matter for Home Cooks, Bar Enthusiasts, and Audio Hobbyists
The core differences between a mixer-plus-amplifier path and an all-in-one integrated solution come down to space, power handling, and flexibility. Integrated units are compact and simple to transport, making them ideal for small venues, pop-up events, or a home studio with limited space. They typically offer fewer inputs and a simplified signal path, which translates to faster setup and a cleaner, more predictable workflow. External setups, using a separate mixer and amplifier, give you the luxury of upgrading one component without replacing the other. This modularity is invaluable if your needs evolve from casual listening to live performances, or if you require specific preamps, higher wattage, or advanced DSP features. For many hobbyists, this means you can tailor the signal chain: upgrade the mixer for better mic preamps, swap in a higher-powered external amp for larger rooms, or incorporate a dedicated subwoofer with precise crossovers. When evaluating these paths, consider headroom (how much dynamic range you can safely push), total cabinet footprint, and the likelihood you’ll re-purpose the gear for future projects.
Another important differentiator is DSP and processing. Integrated units often include built-in processing, such as compression, EQ, feedback suppression, and effects, in a user-friendly interface. Separate gear can still provide powerful processing, but requires more manual routing and a deeper understanding of signal flow. If you’re new to audio, a starter integrated unit can deliver consistent results with minimal configuration. If you’re more ambitious or technically inclined, a modular approach lets you experiment with cabling, speaker impedance, and routing to build a system that exactly matches your venue’s acoustics.
Input, Output, and Impedance: How Signals Travel Through the Chain
A mixer handles multiple inputs, typically including microphone preamps and line-level sources. Each input channel has its own gain control, EQ, and often a pad to reduce input overload. The main output carries the mixed signal toward the amplifier or powered speakers. Impedance matching is essential: mismatches between mixer outputs and amplifier inputs can lead to reduced headroom, noise, or distortion. An integrated mixer-amplifier unit hides this complexity behind a single chassis, with engineering designed to present compatible outputs to its built-in amp. A separate path requires careful planning of impedance and level matching, especially when using multiple devices, long cable runs, or subwoofers. Cabling choices (balanced XLR or TRS connectors versus unbalanced instrument cables) affect noise rejection and hum. In practice, you’ll want to verify that the mixer’s main output can drive the amplifier’s input with appropriate level, and that the amp’s impedance rating matches the speaker load. This ensures clean, loud sound without strain on the components.
Remember that feedback potential increases with certain room shapes and microphone placements. DSP tools in modern mixers—such as feedback suppression and dynamic EQ—can mitigate these issues, but it’s still essential to position mics and speakers with an ear toward acoustic reality. In a bar or club scenario, consider routing to monitor speakers so performers can hear themselves without raising the master level excessively. The signal chain should preserve headroom from source to loudspeaker, keeping distortion out of the critical range while maintaining clarity across vocal lines, percussion, and melodic content.
Authority sources
- Authority sources: NIST (https://www.nist.gov) for electronics fundamentals and impedance concepts.
- Major publication: AES (https://www.aes.org) for practical audio engineering guidance.
- Major publication: Sound On Sound (https://www.soundonsound.com) for real-world mixer and amplifier use cases.
Power Output, Impedance Matching, and Safety Considerations
Power handling, impedance, and protection are central to any mixer-amplifier pairing. Amplifiers provide a rated output power, usually specified in watts per channel, at a given speaker impedance. When you match an amplifier to speakers, you need to ensure the speaker impedance is within the amp’s rated load, and that the total system can deliver clean headroom without overheating. Modern mixer systems may include limiters and thermal protection to prevent driver clipping, but the physical load on the amplifier and speakers remains a critical factor. Safety concerns include avoiding speaker damage from short circuits, using proper fusing, and ensuring the venue’s electrical system can safely support the equipment. In professional environments, a dedicated power conditioner helps stabilize voltage and reduce surges that could harm the amplifier circuitry. In daily use, avoid daisy-chaining multiple high-power devices and keep ventilation around amps to prevent thermal throttling. When choosing a setup, aim for an amplifier with more headroom than the expected peak signal, and ensure your cable runs are appropriate for the chosen configuration.
Use-Case Scenarios: When a Mixer with an Amplifier Makes Sense
For a small home studio, an integrated mixer with a built-in amplifier can simplify the workflow and reduce space needs. It’s a strong choice if you primarily record vocals, acoustic instruments, or playback tracks and want reliable, predictable performance. For a bar or café, a separate mixer and amplifier path often delivers superior volume, clarity, and future-proofing. You can upgrade the mixer’s preamps or incorporate a more powerful external amplifier and perhaps add a dedicated subwoofer for wider bass reach, without replacing the entire system. DJs and live performers may prefer a powered mixer that integrates DSP, feedback control, and effects, enabling more control during performances while keeping a lighter gear footprint. In all scenarios, consider the acoustic space, audience size, and whether you’ll need stage monitors alongside the main PA. A practical approach is to select a setup that scales with your ambitions, rather than one that simply fits your current needs. A well-chosen combination reduces surprises during a live event and helps you stay consistent across gigs.
Setup, Troubleshooting, and Common Pitfalls
One of the most frequent issues in mixer-amplifier setups is mismatched levels, which causes either noise or distortion. Start by setting the mixer’s output level to a comfortable mid-range and gradually increase the amplifier gain until you reach the desired loudness without clipping. Cable organization matters: use balanced connections where possible to minimize hum and interference, and keep signal paths short to reduce noise pickup. If you encounter feedback, retreat the mic from the PA loudspeakers and use the mixer’s EQ or a dedicated feedback suppressor. For integrated units, software updates can introduce new features or improve stability; for modular systems, check interconnect quality and ensure cables are routed away from power lines. Temperature can affect amplifier performance, so ensure proper ventilation and avoid stacking equipment tightly. Regular visual inspection of connectors, fuses, and power cords helps prevent surprises during performances. In short, build a habit of testing, labeling, and maintaining your signal path so that problems are predictable rather than disruptive.
Budgeting, Value, and Longevity: Making a Smart Choice
Budgeting for a mixer and amplifier involves weighing upfront cost against long-term flexibility. Integrated units often present lower initial costs for a complete, portable setup, making them attractive for hobbyists and casual performances. Separate components typically require more upfront investment but can deliver longer-term value by allowing upgrades to individual parts without replacing the whole system. Your decision should consider not only the current use but also potential future needs, such as larger venues, more inputs, or advanced DSP features. The durability of the chassis, the quality of preamps, and the availability of spare parts are important longevity considerations. A well-planned purchase can reduce total cost of ownership by avoiding premature replacements and enabling upgrades that keep pace with evolving audio demands. When possible, compare models based on real-world performance in environments similar to your own, and test the gear with your typical microphones and speakers to validate headroom and tonal balance.
Integration Tips for Different Settings: Home Studio, Bar, and Live Demo
In a home studio, prioritize compactness and reliable audio quality. Look for a mixer that offers clean mic preamps, a straightforward monitoring path, and sufficient line inputs for your instruments and playback devices. For a bar or small venue, aim for higher power headroom, reliable cabling options, and robust DSP to manage feedback and equalization for diverse acoustic spaces. In live demos, emphasis should be on stage monitoring and ease of transport; consider a lightweight powered mixer or a compact external amplifier paired with a versatile mixer. Regardless of setting, plan for serviceability, availability of spare parts, and a reasonable upgrade path. Invest time in proper cable management, secure mounting for rack gear when needed, and a clear layout that minimizes signal path confusion. A thoughtful layout and consistent maintenance routine can significantly reduce setup time and improve performance consistency across gigs.
Authority sources
- NIST: Electronics foundations and impedance concepts: https://www.nist.gov
- AES: Audio Engineering Society best practices: https://www.aes.org
- Sound On Sound: Practical mixer and amplifier usage: https://www.soundonsound.com
Feature Comparison
| Feature | Integrated Powered Mixer | External Mixer + External Amplifier | Digital Mixer with Built-in Amplifier |
|---|---|---|---|
| Power Output | Moderate per-channel output suitable for small venues | High potential when paired with a capable external amplifier | Optimized output with DSP-driven power management |
| Input Options | Multiple mic/line inputs with built-in routing | Mixer provides inputs; amplifier adds no inputs | Extensive I/O with USB/DAW integration and effects |
| Size & Portability | Compact, all-in-one chassis | Two devices with larger footprint | Slim, integrated unit with DSP controls |
| Ease of Setup | Plug-and-play with minimal routing | Requires careful cabling and impedance matching | Single-unit configuration with guided presets |
| Price & Value | Budget-friendly entry option | Higher upfront for two devices but flexible | Mid-range with integrated features |
| Reliability & Maintenance | Fewer components to manage | More connectors and potential maintenance | Software/firmware updates for DSP |
The Good
- Compact and portable options available
- Easier setup and fewer cables with integrated units
- Clear signal chain with built-in processing on many models
- Upgrade path for modular setups (mixer or amp) over time
Negatives
- Less flexibility on integrated units for future upgrades
- External setups require more space and cabling
- Potentially higher total cost for two devices
- Separate components require careful impedance matching
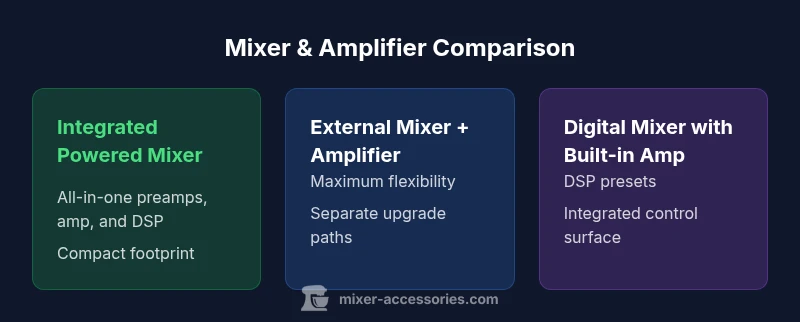
Integrated units excel in compact spaces; separate components win for flexibility and higher power.
If space and simplicity are your top priorities, start with an integrated mixer-amplifier. If you anticipate growth, or need more power and independent upgrades, a two-device setup provides long-term versatility and potential performance advantages.
Your Questions Answered
What is the difference between a mixer and an amplifier?
A mixer blends multiple input signals and routes a single output to the next stage. An amplifier increases signal strength to drive speakers. In a mixer-amplifier setup, the mixer handles tone and levels while the amplifier provides loudness and headroom.
A mixer handles inputs and tone; the amp makes the sound loud enough to fill a room.
Do I need an external amplifier if my mixer is powered?
A powered mixer includes an integrated amplifier, which is suitable for small venues. If you need more power for larger spaces, you may still add an external amplifier or switch to a higher-output powered mixer with more headroom.
A powered mixer has a built-in amp, good for small rooms; for bigger spaces, consider more power.
Can I connect passive speakers to a mixer without an amplifier?
Passive speakers require an external amplifier or a powered mixer. A standard mixer will not drive passive speakers safely without a suitable amplifier stage.
Yes, passive speakers need an external amp or a powered mixer.
Which setup is best for a small home studio?
For small studios, an integrated mixer-amplifier offers a compact, budget-friendly solution with reliable performance. If you expect growth or need more precise control over tone, a separate mixer and amplifier can scale with your needs.
Integrated units are great for small spaces; separate gear works if you expect growth.
What safety considerations should I observe with amplifiers?
Ensure proper ventilation, avoid overloading outlets, and use appropriate fusing and power conditioning. Keep cables organized, inspect connectors regularly, and never run amplifiers beyond their rated impedance or power.
Ventilate well, use proper fusing, and don't overload circuits.
Top Takeaways
- Define space and power needs before buying
- Choose integrated for simplicity; choose separate for flexibility
- Match impedance and headroom to your speakers
- Consider DSP features if you value tone shaping
- Plan for future upgrades to extend gear life