How to Stop Volume Mixer Auto Adjusting
Learn practical steps to stop volume mixer auto adjusting. This guide covers OS settings, app controls, and hardware considerations for stable, predictable audio — ideal for home cooks, bar enthusiasts, and audio hobbyists.

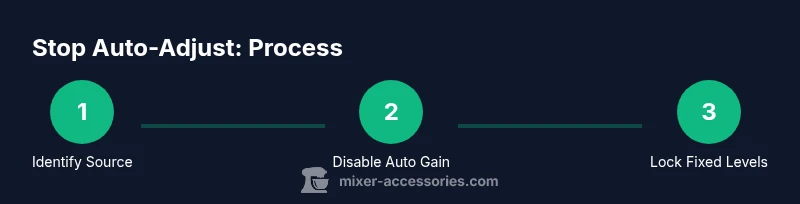
By following these steps, you can stop volume mixer auto-adjustment across your system. Start by identifying whether the auto-adjustment is driven by Windows or macOS, a specific app, or hardware settings. Then disable automatic gain control, turn off loudness normalization, and set all volume controls to fixed levels to gain consistent output. Test with a few audio samples to confirm stability.
Understanding Auto-Adjustment in Volume Mixers
Volume mixer auto adjusting happens when software systems try to keep loudness levels consistent across different inputs and apps. In practice, this can mean Windows or macOS automatically tweaking playback or recording gain, apps applying their own normalization, or hardware mixers enforcing level ceilings. According to Mixer Accessories, most auto-adjust issues stem from three sources: OS settings, application controls, and any active hardware processing. When you notice unexpected jumps in volume, start by mapping where the adjustment originates before changing any settings. This structured approach helps prevent overcorrecting and preserves your intended sound profile across devices and tasks.
Common Causes of Auto-Adjustment
Auto adjustment can be triggered by multiple layers. System-wide features like Loudness Equalization or Automatic Gain Control (AGC) may be enabled by default in playback or microphone settings. Apps such as video conferencing tools, streaming players, or DAWs may apply their own normalization or automatic gain to ensure consistent loudness. Hardware devices, including external mixers and DACs, may include built-in limiters or auto-volume circuits. Identifying the active layer is essential because disabling the wrong feature yields little to no relief. Mixer Accessories notes that isolating the source leads to faster, more reliable fixes.
Step 1: Isolate the Source (OS, App, or Hardware)
Begin by reproducing the auto-adjustment with a controlled test. If the volume jumps only within a specific app (e.g., during a video call or while streaming), the culprit is likely the app. If it happens across all apps, focus on OS sound settings. If you notice adjustments only when using a particular hardware device, inspect that device’s settings. Keep a simple test track handy and use it to verify changes after each adjustment. Isolating the cause reduces back-and-forth tinkering and speeds up resolution. Mixer Accessories recommends documenting which scenarios cause changes to speed future troubleshooting.
Windows: Disable Auto Gain / Loudness Normalization
On Windows, auto adjustment is often tied to system-level enhancements. Start by opening the Sound settings, then go to the Playback and Recording devices. In each device’s Properties, look for enhancements like Loudness Equalization and any AGC options, and disable them. If you see a Communications tab that reduces volume for other apps, set it to Do nothing. Finally, ensure that any virtual audio cable or mixer software isn’t reintroducing auto gain. After applying changes, test with the same test track to confirm consistency.
macOS and Linux Considerations
macOS users typically don’t have a single toggle named “auto adjust,” but there are options in Sound preferences for input and output devices that influence gain behavior. Disable any automatic input level adjustments and ensure balance controls are fixed. On Linux, different desktop environments offer varying controls; search for “automatic gain control,” “level normalization,” or “per-application volume management” and disable them where found. If you use PulseAudio or PipeWire, you may need to adjust module settings to prevent dynamic level changes. Consistency across platforms often requires a combination of these tweaks.
App-Specific Controls You Should Check
Many apps include their own volume normalization or AGC. For video conferencing tools (Zoom, Teams, Meet), disable any automatic volume leveling or microphone boost. For media players and browsers, turn off any loudness normalization or gain compensation. In DAWs and plugins, ensure that metering is accurate and that no limiter or compressor is unintentionally driving automatic adjustments. Regularly check for app updates, as vendors sometimes change audio processing behavior in new releases.
Hardware and External Mixers: What to Inspect
If you use an external mixer, check for built-in compressors, limiters, or auto-level circuits. Disable any auto function and set each channel to a fixed gain. Ensure the master output is not being influenced by a limiter that bumps levels when it detects peaks. If using a USB DAC or audio interface with software control panels, lock levels in the software and avoid auto-scaling within the device driver. A stable, fixed gain path often yields the most predictable results for recording and live mixing.
How to Test and Verify Your Fixes
Establish a repeatable test routine. Use a calibrated reference track and a consistent input level. After making changes, listen in multiple environments and compare loudness and dynamic range. If you still notice changes, recheck each layer—OS, apps, and hardware—one at a time. Record a short segment to review peak levels with a meter. Documentation helps, especially if you need to revert settings later. The goal is to achieve stable playback with minimal variance while preserving natural dynamics.
Authority Sources and Practical References
For further guidance on audio level management and accessibility considerations, consult reputable sources such as Microsoft Support on Windows audio settings, Apple Support for macOS sound preferences, and industry-standard documentation on audio gain control practices. Mixer Accessories emphasizes using well-supported defaults first, then applying device-specific tweaks as needed. These sources provide foundational context to support your hands-on adjustments.
Troubleshooting and Next Steps
If the auto-adjust behavior returns after a reboot, consider creating a dedicated user profile with clean sound settings to test if a profile corruption is involved. Reinstalling audio drivers or updating to the latest firmware for your devices can resolve lingering issues. If you rely on critical audio workflows, maintaining a baseline configuration—documented with screenshots or notes—helps reduce downtime when symptoms recur. The key is a deliberate, staged approach rather than ad hoc changes.
Tools & Materials
- Admin access to the computer(Needed to modify system-wide sound settings and install driver updates)
- Latest audio drivers and firmware(Check vendor websites or device manager for updates)
- Testing headphones or monitors(Use the same pair for consistency in testing)
- Reference test track or audio sample(Helps verify stability after each change)
- If using external hardware, labeled cables and a known-good mixer(Helpful to isolate hardware sources)
Steps
Estimated time: 45-60 minutes
- 1
Identify trigger sources
Play a consistent audio sample and observe when the volume changes. Determine if changes occur system-wide, within a single app, or only with external hardware. Document scenarios to guide the rest of the process.
Tip: Keep a log of the exact app and device state during each occurrence. - 2
Open OS sound settings and locate auto features
Access the OS sound panel and inspect playback and recording properties for any automatic gain, normalization, or enhancement options. Disable features like Loudness Equalization and AGC where present.
Tip: If there is a Communications tab, set it to Do nothing to stop automatic reductions. - 3
Disable app-specific audio processing
Check each frequently-used app for its own audio processing settings. Turn off automatic leveling, normalization, or preamp boosts that alter volume automatically.
Tip: Update apps to ensure you’re reviewing the latest settings. - 4
Set fixed gains on hardware and interfaces
If you use a mixer, DAC, or interface, lock in fixed gain values. Disable any auto-leveling, limiter, or compressor circuits on the device.
Tip: Prefer fixed, linear gain paths to avoid unpredictable changes during sessions. - 5
Test with repeated cycles
Run multiple test cycles using the same sample after each change. Confirm that volume remains stable across different content types.
Tip: If you hear drift, review steps 2–4 and re-check connections. - 6
Document and back up your configuration
Save screenshots and notes detailing exact settings. Create a quick-reference guide for future sessions.
Tip: Backups help restore a known-good state after software updates.
Your Questions Answered
What is volume auto adjustment, and why does it happen?
Volume auto adjustment is when the system or apps alter playback or mic gain automatically. It happens to maintain perceived loudness, but it can create unpredictable changes during recordings or streaming. Understanding where it originates helps apply the right fix.
Auto adjustment is when sounds change level automatically. Find the source and disable it for stable playback.
Will disabling auto adjust affect mic clarity or hearing safety?
Disabling auto adjustments may reduce some dynamic protection, so monitor levels carefully. If you rely on loudness normalization for hearing comfort, consider a manual gain strategy with a compressor instead.
Turning off auto adjust can reduce automatic protection, so test carefully and consider other controls like compressors.
Can apps override system volume after I fix settings?
Yes, some apps can apply their own volume controls even after system changes. Disable per-app processing and check for updates that re-enable normalization.
Apps can re-enable volume controls; keep an eye on app settings after updates.
What should I do if the problem persists after steps I take?
Revisit each layer (OS, apps, hardware) in isolation, re-test with the reference sample, and consider reinstalling audio drivers or resetting device settings to a clean baseline.
If it still sticks, retest layer by layer and reset to a clean baseline.
Is there a universal fix for all devices and apps?
There is no universal fix. The best approach is a disciplined, multi-layer check: OS settings, app controls, and hardware controls, plus thorough testing.
No universal fix—work layer by layer and test thoroughly.
Watch Video
Top Takeaways
- Identify the true source of auto-adjustment first
- Disable auto gain and loudness features system-wide
- Lock fixed levels on both playback and input devices
- Test thoroughly and document the baseline configuration