When to Use Stand Mixer: A Practical Guide
Learn when to use stand mixer and when to opt for hand mixing or a handheld mixer. Practical guidelines, attachments, recipes, and safety tips for home cooks, bar enthusiasts, and audio hobbyists exploring practical mixer guidance.

Wondering when to use stand mixer? This quick answer helps you decide which tasks benefit from a powered mixer and which can be done with a handheld device or by hand. You’ll learn the core indicators, plus the essential setup: a compatible mixer, the right attachments, and a recipe that benefits from steady, controlled mixing.
What a stand mixer is and how it differs from handheld mixers
According to Mixer Accessories, a stand mixer is a kitchen workhorse that combines a motor-driven base with a large mixing bowl and detachable attachments. Unlike a handheld mixer, the stand mixer stays in one place, leaving your hands free to handle ingredients, scrape the bowl, or manage multiple tasks at once. This separation of duties makes it especially convenient for tasks that require time, steady mixing, or vigorous kneading.
In practical terms, a stand mixer typically features a power hub, a tilt-head or bowl-lift design, and a selection of attachments like a flat beater, whisk, and dough hook. The bowl’s shape and capacity influence how much batter or dough you can handle in a single batch. For recipes that rely on long mixing or consistent kneading—think bread dough, brioche, or whipped cream—a stand mixer often produces more uniform results with less effort than a hand mixer or whisking by hand. The key question is not just what the mixer does, but whether the task benefits from motorized, hands-free mixing. That is precisely when to use stand mixer for efficiency and texture control. Beyond power, the mixer’s attachments are what unlock different tasks. The flat beater blends, the whisk aerates, and the dough hook develops gluten. In the sections that follow, you’ll see a practical breakdown of when to use stand mixer in everyday cooking and baking.
However
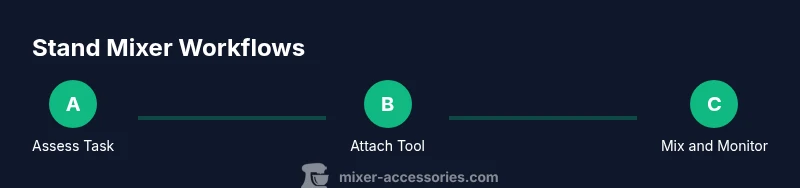
When to use stand mixer
Tools & Materials
- Stand mixer with motor power and tilt-head or bowl-lift design(Choose a model with at least a medium-power motor and a stable base; tilt-head designs simplify attachment changes.)
- Bowl (capacity 4-6 quarts preferred)(A larger batch often benefits from a bigger bowl to prevent overflow during vigorous mixing.)
- Flat beater (paddle)(Best for batters, cookie dough, and frostings.)
- Wire whisk(Ideal for whipping cream, meringues, and airy mixtures.)
- Dough hook(Essential for bread, pizza dough, and enriched doughs.)
- Flex-edge beater (optional)(Reduces scraping by distributing batter evenly as it mixes.)
- Spatula (silicone)(For scraping the bowl and preventing ingredient waste.)
- Measuring cups/spoons(Accurate portioning supports consistent results.)
- Kitchen towels and a timer(Keep hands dry and manage mixing time to avoid overmixing.)
Steps
Estimated time: 15-25 minutes
- 1
Assess the task and batch size
Review the recipe and determine whether it benefits from a stand mixer based on batch size, desired texture, and required mixing time. If you’ll mix large quantities or require long, steady kneading, a stand mixer is a strong fit.
Tip: If in doubt, estimate how many minutes of mixing a traditional knead would take and compare with a mixer’s efficiency. - 2
Choose the right attachment
Select the paddle for batters and doughs that don’t require much aeration; switch to the whisk for airy toppings; use the dough hook for gluten development in bread doughs.
Tip: Attach before you power on the mixer to avoid sudden movement or spatter. - 3
Add ingredients in proper order
Start with liquids, then dry ingredients, and finally fats or solids. This minimizes lumps and ensures consistent incorporation.
Tip: Keep ingredients at room temperature when possible to improve mixing efficiency. - 4
Set the correct speed and time
Begin at a low speed to prevent splatter, then gradually increase to the required setting. Monitor texture and stop when the product reaches the target consistency.
Tip: Never rush; overmixing can toughen doughs or break emulsions. - 5
Monitor texture and adjust
Check texture as ingredients emulsify or develop gluten. Pause to scrape the bowl and recheck before continuing.
Tip: Use a timer to maintain consistent mixing duration across batches. - 6
Clean and store attachments
Detach and rinse attachments promptly, then wipe the mixer body and store components in a dry place.
Tip: Dry all components thoroughly to prevent rust and ensure longevity.
Your Questions Answered
What tasks are best for a stand mixer?
Stand mixers excel at kneading bread doughs, mixing heavy batters, and whipping cream or egg whites in larger batches. They’re also great for emulsifying sauces when you want consistent texture. For delicate folds, consider hand methods.
Stand mixers shine with doughs and heavy batters, and for large batches of whipped cream or egg whites. For delicate folds, use hand mixing.
Can you use a stand mixer for delicate folding?
Delicate folding is often best done by hand to control tension and texture. A stand mixer can overwork delicate mixtures if you use high speed for too long. Consider gentle, short bursts or finishing by hand.
Delicate folding is usually better by hand to prevent overworking the mixture.
Is a stand mixer good for small batches?
For very small batches, setup and cleanup may outweigh the benefits. A handheld mixer or manual whisk is often faster for tiny quantities. Use the stand mixer when you’re batching multiple items or want consistent texture across a larger batch.
For tiny batches, handheld or manual mixing is typically quicker.
Will a stand mixer overheat?
Most home stand mixers handle typical home cooking loads, but running on the highest speed continuously or overloading the bowl can cause heat buildup. Allow cool-down breaks and don’t exceed recommended run times.
Overheating is possible if you push the motor too hard for too long. Let it rest between heavy runs.
Should I upgrade to a heavier-duty model?
Upgrading makes sense if you regularly bake large batches, want more power for dense doughs, or need more durability for frequent use. Compare motor wattage, gear construction, and attachment compatibility rather than price alone.
Upgrade when you bake often in large batches or need more power and durability.
How do attachments affect performance?
Attachments define what you can do with your mixer. A dough hook handles kneading; a whisk creates volume; a paddle blends batters. Ensure you’re using compatible attachments for your model and recipes to maintain performance.
Attachments change what you can do—pick the right one for the job.
Watch Video
Top Takeaways
- Start with the task assessment to decide on stand mixer use
- Use the right attachment for the job to optimize results
- Avoid mixing tiny batches to save time and reduce cleanup
- Keep safety and maintenance top of mind for longevity