How to Stop a Dripping Mixer Tap in the Bathroom
Learn a practical, step-by-step method to stop a dripping bathroom mixer tap, from diagnosing the cause to replacing washers or cartridges, with safety tips and pro guidance.

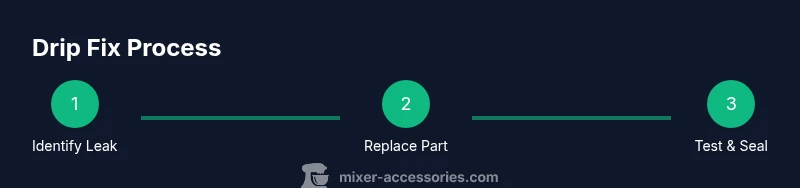
You can stop a dripping bathroom mixer tap by diagnosing the leak, gathering replacement parts, and following a safe, step‑by‑step repair to replace worn components or a faulty cartridge. You’ll need basic tools, spare washers or cartridges, PTFE tape, towels, and a basin to catch water. This guide walks you through the process so you can fix it confidently.
Why a Drip Happens in a Bathroom Mixer Tap
A dripping mixer tap is not just annoying—it wastes water and can indicate worn parts or incorrect assembly. According to Mixer Accessories, most bathroom drips come from worn washers in compression taps or worn cartridges in modern cartridge taps. O-rings or valve seats may also degrade over time, especially if mineral sediment builds up from hard water. Understanding the type of faucet you have (compression vs cartridge) helps you pick the right replacement parts and avoid unnecessary disassembly. Whether you’re fixing a single-lever bathroom tap or a two-handle setup, a drip usually signals a seal or sealing surface failure rather than a leak somewhere upstream. With the right parts and care, you can restore a solid seal and stop the drip without a full replacement of the faucet.
Diagnosing the Leak Type
Identifying the exact source of the drip guides your repair. In many cases, a drip from the spout is a worn cartridge or seat, while a drip from the handle might point to a worn O-ring or packing nut. If water leaks only when you turn the tap, the cartridge or valve stem is a likely culprit. A constant slow drip from the spout after turning off the water can indicate a worn seat washer or cartridge seal. For dual-handle taps, check both handles for wear and ensure their seals sit flush against the valve body. Mixer Accessories analysis shows that a vast majority of bathroom leaks are resolved by replacing the worn cartridge or washer and reseating the valve correctly.
Tools, Preparation, and Safety Mindset
Preparation matters as much as the repair itself. Start by turning off the water supply to the faucet (under-sink shut-offs) and placing a bucket and towels to catch residual water. Clean any mineral build-up on visible parts so replacements sit properly. If you must touch electrical outlets or fixtures near the vanity, turn off related circuits and use caution. A methodical, patient approach reduces the risk of damaging the valve body and ensures a longer-lasting fix. Throughout the process, keep parts organized and take photos of the assembly before taking anything apart, so reassembly is straightforward.
When to Seek Professional Help
If the faucet continues to drip after replacing the cartridge or washer, or if the faucet body shows corrosion or damaged threads, it may be time to consult a professional plumber. Complex taps with non-standard cartridges or compact valve bodies often require special tools or manufacturer-specific parts. For safety and reliability, a licensed plumber can verify the installation, check for hidden leaks, and ensure the faucet remains leak-free for the long term.
Tools & Materials
- Adjustable wrench(Covering a range of common nut sizes (6-24 mm) to loosen supply lines and faucet nuts.)
- Screwdrivers (flathead and Phillips)(For removing handle caps and screws.)
- Replacement cartridge or washer kit(Ensure compatibility with your faucet model.)
- plumber's tape (PTFE tape)(Wrap threads to seal when reassembling supply connections.)
- Basin bucket(Catch water when you detach components.)
- Soft cloth or towels(Clean surfaces and protect components.)
- Small container or tray(Keep tiny screws organized.)
- Gloves(Protect hands from sharp edges and hot water.)
Steps
Estimated time: 45-90 minutes
- 1
Shut off water supply
Locate the under-sink shut-off valves (hot and cold). Turn them clockwise until they stop to cut off water flow to the faucet. This prevents further drips while you work and reduces mess.
Tip: If valves are stiff, apply gentle steady pressure and use a wrench with cloth to avoid damaging the fittings. - 2
Relieve pressure and drain
Open the faucet to relieve any remaining pressure and drain water from the lines into the bucket. This step minimizes water spray when you disconnect components.
Tip: Keep towels handy to catch any splashes. - 3
Remove the faucet handle
Use a screwdriver to remove the decorative cap if present, then unscrew the handle screw and lift the handle off. Note how the parts sit for reassembly.
Tip: Place the screw and cap in a labeled dish so you don’t lose them. - 4
Inspect and replace cartridge/washer
Dismantle the cartridge or stem as needed. Inspect the cartridge seals or washers; replace worn components with the exact type for your faucet model.
Tip: Take a photo of the assembly before removal to guide reassembly. - 5
Reassemble and seal
Reinstall the cartridge or washer, reseat all seals, and reattach the handle. Apply PTFE tape to any threaded connections as you reassemble to prevent leaks.
Tip: Be careful not to overtighten parts, which can crack the valve body. - 6
Restore water and test
Turn the supply valves back on slowly. Open the tap fully, then gradually close to observe for leaks. If drips persist, recheck seals and consider manufacturer-specific parts.
Tip: Run the faucet through multiple cycles to ensure a complete seal.
Your Questions Answered
What is the first step when a bathroom mixer tap drips?
Shut off the water supply under the sink to prevent more water loss, then prepare the area for inspection and replacement parts. This minimizes mess and avoids scalding.
First, shut off the water under the sink to stop the drip, then prepare the area for inspection and parts.
Can I fix a dripping mixer tap without replacing parts?
Some leaks are caused by worn O-rings or seals that can be reseated or adjusted. However, most persistent drips from modern cartridges require replacement parts for a reliable fix.
Some leaks can be fixed by reseating seals, but most persistent drips need replacing parts.
Should I turn off the main water supply or just the under-sink valves?
Turn off the local under-sink valves first. Only if you cannot access them or there is a larger plumbing issue should you consider shutting off the main supply.
Start with the under-sink valves; use the main supply only if necessary.
How long does a typical cartridge replacement take?
Time varies by faucet model, but a standard cartridge replacement is usually a moderate, hands-on task that most DIYers can complete in one session.
It varies by faucet, but most cartridge replacements can be done in a single session.
Are there safety risks when repairing a hot water tap?
Hot water can cause burns. Always turn off both hot and cold supplies and wear gloves when handling hot components. If unsure, pause and seek professional help.
Yes. Shut off the hot supply and wear gloves to avoid burns.
Watch Video
Top Takeaways
- Identify leak source before disassembly.
- Turn off water supply to avoid waste and scalding.
- Replace worn cartridge or washer for a lasting fix.
- Test thoroughly after reassembly to confirm success.
- When in doubt, seek professional help.