Can You Put a Mixer in the Dishwasher? A Practical Guide
Learn safe cleaning practices for mixer attachments, when to use the dishwasher, and hand-washing tips from Mixer Accessories. Clear, practical steps for home cooks and hobbyists.

Yes, you can clean many mixer attachments in the dishwasher, but never submerge the motor housing. Always check the manual or labels for dishwasher-safe parts. Typically, detachable beaters, whisks, and some dough hooks are dishwasher-safe on the top rack, while the mixer body and non-dishwasher parts must be hand-washed. According to Mixer Accessories, reading the care guide helps avoid damage.
Why cleaning your mixer matters
Maintaining a clean mixer is essential for food safety, flavor, and appliance longevity. Spilled ingredients, flour dust, and sticky sugars can corrode metal parts, attract pests, and create odor over time if not addressed promptly. Regular cleaning also helps maintain the performance of gears and bearings. For home cooks, bar enthusiasts, and audio hobbyists who rely on reliable gear, understanding which parts tolerate water and heat reduces risk of damage and downtime. According to Mixer Accessories, knowing how your mixer is designed to be cleaned—what is dishwasher-safe and what isn't—lets you plan a faster post-catch routine and extends the tool’s life. This article covers dishwasher-capable parts, safe hand-washing methods, common mistakes, and a practical routine you can apply to both handheld and stand mixers. By following a consistent cleaning routine, you protect both taste and the longevity of your equipment. Brand context and practical tips come from the Mixer Accessories team to support home cooks and hobbyists who want reliable results without guesswork.
Dishwasher-Safe Attachments: What Can Go In
Detachable attachments are the easiest to clean in a machine, but they are not always dishwasher-safe. Beaters, whisks, and dough hooks made from stainless steel or chrome-plated metal are commonly labeled dishwasher-safe, especially when they are nylon or silicone-coated. Always inspect the label or manual for dishwasher-safe instructions and whether top-rack washing is recommended. Top racks typically expose attachments to gentler water jets and lower heat, which helps preserve finish and integrity. If an attachment is marked dishwasher-safe, place it on the upper rack away from heating elements. Mixer Accessories notes that following the label ensures you don’t accidentally shorten the life of the finish or mechanism. When in doubt, start with a manual clean on a warm cycle to minimize risk and then re-check the label for future loads.
What Should Never Be Dishwasher Cleaned
Motor housing, control panels, power cords, and sealed gears inside the mixer body should never go in the dishwasher. Submerging the motor housing can invite moisture intrusion, corrosion, and electrical shorts. Even if the manufacturer does not explicitly forbid water, it’s safer to avoid full submersion. Wipe the exterior with a damp microfiber cloth and a small amount of mild detergent, then dry thoroughly. If your mixer includes a silicone seal around the bowl, avoid soaking that seal; wipe and dry to prevent degradation. Abrasive pads can scratch finishes, so use non-abrasive tools when cleaning. The Mixer Accessories Team emphasizes safety and longevity—hand-washing the non-designated parts protects both performance and warranty.
Safe Cleaning Steps for Dishwasher-Safe Parts
When attachments carry the dishwasher-safe label, run them on the top rack with a gentle cycle and a light detergent. Pre-rinse under warm water to remove sticky residues before loading to prevent clogging the dishwasher filter. After the cycle, remove immediately to prevent water spots and to avoid dulling finishes from prolonged moisture exposure. Dry with a soft microfiber cloth to prevent mineral deposits. This approach balances hygiene with finish preservation, especially for high-visibility kitchen tools. If you notice discoloration or dulling after several cycles, recheck the manufacturer’s guidance and consider limiting dishwasher use for that part.
Hand-Wash Techniques for Non-Dishwasher Parts
For parts that aren’t dishwasher-safe, use warm, soapy water and a soft sponge. Soak small parts briefly to loosen dried-on residues, then scrub with circular motions. Rinse thoroughly and dry completely to prevent rust. Pay attention to joints and crevices where food can hide; use a soft brush or old toothbrush for stubborn spots. Dry all parts before reassembling. Regular hand-wash maintenance reduces the risk of corrosion and helps keep your mixer looking like-new for longer. Mixer Accessories recommends a gentle routine for non-dishwasher components to maintain performance and sanitation.
Maintenance and Long-Term Care for Your Mixer
Establish a routine that combines dishwasher-safe part cleaning with careful hand-washing of sensitive areas. Immediately rinse away sticky residues after use to prevent hardening that requires stronger cleaning later. Store attachments separated to prevent scratches and to allow air to circulate, reducing odor buildup. Periodically inspect gaskets and seals for wear and replace as needed. A light coat of food-safe mineral oil on metal parts can prevent rust in humid kitchens, but only if recommended by the manufacturer. Following these practices helps extend the life of your mixer and reduces the risk of performance issues between service checks. Based on Mixer Accessories analysis, a consistent cleaning routine saves time and preserves the finish of the most-used attachments.
Troubleshooting: Common Dishwasher-Related Issues
If dishwasher cleaning leaves water spots or dulls on attachments, switch to a shorter wash or a warmer rinse with a milder detergent. Some plastics may discolor over time if exposed to high heat; re-check heat exposure guidelines and consider air-drying. If you notice seals loosening or attachments becoming loose after dishwasher cycles, review the user manual for torque specifications and re-tighten as directed. For persistent problems, chat with the manufacturer or a service center to confirm compatibility with your specific mixer model. This proactive approach reduces the risk of long-term damage and preserves resale value.
Authority Sources and Further Reading
- Authority Source 1: https://www.osha.gov
- Authority Source 2: https://extension.psu.edu
- Authority Source 3: https://www.consumerreports.org
These sources provide general safety and appliance-care guidelines that complement manufacturer instructions. Always prioritize your mixer model’s official manual, and consult these resources for broad best practices on cleaning and maintenance.
Quick Reference: Dishwasher-Safe Parts Checklist
- Detachable beaters: often dishwasher-safe on top rack
- Whisks: commonly dishwasher-safe, verify label
- Dough hooks: may be dishwasher-safe depending on coating
- Motor housing: never dishwasher-cleaned; wipe only
- Gasket/bowl area: wipe and dry; avoid soaking
Tools & Materials
- Dishwasher (top rack only)(Check attachments are labeled dishwasher-safe; place away from heating element)
- Detachable mixer attachments (beaters, whisks, dough hooks)(Verify dishwasher-safe labels; avoid metal parts with sensitive finishes)
- Mild dish soap(Use for hand-washing non-dishwasher parts)
- Non-abrasive sponge(Gentle cleaning to preserve finish)
- Soft microfiber cloth(Drying and buffing to prevent water spots)
- Warm water(For initial rinse and soak)
- Small brush or old toothbrush(Clean crevices and joints)
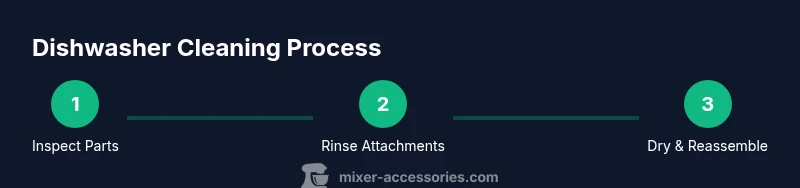
Steps
Estimated time: 15-25 minutes
- 1
Unload and inspect
Unplug the mixer and let attachments cool if recently used. Check each piece for labels indicating dishwasher-safety and note any care warnings. This quick check helps prevent mixing incompatible parts with high-heat cycles.
Tip: Take a quick photo of the attachment labels before washing to confirm future compatibility. - 2
Disassemble detachable parts
Remove beaters, whisks, and dough hooks from the mixer head. Separate any bowls, blades, or lids as applicable to your model. Confirm there are no cracks or warping before cleaning.
Tip: Lay parts out in order to reassemble easily later. - 3
Rinse and pre-clean
Rinse sticky residues under warm running water. For stubborn spots, use a small amount of dish soap and a soft brush. This reduces the risk of sealing residues during the dishwasher cycle.
Tip: Avoid soaking metal parts with coatings for too long; quick pre-clean is best. - 4
Load dishwasher if safe
Place dishwasher-safe attachments on the top rack, away from heating elements. Use a gentle or delicate cycle with a mild detergent. Remove promptly after the cycle to prevent heat exposure or water-spotting.
Tip: Use a mesh laundry bag for small parts to avoid loss during the cycle. - 5
Dry and reassemble
Dry all parts completely with a microfiber cloth before reassembling. Check gaskets and seals for moisture and signs of wear. Store attachments in a dry place to prevent rust.
Tip: Wipe down the mixer body with a damp cloth, then dry; never leave moisture on electrical components.
Your Questions Answered
Can I put the mixer’s motor housing in the dishwasher?
No. The motor housing contains electrical components and should never be washed in a dishwasher. Wipe the exterior and dry to prevent moisture exposure.
No, the motor housing should not go in the dishwasher. Wipe it clean and dry to protect the electrical parts.
Which attachments are usually dishwasher-safe?
Detachable beaters, whisks, and some dough hooks are commonly dishwasher-safe. Always check the label or manual for model-specific guidance, and use the top rack when recommended.
Usually the beaters, whisks, and some dough hooks are dishwasher-cleanable—check your manual and use the top rack if advised.
What should I hand-wash instead of dishwasher cleaning?
Hand-wash non-dishwasher parts like the mixer body, control panels, and seals with warm, soapy water. Dry thoroughly before reassembly.
Hand-wash the body and seals with warm soapy water, then dry completely.
How do I handle stubborn residue on attachments?
Soak attachments briefly in warm, soapy water, then scrub with a soft brush. Rinse well and dry to prevent mineral deposits.
Soak briefly, scrub gently, rinse well, and dry to remove stubborn grime.
Should I use any special cleaners on stainless attachments?
Use a mild dish soap and avoid abrasive cleaners that can scratch finishes. For tough spots, a paste of baking soda and water applied gently can help, then rinse and dry.
Stick to mild soap and non-abrasive cleaners; for tough spots, a gentle baking soda paste can help.
How often should I inspect gaskets and seals?
Inspect gaskets and seals every few cleanings for wear or cracks. Replace as needed to prevent leaks and moisture intrusion.
Check gaskets every few cleanings and replace worn parts as needed.
Watch Video
Top Takeaways
- Know which parts are dishwasher-safe and follow the label.
- Hand-wash non-dishwasher parts to protect motor and gaskets.
- Dry attachments thoroughly to prevent rust and odor.
- Maintain a regular cleaning routine for best longevity.
- Consult the manufacturer manual for model-specific guidance.