How to Mix in Protein Powder: A Practical Guide
Master protein powder mixing with practical tips on liquids, tools, troubleshooting, and storage. A Mixer Accessories guide for home cooks, bar enthusiasts, and audio hobbyists.

According to Mixer Accessories, mastering how to mix in protein powder leads to smoother textures, better flavor, and easier digestion. In this guide you’ll learn the essential steps, the best tools, and practical tweaks to get consistently lump-free shakes, smoothies, and baked treats—no guesswork, just reliable technique.
Why proper mixing matters
According to Mixer Accessories, how to mix in protein powder properly affects texture, palatability, and digestion. For many home cooks and fitness enthusiasts, the result of a protein shake hinges on one simple skill: ensuring a smooth, lump-free blend. When powder clumps or refuses to dissolve, the experience is unsatisfying and can impact how well you meet daily protein goals. This section unpacks why emulsification matters, how agitation speed can change texture, and how timing—such as adding powder to the liquid gradually—reduces lumps. By mastering the basics of how to mix in protein powder, you set yourself up for reliable results across shakes, smoothies, and even protein-rich batters. The approach you adopt now will pay off in consistent flavor and better satisfaction with your routines.
Liquid choices and temperature for best results
Liquid choice dramatically affects the final texture. Water yields a lighter shake, while dairy or fortified non-dairy milks add creaminess and nuance. For many, room-temperature liquids blend more smoothly than icy cold options, reducing the risk of chalky aftertaste. When you’re asking how to mix in protein powder, start with the liquid you use most often and adjust as needed. If you’re aiming for a thicker shake or smoothie, add less liquid; for a drinkable beverage, add more. You can experiment with a mix of liquids, such as half water and half almond milk, to balance flavor and texture. Temperature matters: very hot liquids can clump proteins or cause them to thicken unusually, while very cold liquids may require a few extra shakes or a brief blend to achieve uniform dispersion. In all cases, aim for a smooth, cohesive mixture rather than dry clumps, and remember that texture preferences vary by powder formula.
Tools and methods for mixing protein powder
Your toolkit determines how reliably you achieve a lump-free result. A dedicated shaker bottle with a tight seal is convenient for quick mixes, particularly when you’re on the go. A blender or immersion blender creates a uniformly creamy texture, ideal for smoothies or desserts. A sturdy spoon or whisk can work in a pinch for simple, low-volume preparations. When you’re wondering how to mix in protein powder, choose a method that fits your routine and cleanup willingness. Wipe down or rinse containers promptly to prevent powder residue from drying and becoming harder to remove. This is why many home cooks keep multiple options available—shaker for speed, blender for creaminess, and a whisk for small quantities or recipe testing. In addition to tools, measure out your powder and liquid first to prevent overfilling your container and spillage.
Step-by-step overview for effective mixing (high-level)
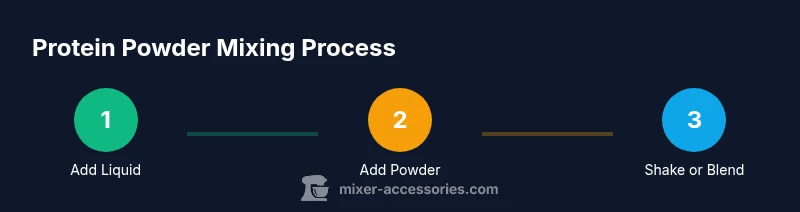
To build a solid routine for how to mix in protein powder, follow a simple sequence: add your liquid first, then the powder, then agitation, and finally assess texture. This overview helps you avoid common pitfalls like clumping and under-mixed chunks. Start by adding the liquid to your chosen vessel, then sprinkle in the powder gradually while you hold the container at a slight angle. Seal and shake or blend for 20–30 seconds, pausing to check texture. If needed, add a splash more liquid and re-mix until smooth. By following this predictable flow, you’ll train your senses to recognize the signs of proper dissolution and can customize the texture to taste. This approach supports consistent results across different powder brands and formulations, reinforcing the core skill behind how to mix in protein powder.
Troubleshooting common texture issues
Even with careful technique, you may encounter lumps or grit. If powder appears grainy, try adding a little more liquid and blending longer, or switch to a blender for a creamier result. Lumps often form when the powder hits the liquid too quickly or when the shaker is overfilled, so adjust the pour rate and count shakes accordingly. For thicker shakes, consider using cold, slightly thicker liquids or chilling the mixture for a few minutes before drinking. Flavor masking is another option: adding a dash of vanilla extract, cocoa powder, or cinnamon can mask chalkiness and improve overall taste. Throughout the process, take notes on what works best with your favorite protein powder to develop a repeatable habit for how to mix in protein powder that suits your palate and goals.
Flavor and texture customization tips
Protein powder is versatile, so you can tailor texture and taste to your preferences. If you want a creamier shake, switch to a dairy or fortified plant-based milk, or add a small amount of yogurt or silken tofu for body. For a fruity smoothie, blend fruit pieces with ice and a splash of juice. To keep things simple, start with one fruit and a modest amount of ice; you can gradually increase as you test different powder formulas. Ice often helps with mouthfeel, but too much can dull flavor or water down the protein; adjust to your preferred balance. Try adding flavor boosters such as cocoa, espresso powder, or peanut butter in small increments and taste as you go. The key is to experiment so you’ll be confident in your own signature shake, while keeping true to the science of how to mix in protein powder.
Safety, storage, and cleanup for long-term success
Store protein powder in a cool, dry place away from direct sunlight and moisture to protect quality and shelf life. Seal containers tightly after each use to prevent clumping caused by humidity and to keep out pests. Clean your mixing tools promptly after use to avoid residue that hardens and becomes difficult to remove. A quick rinse with warm soapy water, followed by thorough drying, keeps equipment ready for your next batch. If you’re mixing in protein powder regularly, consider labeling your containers with batch dates and flavors to track changes in texture and taste over time. By following these safety and care practices, you’ll maintain powder quality and enjoy consistent results during your how to mix in protein powder routine.
Tools & Materials
- Shaker bottle(Leak-proof with a wide mouth)
- Blender or immersion blender(For creamier textures)
- Spoon or whisk(Good for small batches)
- Measuring cup or scale(Accurate powder and liquid amounts)
- Protein powder (your preferred flavor)(Choose formula suited to goals)
- Liquid (water, milk, or plant milk)(Temperature neutral to start)
- Ice (optional)(For texture and cooling)
Steps
Estimated time: 8-12 minutes
- 1
Prep and measure
Gather your liquids and protein powder. Measure the powder with its scoop and set out your liquid so you can control pour rate. This prep reduces spill risk and makes the following steps smoother.
Tip: Use a scale or leveled scoop for consistency. - 2
Add liquid first
Pour the liquid into the shaker or blender before adding powder. A liquid base helps prevent powder from sticking to the bottom and forming clumps.
Tip: Starting with cold liquid can help with texture, but avoid ice-cold extremes that slow dissolution. - 3
Gradually add powder
Sprinkle the protein powder slowly while the liquid is agitated. This minimizes lumps and improves dispersion.
Tip: Pour in small amounts and give a 1–2 second stir after each addition. - 4
Agitate and blend
Seal the container and shake vigorously for 20–30 seconds, or blend 15–20 seconds until smooth. Stop if you still see small particles and remix briefly.
Tip: Pause to wipe the inside of the lid; trapped powder can seed lumps later. - 5
Check texture and adjust
Open and inspect the consistency. If needed, add a splash more liquid and remix until you reach a uniform texture.
Tip: If using a blender, a brief second run can help until smooth. - 6
Clean up and store
Rinse tools promptly to prevent residue from drying. Dry thoroughly and seal containers to preserve powder quality.
Tip: Label containers with flavor and date for easier future mixing.
Your Questions Answered
What liquid is best for mixing protein powder?
Water, dairy milk, or fortified plant milks all work; choose the base you use most and adjust texture with more or less liquid. Personal preference matters, and different powders may behave differently with each base.
Water, milk, or fortified plant milks all work; start with your preferred base and adjust texture as needed.
Can I mix protein powder in hot beverages?
Hot beverages can cause some powders to clump or denature texture. If you must, do a quick cool-down step by letting the drink sit briefly or adding powder to warm, not boiling, liquid and mixing thoroughly.
Avoid hot liquids when possible; if you must, mix into warm, not boiling, liquids and blend well.
How long does it take for protein powder to dissolve?
Dissolution time varies by powder and liquid, but a well-prepared mix typically dissolves within 20–30 seconds of shaking or blending. If grit remains, remix or add a splash more liquid.
It usually dissolves in about 20 to 30 seconds with proper shaking or blending.
Why does my mix clump, and how can I fix it quickly?
Clumping is often caused by adding powder too quickly or using too much powder at once. Slow additions, consistent agitation, and ensuring liquid isn’t too cold or too warm can fix it quickly.
Clumps come from trying to pour too fast; remix with a little more liquid and a steady shake.
Should I drink the shake right away or can I store it?
For best texture and flavor, drink soon after mixing. If you need to store, refrigerate in a sealed container and shake again before drinking to re-emulsify.
Best to drink soon, but if you store, shake again before drinking.
Is it necessary to use a blender or shaker every time?
Not always. A shaker works for quick mixes, while a blender creates creamier textures when you want a smoothie or dessert. Choose based on your texture goal and cleanup tolerance.
No—use a shaker for speed or a blender for creaminess depending on your goal.
How can I adjust texture without changing flavor?
Modify texture by adjusting liquid amount, adding ice, or using yogurt or silken tofu for body. These tweaks keep flavor consistent while improving mouthfeel.
Change texture with liquids or add-ins like yogurt, not more powder.
Watch Video
Top Takeaways
- Master the 4-step technique for smooth protein shakes
- Choose the right tool for your routine
- Adjust liquids to control texture and flavor
- Address clumps quickly with a quick remix
- Clean and store properly to extend powder quality