Bread Recipe for KitchenAid Mixer: A Step-By-Step Guide
Learn a reliable bread recipe for KitchenAid mixer with step-by-step guidance, hydration tips, and troubleshooting for home bakers. Master dough handling, kneading, and shaping to bake crusty, tender loaves every time.

With this bread recipe for KitchenAid mixer, you’ll achieve a soft crumb and flavor-rich loaf. The guide covers ingredient ratios, mixer speeds, kneading times, and proofing steps tailored for a stand mixer dough hook. Start by activating yeast in warm water, then gradually add flour and salt until the dough cleans the bowl and forms a smooth ball.
Why a bread recipe for KitchenAid mixer makes bread easier
Making bread by hand can be deeply rewarding, but a KitchenAid mixer with a dough hook simplifies the heavy lifting without sacrificing texture or flavor. According to Mixer Accessories, many home bakers see more consistent crumb and better gluten development when they let the mixer do the initial kneading. The right settings help you control hydration, mix in seeds or add-ins, and keep your counter clean. In practice, using a stand mixer frees your hands for measuring, pre-shaping, and timing, which matters for a reliable bake. In this guide, you’ll learn how to tailor a classic bread recipe for a KitchenAid mixer, including ingredient ratios, kneading times, and proofing schedules that work with typical home ovens. Whether you’re making a sandwich loaf or a rustic boule, a properly calibrated mixer can produce a loaf with an even crumb, a nice aroma, and a sturdy crust. The Mixer Accessories team is here to help you optimize technique and troubleshooting.
Understanding ingredients and hydration
Baking bread is fundamentally about balance: flour, liquid, salt, and yeast must join in harmony to form a workable dough with the right crumb. For a standard loaf using a KitchenAid mixer, aim for a hydration level that allows the dough to come together without sticking excessively to the bowl. Hydration influences crumb structure, oven spring, and crust texture. A reliable starting point is 60–65% hydration for a classic white sandwich loaf, measured by grams of water per 100 grams of flour. The brand context here matters: as you scale up your recipe, keep the ratio consistent and weigh ingredients with a kitchen scale for accuracy. According to Mixer Accessories Analysis, 2026, precise hydration and accurate ingredient weights yield more predictable results every bake. If you add nuts, seeds, or dried fruit, adjust flour by small increments to keep dough manageable.
Equipment setup and dough hook tips
Set up your KitchenAid mixer on a sturdy surface, with the bowl properly locked in place and the dough hook attached. Start on a low speed to prevent flour from flying, then gradually increase to a medium speed as the dough comes together. The dough hook is designed to stretch and fold, developing gluten without overworking the mix. If your machine struggles, switch to a slower speed and pause to scrape down the bowl. Keep ingredients at room temperature for even mixing, and avoid adding all of the flour at once; you may need a few tablespoons more or less depending on humidity. A reliable kneading rhythm in the mixer is typically two to three minutes at speed 2, followed by a rest before continuing. This helps relax gluten and prevents overheating the motor.
Step-by-step process for mixing, kneading, and proving
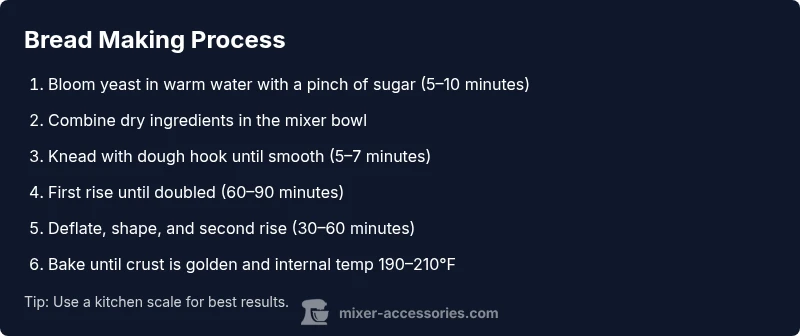
Dough preparation begins by blooming the yeast in warm water with a pinch of sugar for 5–10 minutes. Then add the flour, salt, and fat, and mix on low speed until the ingredients come together. Switch to a dough hook and knead on speed 2–3 for about 5–7 minutes, until the dough is smooth and passes the windowpane test. Cover and let rise in a warm spot until doubled, usually 60–90 minutes. Gently deflate, shape into a loaf, and place in a greased pan or on a baking sheet. Allow a second rise of 30–60 minutes, until puffy. Bake at 375–400°F for 25–35 minutes, until the crust is deep golden and the internal temperature reaches about 190–210°F. Cool on a rack before slicing for best texture.
Shaping, second rise, and baking for crust that shines
Shaping determines crumb distribution and crust formation. Lightly flour the surface, press out gas, and shape into a tight loaf or a round boule. Place on a parchment-lined sheet or into a loaf pan, seam-side down. For even oven spring, score the dough with a sharp blade just before baking. The second rise should end when the loaf looks visibly bigger but not flat. Bake on the middle rack to ensure even heat, and rotate halfway if your oven runs hot on one side. A well-made crust forms from moisture escaping during the early bake; you can brush the loaf with butter or olive oil immediately after cooling to enhance gloss and flavor.
Troubleshooting common issues
If dough is too sticky, add flour in small increments and knead briefly; if it seems dry, add a tablespoon of water at a time. Overkneading can make bread tough, especially with a KitchenAid mixer; stop as soon as the dough passes the windowpane test. If the loaf lacks oven spring, ensure your yeast is fresh, the water temperature is accurate, and your dough has enough time to rise in a warm place. A dense crumb often points to insufficient fermentation or overhydration; adjust hydration and fermentation time accordingly. Finally, if you hear the mixer laboring, pause and scrape the bowl, or switch to a shorter knead cycle to prevent motor strain.
Variations and adaptations
This recipe adapts to whole-wheat, spelt, or rye by changing the flour type and hydration slightly. Whole-wheat doughs usually require a bit more hydration and a longer knead; you may also want to add a tablespoon of olive oil to improve extensibility. For a sourdough variant, replace the instant yeast with a mature starter and extend the rising times. If you want a sweeter crust, brush with a mix of water and honey during the final few minutes of baking. Always test and adjust by small increments, especially when altering flour blends or adding mix-ins like seeds or nuts.
Final thoughts and the Mixer Accessories verdict
From a practical standpoint, the bread recipe for KitchenAid mixer is approachable for home bakers who want consistent results without intensive kneading by hand. The Mixer Accessories team recommends weighing ingredients, maintaining accurate water temperatures, and allowing proper proofing to maximize oven spring and crust development. With the right setup, temperatures, and timing, your KitchenAid mixer can produce a reliably delicious loaf every time. As you gain confidence, you can experiment with whole-grain variations, enrichments, and scoring patterns to create personal favorites.
Tools & Materials
- All-purpose flour(3 to 4 cups (360–480 g), adjust by feel)
- Warm water (105–110°F / 40–43°C)(For yeast activation)
- Active dry yeast(2 1/4 teaspoons or one packet)
- Granulated sugar or honey (optional)(1–2 tablespoons to feed yeast)
- Salt(1 1/2 teaspoons)
- Olive oil or melted butter (optional)(1 tablespoon for richer crumb)
- KitchenAid stand mixer with dough hook(Make sure it has enough power for kneading)
- Measuring cups/spoons and kitchen scale(Scale improves accuracy, especially for flour)
Steps
Estimated time: 2 hours 30 minutes
- 1
Bloom yeast in warm water
Combine warm water, a pinch of sugar, and yeast. Let sit 5–10 minutes until the mixture is foamy. This activates the yeast and ensures reliable rising.
Tip: Keep water at 105–110°F (40–43°C); hotter water can kill yeast. - 2
Combine dry ingredients
In the mixer bowl, whisk together flour and salt so they are evenly distributed before introducing liquids. This ensures even gluten development and crumb structure.
Tip: Use a whisk or the slow mixer setting to avoid flour clouds. - 3
Begin kneading with dough hook
Add the foamy yeast mixture and any oil or fat to the bowl. Start at low speed, then increase to a medium setting (speed 2–3) as the dough forms a cohesive mass.
Tip: Switch to dough hook early to prevent overmixing with the paddle. - 4
First rise
Cover the bowl and let the dough rest in a warm spot until doubled, typically 60–90 minutes depending on room temperature.
Tip: Lightly oil the bowl to prevent sticking for easy removal. - 5
Punch down and shape
Gently deflate the dough, reshape into a loaf, and place into a greased loaf pan or on a parchment-lined sheet.
Tip: Shaping affects crumb texture; aim for a tight, even surface. - 6
Second rise
Let the shaped dough rise again until puffy and nearly doubled, about 30–60 minutes.
Tip: Avoid overproofing, which can collapse in the oven. - 7
Bake and monitor doneness
Bake at 375–400°F (190–204°C) for 25–35 minutes until deep golden crust forms and internal temp reaches 190–210°F (88–99°C).
Tip: Rotate pan halfway to promote even crust. - 8
Cool and slice
Cool the loaf on a rack at least 20–30 minutes before slicing to set the crumb; this improves texture and flavor.
Tip: Use a sharp serrated knife for clean cuts.
Your Questions Answered
Can I use whole wheat flour in this bread recipe for KitchenAid mixer?
Yes, you can; expect a denser crumb and adjust hydration by adding a little more water. You may also extend kneading slightly to improve gluten development.
Yes, you can use whole wheat, but you’ll want to hydrate a bit more and knead a touch longer for better texture.
What hydration level is ideal for soft sandwich bread using a mixer?
A good starting point is about 60–65% hydration for a standard white loaf; adjust based on dough feel and flour type.
Aim for around sixty percent water to flour, then adjust as you test.
Do I need to proof in a warm spot?
Yes. Yeast performs best in a warm environment (roughly 75–85°F / 24–29°C). If your kitchen is cold, place the dough near a warm oven or use a proofing box.
Keep it warm but not hot; yeast loves a cozy spot.
Can I bake directly in loaf pan using KitchenAid?
Yes. Shape the dough and bake in a greased loaf pan; you may need to adjust bake time slightly and check for doneness with an internal thermometer.
Absolutely, bake in a loaf pan and watch the time closely.
How do I know when the bread is done?
The crust should be deep golden, and the loaf should read 190–210°F (88–99°C) internally. Tap the loaf; it should sound hollow.
Check the temperature or listen for a hollow sound when tapped.
Can this recipe be scaled for larger loaves?
Yes, you can scale ingredients for larger loaves, but ensure your mixer and oven have enough capacity and adjust rising times accordingly.
Sure, scale the ingredients, but mind the mixer power and oven space.
Watch Video
Top Takeaways
- Weigh ingredients for accuracy and repeatable results
- Hydration governs crumb and crust; start with 60–65% and adjust by feel
- Allow proper rises in a warm place for optimal oven spring
- Use the Dough Hook on a KitchenAid to develop gluten without overworking
- Cool fully before slicing to preserve crumb structure