Which Blender for Nut Butter: A Practical Guide
Discover how to choose the right blender for making smooth, creamy nut butter. We compare high-torque vs standard blenders, explain texture, heat, cleaning, and price, and provide actionable steps for home cooks and bar enthusiasts.

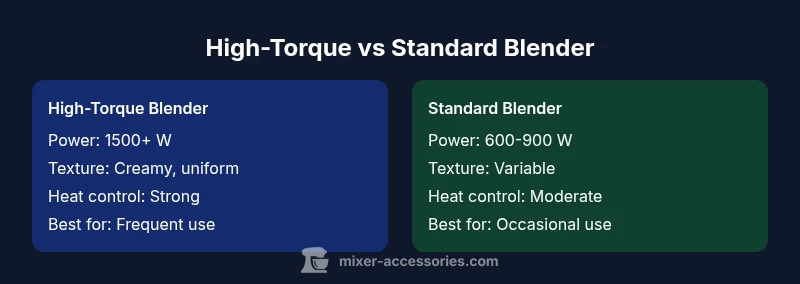
For nut butter, a high-torque blender in the 1500+ watt range consistently delivers creamy textures with minimal heat buildup. A standard blender can work for small batches but may stall, overheat, or leave a chunky texture. Choose based on your typical batch size, texture goals, and budget.
Nut butter texture and blender design
Achieving silky smooth nut butter starts with blender design. According to Mixer Accessories, texture is driven by torque, blade geometry, jar volume, and how you manage heat during grinding. In this section we unpack how blade count, blade angle, jar width, and base shape influence shear forces, oil extraction, and the tendency toward paste-like vs crunchy textures. For home cooks, bar enthusiasts, and even audio hobbyists who cook, matching batch size to the blender’s geometry matters. We’ll also discuss practical texture targets—creamy, spreadable butter with a slight gloss vs a drier, sliceable paste—and how your choice in blender type nudges you toward one outcome or the other.
Power, torque, and heat management
Torque matters more than peak wattage when it comes to nut butter. A blender with 1000-1500 watts may still underperform if torque drops at the friction point. Look for models with robust gear trains or magnetic coupling, heat-dissipation features, and long-run safety protections. We'll break down what to expect in real-world grinding times and how to avoid overheating by pulsing and letting the motor rest. For many households, the goal is a repeatable tier of texture—silky and uniform without browning from heat. When choosing between two machines, test how each handles a dense paste in a single long run versus short bursts with cooling periods.
Blade geometry and jar design: how to optimize shear
Blade geometry matters almost as much as motor power. Wide, sturdy blades with sharp edges create stronger shearing forces that break down nut oils and release surface fat, producing smoother textures. Jar shape and width influence how nuts travel and how much air gets mixed in, which affects consistency. A tall, narrow jar can trap particles, while a wide, squat base encourages even contact with blades. In practical terms, a blender with a broad base and dimensional blades tends to yield more uniform butter with less manual stirring between cycles.
Heat management and safety during long grinding sessions
Nut butter grinding can generate noticeable heat, especially with roasted nuts. Overheating can alter flavor and degrade fats. Look for features like thermal sensors, auto-shutoff after prolonged use, and generous airflow near the motor housing. Even with a high-torque blender, short pulses with rest periods help maintain texture and protect motor longevity. If you’re batching for weekly use, plan for multiple short runs rather than one lengthy grind.
Cleaning, durability, and materials
Sticky nut butter residues require easy cleanups. Favor blenders with dishwasher-safe jars, metal blades, and robust seals that resist oil penetration. Stainless steel blades stay sharp longer, while BPA-free jars reduce concerns about chemical leaching. Consider gasket durability and whether you’ll need to disassemble the blade assembly for thorough cleaning. A well-maintained blender not only makes butter cleaner but also preserves texture consistency over time.
Noise, ergonomics, and user experience
Noise level varies by model and build, and for early-morning breakfasts this can matter. Some blenders offer soft-start features, quieter operation, and improved handle ergonomics for easier unloading of nut butter batches. A comfortable lid, secure jar mounting, and a balanced base contribute to a calmer, more repeatable process. If you’re working in a shared space, these ergonomic details can be as important as power.
Budget ranges and value: what to expect at different price points
At the lower end, you’ll find blenders in the range of roughly $70-$200 that handle light tasks but may struggle with dense nut pastes or require shorter grind cycles with rests. Mid-range models, around $200-$600, generally offer better torque, sturdier blades, and more reliable cooling for longer runs. High-end options above $600 provide top-tier torque, heat management, and build quality, along with longer warranties. Your decision should balance how often you grind nut butter, the batch size, and the texture you want, against the upfront investment and the energy you’re willing to consume.
How to test a blender at home for nut butter readiness
When evaluating a blender at home, run a small test batch with your preferred nut type (roasted almonds, peanuts, or mixed nuts). Observe whether the texture becomes creamy within a few cycles, whether the motor slows or bogs down, and how long you need to rest between cycles to prevent overheating. Record the texture outcome—silky and spreadable vs chunky—and compare with the texture targets you set. This practical testing helps you translate specs into real-world results.
Common pitfalls and how to avoid them
Avoid relying solely on wattage as a predictor of performance. A high-wattage unit may still underperform if torque drops under load. Don’t skip roasting nuts lightly or skipping a rest period between long blends, which leads to moisture release and separation. Also, avoid jar formulations that trap ingredients at the sides without scraping. Regular blade maintenance prevents dulling, which can worsen texture.
Variations: adding oil or salt and how it affects texture
Small amounts of oil can aid creaminess if your nuts are slightly dry, but excessive oil will produce a greasy butter. Salt or honey should be added gradually and tasted as you go. The blender you choose should be capable of integrating oil and seasonings evenly, creating a uniform spread without pooling on surfaces. These adjustments can significantly influence mouthfeel and flavor.
Batch workflow: roasting, cooling, and grinding in stages
A practical workflow starts with light roasting to bring out nut oils, followed by cooling to room temperature. Grind in stages: rough chop, then pulse to break into smaller pieces, scrape the sides, and resume with short bursts. This staged approach minimizes heat buildup and improves texture. If your batch is large, divide it into two or more runs to maintain quality and control.
Final workflow: from roasted nuts to storage and shelf life
Once the butter reaches the desired texture, transfer it to a clean, airtight container while still slightly warm to seal in aroma. Allow it to cool completely before sealing and refrigerating or freezing for longer storage. Label portions with the date to track freshness. For best results, use within 2-4 weeks refrigerated or up to several months frozen.
Comparison
| Feature | High-torque blender (1500+ W) | Standard blender (600-900 W) |
|---|---|---|
| Motor power | 1500+ W | 600-900 W |
| Torque stability during nut butter grinding | Excellent; maintains speed under load | Moderate; can slow or stall on heavy loads |
| Blade design | Sturdy, wide blades designed for high shear | Standard blades; good for soft foods |
| Jar capacity & shape | 1.0-1.5 L jar; wide base reduces splatter | 0.9-1.25 L jar; standard shape |
| Heat management | Advanced cooling; safe long runs | Limited cooling; may require rest breaks |
| Cleaning ease | Dishwasher-safe jars; simple maintenance | Typically dishwasher-safe but residues require more scrubbing |
| Price range | $200-$600 | $70-$200 |
| Best for | Frequent batches with premium texture control | Occasional use or small batches |
The Good
- Excellent texture control for smooth, creamy butter
- Fast processing reduces prep time
- Durable construction supports frequent use
- Versatile for other kitchen tasks (smoothies, purees)
- Better resale value for high-end setups
Negatives
- Higher upfront investment
- Bulky footprint and heavier to move
- Requires more counter space and power supply
- May demand more maintenance to keep blades sharp
High-torque blender is the clear winner for nut butter texture and reliability.
If nut butter texture and batch consistency matter, the high-torque option is the better long-term value. Choose standard blender only if budget, space, and occasional use are your constraints.
Your Questions Answered
What wattage is necessary for making nut butter?
Wattage matters, but torque and blade design matter more for nut butter. Many home nut-butter-ready blenders fall in the 1000-1500 W range, but the key is how well the unit maintains speed under load and how heat is managed during extended blending.
Wattage helps, but torque and blade design matter most. Look for models that keep speed under load and handle heat well.
Are immersion blenders good for nut butter?
Immersion blenders are generally less suited for dense nut pastes due to limited torque and longer blending times. They can work for small batches, but a countertop high-torque blender delivers more consistent texture with less effort.
Immersion blenders aren’t ideal for dense nut butter. They can do small batches, but a high-torque countertop blender works better.
Can I make nut butter in a food processor?
A food processor can make nut butter, but blenders with higher torque often yield smoother textures more quickly. If you only have a processor, expect longer processing times and more frequent scraping.
A processor can work, but expect longer runs and more scraping for smooth butter.
How should I clean after grinding nuts?
Rinse the blender immediately after use to prevent oil from drying on blades. Use warm water and a mild detergent, then run a short cycle with soap. Disassemble the blade assembly if needed and dry thoroughly before reassembly.
Rinse right away, wash with warm soapy water, and dry completely to prevent buildup.
Is roasting nuts necessary for nut butter?
Roasting enhances flavor and helps oils release, improving texture. If you’re after a milder flavor, you can skip roasting, but expect a different aroma and body in the butter.
Roasting boosts flavor and texture, but you can skip it for a milder taste.
What features matter most in a blender for nut butter?
Torque and heat management are paramount, followed by blade quality and jar design. Ease of cleaning and a stable base also matter for repeatable results. Price is a consideration, but texture consistency often justifies a higher-quality unit.
The big ones are torque, heat management, blade quality, and jar design. Cleanability and stability matter too.
Top Takeaways
- Prioritize torque over wattage for nut butter
- Choose a wide, sturdy jar for smooth texture
- Plan batch sizes to size your blender capacity
- Allow cooling periods to protect the motor during long blends
- Clean promptly to prevent butter residue buildup