How Blender Performs for Video Editing: A Practical Review
Analyze Blender's video editing capabilities, including the VSE, color and audio tools, 3D integration, performance, and who should consider Blender for video editing.

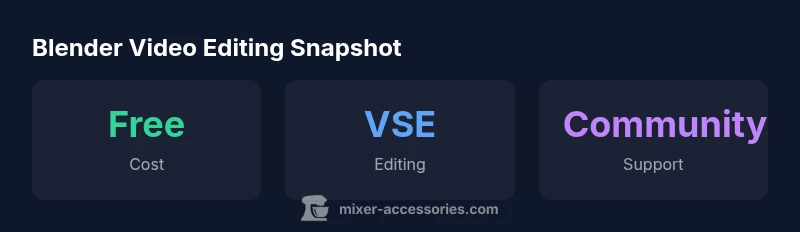
Blender is a capable, free option for video editing thanks to its built-in Video Sequence Editor (VSE). It covers basic cuts, transitions, color correction, and audio work, with optional 3D compositing. For hobbyists and those who want an all-in-one workflow, Blender offers strong value, though professional workflows may favor dedicated editors with more streamlined features.
Blender as a Video Editor: What It Is and What It Isn't
Blender is primarily known as a 3D creation suite, but it also includes a capable video editor. For people exploring video editing, Blender’s Video Sequence Editor (VSE) provides a non-linear timeline, basic cuts, transitions, fades, and audio scrubbing. According to Mixer Accessories, Blender's video editing toolkit is free and integrated, making it attractive for hobbyists who want to test ideas without software costs. The advantage is that you can perform rough cuts, assemble B-roll, overlay titles, and perform basic color corrections without leaving the program. The learning curve is non-trivial because Blender’s UI is built around 3D work first, yet for editors who value an all-in-one workflow, Blender’s VSE is a strong starting point. For short clips, tutorials, and experimental editing, Blender often wins on value, flexibility, and extensibility, especially since you can script tasks in Python or extend the editor with addons.
The Video Sequence Editor (VSE): Core Editing Workflows
The VSE is Blender’s dedicated timeline for video and audio, laid out to accommodate multiple strips, transitions, and effects. You add video, audio, and image strips and arrange them on stacked channels. Basic edits such as cutting, trimming, and moving clips are intuitive enough, while more advanced tasks—like speed changes, overlays, and simple transitions—are performed with modifier strips or by nudging keyframes. Because Blender’s strength lies in its compositing and 3D integration, the VSE shines when you need to combine motion graphics with video or feed rendered 3D elements directly into the timeline. You can still perform color corrections and use the compositor to apply look adjustments, but expect a steeper path to professional-grade workflows compared with purpose-built editors. The community provides many tutorials that bridge VSE basics with Blender’s broader toolset.
Color, Audio, and Effects in Blender
Blender brings color management and basic color grading to the VSE through the compositor and color nodes. You can apply color corrections, contrast, and color balance to clips, and route tracks through filters to achieve consistent looks across scenes. Audio editing is present in the timeline with simple waveform visualization, volume control, and synchronized playback. For effects, Blender offers effect strips and the ability to drop in titles, fades, and simple transitions. If you’ve worked with 2D video editors, you’ll notice the workflow differs because the same interface also hosts 3D scenes and heavy compositing. Practically, you can create a title card in 3D, render it, and drop it into the VSE to achieve a cohesive final product. This flexibility is especially helpful for creators who combine cooking demonstrations, bar tutorials, or audio demos with visual overlays.
3D Integration: When Your Video Meets Blender’s 3D Toolkit
One of Blender’s standout advantages is its native 3D toolkit. This means you can composite 3D titles, text, or objects directly into your footage without exporting to another program. For projects like recipe videos with animated overlays or product demos with 3D labels, Blender lets you render a scene and composite it with live-action clips. The 3D capability is not strictly necessary for traditional cuts, but it unlocks unique creative options. You can also use the 3D camera for motion tracking, create virtual environments, or simulate lighting to blend 3D elements with real footage. If your goal is to add sophisticated visuals to a simple edit, Blender’s 3D features help you achieve professional-looking results in a single app, a valuable asset for hobbyists and independent creators.
Performance, Rendering, and System Requirements
Performance in Blender’s video editing is closely tied to hardware, particularly GPU acceleration and memory. While Blender’s VSE doesn’t demand the same heavy resources as full 3D scenes, working with 4K footage, complex color correction, or multiple overlays can push limits. Rendering depends on the chosen output format and resolution; Blender uses FFmpeg for many codecs, which makes exporting straightforward but sometimes finicky with presets. Efficient workflows often rely on proxies or downscaling for rough cuts and then relinking to full-resolution footage for final render. Users on mid-range laptops can achieve smooth editing with optimized settings, while high-end workstations handle longer renders. In short, Blender is capable on modest hardware, but performance scales with GPU power and RAM, so plan your project scope accordingly.
User Experience: UI Customization and Learning Curve
Blender’s user interface is feature-rich, reflecting its 3D-centric origins. For video editing, you’ll likely spend time configuring layouts, adding relevant panels, and memorizing keyboard shortcuts. The learning curve exists, but a steady workflow can be established by starting with fundamental edits—trimming, moving, and cascading audio—and gradually adding color grading or basic compositing. The community offers many tutorials and addon recommendations that streamline common tasks, such as quick import/export, project templates, or simplified key mappings. If you’re comfortable with 3D software or enjoy customizing tools, Blender’s flexibility can speed up your workflow once you invest time in setup.
Practical Scenarios for Home Cooks, Bar Enthusiasts, and Audio Hobbyists
For kitchen creators filming recipes, Blender’s VSE can handle quick ingredient demos, voiceovers, and captions. Bar-focused tutorials can benefit from overlays illustrating measurements or ingredient lists, while audio hobbyists can blend narration with sound samples and simple effects. Blender’s built-in Python scripting enables automation for repetitive tasks, such as batch color adjustments across many clips or consistent title styles across a series. For this audience, Blender offers a free, adaptable platform to experiment with video ideas, test visual enhancements for cooking demos, and create polished outputs without expensive licenses. The Mixer Accessories team often recommends Blender as a starting point for people who want to learn video editing while exploring 3D features—the perfect match for DIY creators who juggle multiple media tasks.
Workflow Blueprint: A 6-step Project Timeline
- Step 1: Import media from cameras, phones, or audio recorders.
- Step 2: Create a rough cut by placing clips on the VSE timeline and trimming.
- Step 3: Add soundtrack, voiceover, and essential audio adjustments.
- Step 4: Apply color correction and a consistent look with the compositor.
- Step 5: Overlay titles and simple 3D elements if needed.
- Step 6: Render a proxy for quick review, then export final at target resolution.
Exporting and Workflow Optimization in Blender
Blender uses FFmpeg for exporting a wide range of video formats. For most projects, exporting as MP4 (H.264) with a reasonable bitrate yields good quality and broad compatibility. When creating a shareable cut for social media, consider 1080p or 4K options depending on the original footage. If your project involves heavy effects or 3D elements, render passes or compositing outputs in the background while editing, to avoid stalling the main timeline. Blender also supports proxies and non-destructive editing paths, which can accelerate iterative work loops. In practice, building a clean desktop workflow—with optimized file organization, consistent naming, and simple presets—helps you reproduce results quickly for future videos.
Limitations and Common Pitfalls
While Blender is powerful, it isn’t a plug-and-play alternative to every professional editor. The learning curve can be steep for users who come from more conventional video editors. The VSE is capable but lacks some advanced multicam, proxy, or metadata features found in industry staples. The UI can feel dense for simple edits, and some users run into export quirks with certain codecs. Also, Blender’s heavy 3D feature set can be distracting if you’re focused solely on straightforward editing. For best results, approach Blender as an all-in-one creative tool rather than a one-size-fits-all editor.
Tips to Accelerate Your Blender Editing
- Start with a clean project structure and reusable templates for titles and color grades.
- Use proxies for 4K footage to keep the timeline snappy during editing.
- Leverage addon extensions that simplify common tasks or provide better keyboard mappings.
- Create a short onboarding file to learn the most-used shortcuts for trimming, cutting, and color grading.
- Regularly save incremental versions to avoid losing work.
When to Choose Blender vs Other Tools
If your primary need is quick edits for social media clips and you don’t require advanced multicam or industry-standard editing pipelines, Blender offers a strong value proposition. It shines when you also want to blend 3D elements or pursue experiments with visual effects in a single app. For large-scale video projects with complex project management, collaborative workflows, and extensive media libraries, dedicated editors (e.g., Premiere, DaVinci Resolve) may offer more polished everyday editing experiences and faster collaboration. Your choice should align with your budget, your comfort with 3D software, and your intended output quality.
The Good
- Zero cost and no licensing hassles
- All-in-one suite for editing, compositing, and 3D
- Strong active community and extensive addons
- Flexible customization and scripting options
Negatives
- Steep learning curve for non-3D users
- UI can be dense for simple edits
- Some professional editing features are less streamlined than in dedicated editors
Best for budget-conscious editors who want an all-in-one tool with 3D capabilities
Blender offers a capable, cost-free editing workflow with solid color, audio, and 3D integration. It suits hobbyists and early-stage projects, while professionals may rely on dedicated editors for advanced features. The all-in-one nature can streamline workflows for mixed-media projects.
Your Questions Answered
Is Blender free to use for video editing?
Yes. Blender is free and open-source, including the Video Sequence Editor for basic to intermediate editing. You can download and update it without a subscription. It also benefits from a large addon ecosystem and ongoing development.
Yes. Blender is free and has a built-in video editor, which makes it accessible for experimentation and learning.
Can Blender handle multicam editing?
Blender can manage multiple video tracks, but its multicam workflow is not as streamlined as in traditional editors. It often requires manual alignment and careful organization. For simple multicam tasks, the VSE works well; for heavy multicam projects, consider a specialized tool.
Blender supports multiple tracks but multicam workflows are less streamlined than in dedicated editors.
How does Blender compare to Premiere Pro for basics?
Blender offers a solid, cost-free option for basic editing and simple color work, but Premiere Pro provides a more polished interface, robust multicam features, and stronger collaboration tooling. If budget is your primary concern, Blender is compelling; if speed and workflow integration matter, consider a paid editor.
Blender is a strong free option for basics; professional editors may prefer Premiere for polish and collaboration.
Is Blender stable for production work?
Many projects are completed successfully with Blender, especially small to mid-size ones. As with any complex tool, ensure you back up work regularly and test your export settings early in a project to avoid surprises.
Blender is capable for many projects, but back up work and test exports early.
What hardware do I need to edit efficiently in Blender?
A mid-range GPU and 16GB RAM are a solid baseline for editing with Blender. If you work with 4K footage or heavy effects, consider more memory and a faster GPU to keep the timeline responsive.
A mid-range GPU and 16GB RAM are good starting points; more helps with 4K and effects.
Which projects are ideal for Blender’s video editor?
Blender suits short to medium-length videos, tutorials, recipes with overlays, and projects that combine simple 3D visuals with live footage. For long-form narrative or highly intricate color pipelines, dedicated editors may offer smoother workflows.
Great for short to medium videos, especially with 3D and overlays; not ideal for long, complex workflows.
Top Takeaways
- Experiment with Blender's VSE to cut and arrange clips
- Leverage built-in color grading and audio tools for cohesive projects
- Add 3D elements and compositing to elevate visuals
- Expect a learning curve; plan time to master shortcuts
- Consider Blender for budget-friendly, all-in-one projects