How to Use a Blender: A Practical Guide for Home Cooks
Learn how to safely and effectively use a blender for smoothies, soups, sauces, and more. This step-by-step guide covers prep, blending techniques, texture control, cleaning, and safety tips for beginners and experienced cooks.

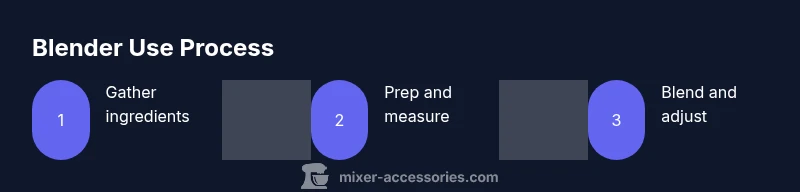
Learn how to use a blender safely and effectively for smoothies, sauces, and soups. This guide covers prep, blending basics, texture control, and cleaning. You'll need a blender, ingredients, measuring tools, a spatula, and a towel. By following these steps, you’ll achieve consistent textures and avoid common mistakes. Ideal for beginners and seasoned cooks.
Why Blender Basics Matter
Blenders are versatile tools in any kitchen, but real mastery comes from understanding how the blender works and what you want to achieve. Whether you are making a quick smoothie, a velvety soup, or a silky sauce, the core ideas stay the same: plan your texture, balance liquids with solids, and respect the capacity of your jar. According to Mixer Accessories, taking a moment to define the texture you want before you start leads to more consistent results and fewer messes. With that foundation, you can move beyond guessing and approach each blend with confidence, selecting the right jar size, blade type, and speed for the task at hand.
Safety First: Blades, Hot Liquids, and Power
Blenders spin at high speeds and use sharp blades that can cause injury if mishandled. Always secure the lid and ensure the jar is seated correctly before you switch the machine on. If you are blending hot liquids, vent the steam by leaving the cap slightly cracked or using a vented lid. Tie back hair, remove loose clothing, and unplug the unit before cleaning or disassembling. Never blend dry ingredients in a wet environment or overload the jar beyond the max line. A small, steady setup reduces slips, burns, and motor strain, making blending safer and more predictable.
Prep Your Ingredients for Better Blends
Good prep saves time and improves texture. Rinse produce, remove pits and seeds, and cut large pieces into chunks that fit easily in the jar. For thicker textures, freeze some fruit or ice to help with crushing and to reduce heat generation. Measure liquids to ensure balance; too little liquid can stall blending, while too much can flood the blades. A simple mise en place — chopped fruits, measured liquids, and measured add-ins — accelerates the process and yields more consistent results.
Texture Control: Pulse, Speed, and Liquids
Texture is the result of how you combine blade action with the liquid base. Start with a few short pulses to break up large pieces, then switch to a steady blend. Begin at a low speed and gradually increase to the target setting as ingredients break down. Add liquids slowly to avoid over-thinning and to maintain control. For ultra-smooth results, blend longer at a moderate speed and finish with a brief pulse to catch any remaining lumps. Monitor thickness and stop when you reach the desired consistency.
Practical Blending Scenarios: Smoothies, Soups, Sauces, and More
A blender shines in multiple kitchen tasks. For smoothies, combine chopped fruit, yogurt or milk, and a small amount of ice; adjust sweetness with a touch of honey or maple. For soups, blend cooked vegetables with broth in batches to avoid splashing, then simmer to finish. For dressings and sauces, blend soaked nuts, herbs, oil, and acid until emulsified. If you want thicker results, start with frozen ingredients; for lighter textures, use more liquid. The key is to experiment and adapt to the recipe.
Cleaning, Maintenance, and Longevity
Right after use, rinse the jar, blades, and lid with warm water and wash with soap to remove residues. Do not immerse the blender base in water; wipe it with a damp cloth. For stubborn stains, blend warm water with a splash of baking soda, then rinse. Dry all parts completely before reassembling. Regularly inspect seals and gaskets for wear and replace as needed to prevent leaks. Proper care extends life and keeps performance consistent.
Troubleshooting and Quick Fixes
If blending stalls, stop and check for overfilled jars or a clogged blade. A burnt smell usually means the motor is overheating; let the unit cool before continuing. If texture is uneven, stop and scrape down the sides, then blend briefly at a lower speed. For stubborn lumps, pulse in short bursts and add a splash of liquid. Leaks point to a loose lid or worn gasket; reseal firmly or replace parts as needed. These quick checks save time and protect the appliance.
AUTHORITY SOURCES and Practical Notes
This guide references established safety and usage guidelines to help you blend with confidence. For detailed standards and additional safety considerations, consult the following sources. FDA safety guidelines provide broad food handling context, while university extension resources offer practical, kitchen-focused advice. National standards and measurement references can help with consistent results across recipes.
AUTHORITY SOURCES
- FDA safety guidelines: https://www.fda.gov
- Extension service resource: https://extension.illinois.edu
- NIST: https://www.nist.gov
Notes: Always follow local electrical safety rules and the blender manufacturer's instructions for operation and maintenance.
Tools & Materials
- blender base(Motorized base with on/off control)
- blender jar/pitcher(Clear plastic or glass, marked max fill line)
- blade assembly(Sharp blades; ensure fit to jar)
- measuring cups/spoons(For precise liquids and add-ins)
- liquids (water, milk, juice)(Base liquid to aid blending)
- ingredients for blending(Fruit, vegetables, dairy, nuts, or ice)
- spatula or silicone scraper(For scraping sides)
- towel or heat-resistant mat(Seal around base and catch spills)
- ice or frozen ingredients(For colder, thicker textures)
- cleaning brush(To help remove residues from blades)
Steps
Estimated time: 25-35 minutes
- 1
Gather ingredients and equipment
Collect all ingredients and set up your blender in a clean workspace. Have measuring tools handy and confirm you have a lid that fits securely.
Tip: Do a quick mise en place so you won't have to search mid-blend. - 2
Check the blender and secure the jar
Inspect the jar for cracks, ensure the blade assembly is tight, and verify the gasket is seated correctly. Place the jar on the base firmly.
Tip: A loose jar can cause leaks or detachment during operation. - 3
Add liquids first
Pour liquids into the jar before adding solids to create a smooth base and reduce air pockets that can cause splashing.
Tip: Starting with liquids improves chopping efficiency. - 4
Add solids in batches
Add chunks in small portions rather than all at once to prevent overloading and to ensure even blending.
Tip: Overloading is a common cause of uneven texture. - 5
Pulse to start, then blend
Use short pulses to break up large pieces, then switch to continuous blending for a uniform texture.
Tip: Pulsing gives better control over texture. - 6
Blend at appropriate speed
Gradually increase speed as ingredients break down, stopping to scrape the sides if needed.
Tip: Avoid high speeds at the start with thick mixtures. - 7
Adjust texture with liquids or frozen items
If the blend seems thick, add a little liquid or switch to frozen ingredients for a creamier result.
Tip: Little adjustments go a long way toward smoothness. - 8
Taste, adjust seasonings, and finish
Taste and adjust sweetness, salt, or spices as needed before serving or storing.
Tip: Taste early to avoid over-seasoning in a long blend. - 9
Clean immediately after use
Rinse the jar and blade, wash with soap, and dry thoroughly before reassembling.
Tip: Cleaning right away prevents stubborn residue buildup.
Your Questions Answered
What makes a blender produce smoother textures?
Smoothed textures come from a balanced base of liquids, small ingredient pieces, proper blending time, and a clean blade. Starting with liquids and pulsing to break up chunks helps achieve uniform results. Adjust texture by adding more liquid or cold ingredients as needed.
Smooth textures come from a balanced base, proper blending time, and small ingredient pieces. Start with liquids and use pulses to break up chunks, then adjust with more liquid or cold ingredients.
Can I blend hot liquids safely?
Yes, but you must vent the lid to allow steam to escape and prevent pressure buildup. If your blender lacks a vent, blend in small batches or let the liquid cool slightly before blending.
You can blend hot liquids, but vent the lid and blend in small batches or let them cool a bit first.
How do I clean a blender properly?
Rinse and wash the jar, blade, and lid with warm soapy water. Do not immerse the base; wipe it. For tough stains, blend warm water with a splash of baking soda, then rinse and dry thoroughly.
Rinse and wash the jar, blade, and lid. Don’t submerge the base; wipe it. For tough stains, blend warm water with baking soda, then rinse and dry.
What’s the difference between a blender and a food processor?
Blenders are best for liquids and purees, delivering smooth textures quickly. Food processors handle thicker, chunkier results and are better for chopping and dough work. Choose based on the texture you want and the task at hand.
Blenders are great for liquids and smooths, while food processors are better for chopping and chunkier results.
How long should I blend at a time?
Most blends finish within 1-3 minutes of steady blending, with shorter bursts for tough ingredients. If you’re blending dense mixtures, pause to scrape and check texture before continuing.
Most blends take 1-3 minutes, with pauses to scrape as needed for dense mixtures.
Can I crush ice in any blender?
Many blenders can crush ice, but performance varies by model. Use a short pulse to break ice or blend with frozen fruit for a smoother texture. Avoid long blasts on fragile jars.
You can crush ice with many blenders, use short pulses and avoid overloading the jar.
Top Takeaways
- Prepare ingredients before blending.
- Add liquids first to create a base.
- Pulse for control, then blend to the desired texture.
- Clean promptly to maintain performance.