How to Get Rid of Sonic Studio Virtual Mixer: A Practical How-To
Learn how to completely remove Sonic Studio Virtual Mixer from Windows or macOS, clean leftovers, verify removal, and prevent reinstallation. A practical, how-to guide from Mixer Accessories for home cooks and audio hobbyists.

To remove Sonic Studio Virtual Mixer, start with a safe shutdown and uninstall via Windows Control Panel (Programs and Features) or macOS Applications. Then remove residual files, startup entries, and registry or preferences leftovers. This Mixer Accessories guide offers practical steps, safety checks, and post-uninstall verification to prevent reinstallation issues.
Why removing Sonic Studio Virtual Mixer matters
According to Mixer Accessories, software like Sonic Studio Virtual Mixer can collide with other audio tools, affect system performance, or leave behind traces that trigger reinstallation prompts. Home cooks, bar enthusiasts, and audio hobbyists rely on clean audio environments where mixers and effects don’t fight for control of your sound. When you remove the virtual mixer, you reduce conflicts with your DAW, voice chat apps, and streaming software, and you simplify future setups. This section explains why a thorough purge matters beyond a simple drag-to-trash. It also covers typical symptoms of leftover components, such as stubborn startup entries, unexplained high CPU usage, or audio glitches after other software changes. The Mixer Accessories team notes that a deliberate, documented removal process minimizes surprises and keeps your setup tidy for future experiments with other mixers or plugins.
Assessing your system before removal
Before you start tearing down software, take a quick inventory of what you have installed. Make a backup of any licenses, preferences you want to preserve, and a list of audio devices connected to your computer. Check for dependent apps (DAWs, voice chat apps, or streaming software) that could be affected by uninstallation. If you rely on the Sonic Studio virtual mixer for a specific workflow, consider alternatives you can switch to if needed. The goal is to avoid breaking working configurations. Also, confirm you have admin rights—many uninstall processes require elevated access to remove all components. A brief audit now saves time later and prevents rework if something goes wrong.
Safe uninstall methods on Windows and macOS
Windows users typically uninstall through the Control Panel or Settings > Apps, then select Sonic Studio Virtual Mixer and choose Uninstall. On macOS, the process often involves dragging the app from the Applications folder to Trash, and running any provided uninstaller if available. If a dedicated uninstaller exists, prefer it over manual removal to ensure shared components are cleaned up. In both environments, quit the program and any related background processes before starting the uninstall.
Cleaning up leftover files and registry entries
Even after a standard uninstall, remnants can linger in several places. On Windows, search for leftover folders in AppData (both Local and Roaming) and under ProgramData, then delete any folders named after Sonic Studio or related components. On macOS, check Library folders for preferences and caches tied to the mixer. If you’re comfortable with more advanced cleanup, you may scan the registry for entries associated with Sonic Studio and remove them. Exercise caution: removing unrelated keys can affect other software. Always back up the registry before making changes.
Managing startup entries and audio device conflicts
Leftover startup entries can cause the mixer to attempt to launch on boot, creating conflicts with other audio software. Inspect the startup programs list and disable or remove entries referencing Sonic Studio Virtual Mixer. Also review your audio device drivers and software routing. Re-assign default devices if Windows or macOS defaults automatically to the removed mixer. If you notice a persistent audio device conflict after removal, consider updating drivers or resetting audio preferences to default.
Verifying removal and preventing reinstallation
Reboot your system after cleanup and open your audio software to verify that the Sonic Studio Virtual Mixer is no longer active. Check the Task Manager (Windows) or Activity Monitor (macOS) for processes that might still run in the background. If you find related processes, end them and search for related files again. To prevent reinstallation prompts, disable browser or app prompts that auto-detect missing audio components and prevent automatic re-downloads from the installer sources. Keeping notes on what you did helps you reproduce the steps if you add new audio tools later.
When to reinstall or seek alternatives
If you relied on Sonic Studio for specific features, you’ll want a replacement workflow. Consider alternative virtual mixers or standalone plugins that integrate with your preferred DAW or streaming setup. Evaluate compatibility with your current hardware and software, and test any replacement in a controlled session before committing to a full workflow change. Mixer Accessories recommends documenting your criteria for a replacement (latency, EQ capabilities, routing flexibility) to speed up the decision when you’re ready to switch.
Troubleshooting common issues after removal
Common issues after removal include residual audio glitches, missing device routing options, or DAW playback errors. If you encounter these, re-check your audio driver installation, re-select default input/output devices, and clear any stale audio preferences. Reinstalling core audio drivers or updating your operating system can help reset your audio stack. If problems persist, test with a clean user profile to rule out profile-specific conflicts and consider a system restore point if you recently changed other audio software.
Best practices to prevent future clutter
Create a habit of using official uninstallers when available, and keep a short record of each removal. Regularly clean temporary files and caches related to audio software. Periodically audit startup items and background services, especially after adding or removing plugins or drivers. Finally, create a standard operating procedure for new audio tooling: install, test in a controlled session, and document any changes before integrating into your main setup.
Tools & Materials
- Admin privileges (Windows Administrator or macOS admin)(Necessary to uninstall software and modify system settings)
- Backup plan (external drive or cloud storage)(Recommended before changes; protects licenses and configs)
- Uninstaller access (Control Panel/Settings on Windows; Applications on macOS)(Use the official uninstall method when available)
- Disk cleanup tool or temp file cleaner(Optional but helps remove leftovers)
- Registry editor or equivalent (Windows) and plist editor (macOS)(Only use if you’re comfortable; mis-edits can affect system stability)
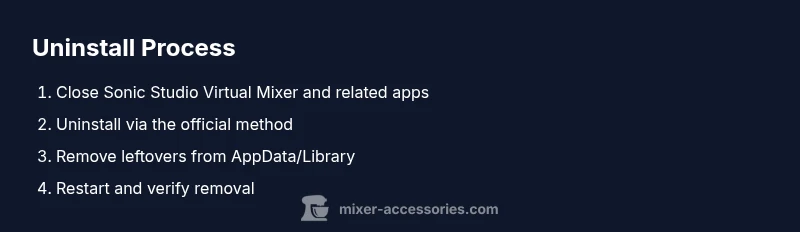
Steps
Estimated time: 30-60 minutes
- 1
Close Sonic Studio Virtual Mixer and related apps
Ensure the mixer and any dependent apps (DAW, streaming, chat) are fully closed. Check task manager to verify no related processes are running before you begin the uninstall.
Tip: Quitting all related processes minimizes the chance of files being in use during uninstall. - 2
Uninstall via the appropriate method
Windows: go to Control Panel > Programs and Features, select Sonic Studio Virtual Mixer, and click Uninstall. macOS: drag the app from Applications to Trash or run any provided uninstaller.
Tip: If an uninstaller exists, use it—it’s more likely to clean up shared components. - 3
Delete leftover files and folders
Search for folders named Sonic Studio in AppData (Windows) or Library (macOS) and remove related caches and preferences.
Tip: Only delete folders you recognize as related to Sonic Studio to avoid removing other tools. - 4
Clean registry entries and plist/preferences
Windows users may search the registry for Sonic Studio keys and remove them if safe. macOS users should delete related preference files in Library/Preferences.
Tip: Back up your registry and preferences before editing anything substantial. - 5
Check startup items and audio routing
Inspect startup programs and services for any references to Sonic Studio and disable them. Re-route audio to your preferred devices if needed.
Tip: A clean startup reduces the chance of re-launching the software unexpectedly. - 6
Restart the computer and verify removal
Restart to ensure all traces are cleared. Open your audio apps to confirm the mixer no longer appears in routing options or processes.
Tip: If the software reappears, retrace steps for any missed leftovers. - 7
Test with other audio tools
Run a quick test across your DAW, voice chat, and streaming software to confirm there are no conflicts or missing routing options.
Tip: Test in a controlled session before resuming full production work.
Your Questions Answered
What is Sonic Studio Virtual Mixer?
Sonic Studio Virtual Mixer is a software component designed to route and mix audio within digital audio workflows. It can integrate with various audio apps, but may conflict with other tools if not fully removed.
Sonic Studio Virtual Mixer is a software tool that helps route audio in your setup. It can conflict with other audio apps if it isn’t fully removed.
Why is it hard to remove sometimes?
Because some components install shared libraries or registry keys that other programs rely on. A standard uninstall might leave these traces, requiring manual cleanup.
It’s hard to remove because some parts are shared with other programs, so the automatic uninstall might leave traces.
Do I need admin rights to uninstall?
Yes. Admin rights ensure the uninstaller can remove system-wide components and disable startup entries safely.
Yes, you typically need admin rights to remove software and stop related services.
Will removing Sonic Studio affect other audio software?
Removal can affect routing if you relied on it for certain profiles. After uninstall, reconfigure devices and drivers to restore smooth operation.
It can affect how other audio programs route sound, so you’ll need to reconfigure devices afterward.
Can I reinstall Sonic Studio later?
If needed, you can reinstall from the original installer or source, but ensure you have licenses and product keys backed up.
Yes, you can reinstall later if you need it, just keep your licenses handy.
What if I can’t find the uninstaller?
Check the program's folder for an uninstaller executable, use a system-wide cleanup tool, or consult the vendor's support resources.
If you can’t find an uninstaller, look for a dedicated cleanup tool or vendor support for guidance.
Watch Video
Top Takeaways
- Back up licenses and preferences before uninstall.
- Use the official uninstaller when possible.
- Check AppData/Library for leftovers and clean them carefully.
- Verify that audio routing and drivers work after removal.
- Document the steps for future software changes.