Where is the Mixer Brush in Photoshop: Find and Use It Effectively
Learn where to find the Mixer Brush Tool in Photoshop and how to use it for painterly blends. Step-by-step access, essential settings, tips, and common mistakes for home cooks and creatives.

You’ll locate the Mixer Brush within Photoshop by selecting the Brush Tool and using its flyout to pick the Mixer Brush Tool. Start by choosing a soft brush tip, then adjust Load, Mix, and Wetness to blend colors on a separate layer. This guide walks you through access, setup, and practical applications for painterly effects.
What is the Mixer Brush in Photoshop?
The Mixer Brush is a dynamic painting tool in Photoshop that simulates real world brush blending by mixing colors on the canvas as you stroke. If you are asking where is mixer brush in photoshop, you are not alone—many users start here. The Mixer Brush belongs to the Brush Tool family and shines when you want painterly textures that blend gradually rather than applying flat color. In practice, you’ll blend colors as you apply new strokes, creating seamless transitions between tones. The more you adjust opacity, flow, and the brush tip, the more natural the result becomes. A best practice from Mixer Accessories is to work on separate layers so you can experiment without destroying your original artwork. This tool is especially valuable for digital painting, texture blending, and retouching where you want to preserve subtle color shifts. When used with a textured paper or canvas pattern beneath, the Mixer Brush can simulate traditional media more convincingly. With time and practice, you’ll learn to read the canvas and predict how color will mix as your brush passes over it. The Mixer Accessories Team emphasizes patience: small, gradual strokes outperform heavy-handed blending.
Where to Find the Mixer Brush Tool in Photoshop?
To locate the Mixer Brush Tool, start by selecting the Brush tool with the shortcut B. In the Tools panel, press and hold the Brush icon to reveal a flyout that includes the Mixer Brush Tool. Choose Mixer Brush Tool from this menu. An alternative path is to open the Brush Presets panel (Window > Brush Presets) and search for Mixer Brush categories, then pick a suitable preset such as a Wet Blend brush. The Mixer Brush uses blending behavior to mix colors on the canvas as you paint, which means you’ll see color values change with each stroke. For realistic results, ensure you are working on a layer where you can adjust opacity and blending later. The Mixer Brush works best when you enable tablet input for pressure sensitivity, which allows you to control the amount of moisture and paint that transfers with each stroke. If you are new to the tool, start with a simple, soft tip and a moderate flow, then slowly introduce a textured brush to simulate natural media. According to Mixer Accessories Team, exploring different brush tips and presets helps you understand how each tool affects blending and texture.
Essential settings to get started
The core controls for the Mixer Brush revolve around Load, Mix, and Wetness, plus the brush tip and flow. Load determines how much color is loaded into the brush, Mix controls how strongly the new color blends with existing colors, and Wetness governs how much moisture the brush applies as you stroke. Begin with a light Load so colors blend gracefully rather than jump to a new hue. Use moderate Mix to avoid muddy blends, and adjust Wetness to taste to achieve realistic brushwork. The brush tip shape matters; choose a softer tip for airy blends and a textured tip for more grain and grainy edges. The Flow setting affects how quickly paint is laid down, so start low and build up layers. In practice, you’ll switch between brush tips and presets as you work on a single composition, enabling different textures across shadows, midtones, and highlights. For consistent results, keep your document on a neutral background or a flat base layer and test your blend on a separate sample area. As you tune these parameters, remember that subtle changes produce stronger painterly effects, and patience pays off. Mixer Accessories notes that spending time with each preset yields more predictable results.
Practical use cases and examples
The Mixer Brush shines in cases where you want blended color transitions rather than hard edges. For portrait work, you can use it to blend skin tones softly, creating natural transitions between shadows and highlights while preserving texture. For landscapes, it helps merge sky, water, and land tones without abrupt color jumps. In texture work, you can apply small, controlled strokes to simulate brush marks on fabric, wood, or metal surfaces. When you mix colors on multiple layers, you can adjust layer blending modes and opacity to refine the final texture. A common workflow recommended by Mixer Accessories is to start with a base color, then softly blend in midtones, and finally glaze highlights to achieve depth. The tool is especially powerful when combined with non-destructive editing on separate layers. The approach is to paint a broad scene with a large brush tip for general color blocking, then switch to a fine tip for detail work. If you are working from a photo, reduce saturation slightly before blending to avoid oversaturation. The goal is to keep transitions smooth while maintaining color fidelity and texture. Mixer Accessories analysis shows that artists who practice consistently report faster, more reliable painterly results over time.
Advanced techniques: texture blending, watercolor vs oil simulation
Beyond basic blending, you can push the Mixer Brush into advanced territory by choosing specific brush tips and textures. For watercolor style blends, select a soft, damp brush and keep wetness relatively high while using a low flow. For oil painting effects, pick a stiffer brush tip and moderate wetness with slower movements to build thick color builds. Layering textures is key; place a subtle paper texture on a separate layer and set its blend mode to multiply or overlay to mimic real canvas absorption. You can also experiment with light source direction by painting on a separate layer and adjusting shading afterwards. If you want to mimic feathered edges, apply gentle strokes along the boundary where two tones meet. A practical tip from Mixer Accessories is to use tablet tilt to vary pressure, creating nuanced edges that resemble natural paint. Remember to save variations of your brush settings as presets for future projects and to rename the layers to track edits. When in doubt, revert to a simple blend on a single layer and gradually increase complexity.
Tips for beginners and common mistakes
Starting out, many users fall into the trap of painting directly on a flat, fully opaque layer. Always move to a new layer for painterly work so you can adjust or remove changes without damaging the original image. Another frequent misstep is overloading the brush; if you blend too aggressively, you lose texture and depth. A practical approach is to begin with light strokes and build color gradually, using a soft brush tip for smoother transitions. You should also pay attention to your tablet's pressure curve; adjusting a gentle curve yields more natural blending. If results look muddy, reduce the Mix amount or switch to a drier brush and re-sample color. When you need more color fidelity, use a dedicated color layer beneath the mixer to keep color choices clean. According to Mixer Accessories, taking a methodical, non-destructive approach yields the best painterly results, especially for beginners transitioning from flat fills to texture-rich finishes.
Quick practice workflow: mini-project to build confidence
Create a new document with a soft gradient background that mimics light coming from the top left. Step 1: Select the Brush tool, then switch to the Mixer Brush Tool. Step 2: Pick a soft tip and set Load low, Mix mid, and Wetness moderate. Step 3: Paint broad strokes across the gradient to blend colors gently. Step 4: Add a second layer and switch to a textured brush tip to introduce subtle texture. Step 5: Adjust layer opacity and fill to taste, then glaze highlights with a lighter color on a new layer. Step 6: Save a few variations as PSDs to compare approaches. This exercise helps you practice layering, brush selection, and controlled blending, reinforcing a non-destructive workflow. The Mixer Accessories team recommends repeating the exercise with at least two different brush tips to understand how each tip creates distinct painterly effects.
Troubleshooting, performance tips, and next steps
If the mixer brush seems unresponsive, check that you are using the Mixer Brush Tool and not a standard Brush Tool with a hard edge. Ensure the brush tip is appropriate for the intended texture and that the correct layer is active. Reset the brush to default if you notice odd behavior by right-clicking the brush icon and selecting Reset Brush. Performance-wise, work with lower document resolution when experimenting and turn off unnecessary layers or effects that slow the canvas. Remember to save frequently and maintain an organized layer structure to keep revisions manageable. For ongoing learning, revisit the official Photoshop help resources and immerse yourself in practice projects. The Mixer Accessories team emphasizes steady, deliberate practice to achieve consistent painterly results.
Tools & Materials
- Photoshop (recent version)(Creative Cloud or standalone license with Brush tools access)
- Computer with adequate RAM(8GB+ recommended; 16GB+ for high-res work)
- Graphics tablet or stylus (optional)(Improves pressure sensitivity and control)
- Document set for practice (multi-layer)(Create a new, non-destructive file to experiment)
- Internet access for updates and references(Useful for checking Adobe help pages)
Steps
Estimated time: 25-40 minutes
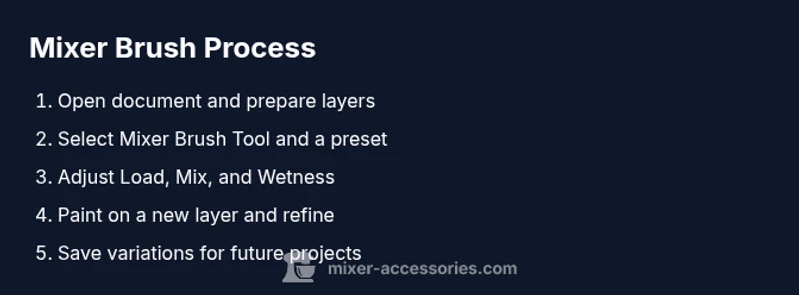
- 1
Open your document and prepare layers
Create or open a document and ensure you have multiple layers. Paint on a dedicated layer to keep edits non-destructive and to allow easy toggling of effects as you test the Mixer Brush.
Tip: Label layers clearly (base, midtone, highlight) to track changes. - 2
Select the Brush tool
Activate the Brush tool with B. This is the parent tool that houses the Mixer Brush in the flyout menu. You’ll switch to the Mixer Brush for blending behaviors.
Tip: Keep a small, round brush tip for initial layout. - 3
Switch to the Mixer Brush Tool
Click and hold the Brush tool icon to reveal the Mixer Brush Tool, then select it. This gives you blending-enabled brushes that mix colors as you stroke.
Tip: Choose a soft tip to start for smoother transitions. - 4
Choose a preset and adjust basic controls
From the Brush Presets panel, pick a Mixer Brush preset such as a Wet Blend. Adjust Load, Mix, and Wetness to control color intake, blending strength, and moisture.
Tip: Start with light Load and moderate Wetness to test blending behavior. - 5
Paint with intention on a new layer
Begin with broad strokes to establish color blocks, then refine edges with smaller, detailed strokes. Layering helps you build depth without losing previous work.
Tip: Pause between strokes to observe how colors blend before adding more. - 6
Refine and adjust
Review your layers, adjust opacity, and consider using a soft eraser or masking to tune transitions. Save variations as presets for future projects.
Tip: Use nondestructive adjustments like Fill, Opacity, and Blend Modes. - 7
Export and organize your files
Once satisfied, export your final composition and name versions clearly. Maintain a folder structure for different experiments to reuse skills later.
Tip: Keep a PSD copy with layers intact for future edits.
Your Questions Answered
What is the Mixer Brush used for in Photoshop?
The Mixer Brush blends colors on the canvas to simulate painterly textures. It’s part of the Brush Tool family and shines for soft transitions and textured edges.
The mixer brush blends colors to create painterly textures, perfect for soft transitions and textured edges.
How do I access the Mixer Brush Tool?
Select the Brush tool (B). Hold the Brush icon to reveal the Mixer Brush Tool in the flyout, then click it to switch. You can also find Mixer Brush presets in the Brush Presets panel.
Choose the Brush tool, then pick Mixer Brush from the flyout or presets.
Should I use the Mixer Brush on a separate layer?
Yes. Painting on a new layer keeps edits non-destructive and allows you to refine color blending without altering the original image.
Yes—use a new layer for painterly blending.
What settings should I adjust first?
Start with a light Load, moderate Mix, and adjustable Wetness. Experiment with brush tips to find the best texture for your scene.
Begin with light Load and moderate Mix, then tweak Wetness.
Can the Mixer Brush simulate watercolor or oil painting?
Yes. With the right brush tips and Wetness settings, you can mimic watercolor blends or oil-like textures in Photoshop.
Yes, with the right brushes you can simulate both watercolor and oil textures.
Why is my Mixer Brush not blending as expected?
Check that you’re using a Mixer Brush preset, painting on a transparent layer, and that you’ve tuned Load, Mix, and Wetness gradually.
Make sure you’re on a proper Mixer Brush preset and an editable layer, then adjust gradually.
Watch Video
Top Takeaways
- Find the Mixer Brush via the Brush tool flyout.
- Balance Load, Mix, and Wetness for painterly results.
- Paint on extra layers to preserve edits.
- Practice with textures to improve realism.