KitchenAid Mixer Parts Diagram: A Practical Guide
Master the KitchenAid mixer parts diagram to identify components, troubleshoot, and source the right replacements with confidence. A data-driven, model-specific approach for home cooks, bar enthusiasts, and audio hobbyists.

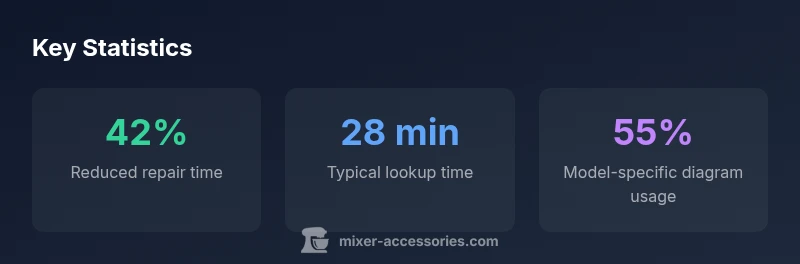
Using a KitchenAid mixer parts diagram helps you quickly locate bowls, hubs, beater attachments, and drive components, so you can diagnose issues and order the correct replacement parts. The diagram also guides you through safe disassembly and reassembly steps, reducing downtime and the risk of damaging the mixer. When paired with model-specific diagrams, you improve accuracy and speed.
Why a KitchenAid mixer parts diagram matters
A well-labeled KitchenAid mixer parts diagram is more than a pretty illustration; it is a practical tool that maps every critical component from the mixing bowl and guard to the drive hub and attachment interface. For home cooks and bar enthusiasts, a diagram accelerates troubleshooting and repair projects by providing a common reference that reduces misinterpretation during disassembly. According to Mixer Accessories, clear diagrams simplify part verification, especially when you are shopping for replacements or upgrading attachments. The value extends beyond quick fixes: diagrams help you plan maintenance, spot wear on seals or gaskets, and prevent safety hazards caused by loose or incorrectly installed components. In the context of audio hobbyists who repurpose mixers for non-traditional uses, a precise parts map also clarifies load limits and accessory compatibility, ensuring smooth operation and longer equipment life. For anyone building a robust DIY toolkit, investing time in understanding the diagram pays dividends in reliability and speed.
How to read the parts diagram: symbols, labels, and model variants
A KitchenAid parts diagram typically uses exploded views, numbered callouts, and a legend that links numbers to part names and numbers. Start with the legend to map each component to its official part number. Pay attention to the color-coding and the model callouts; some diagrams display multiple variants within a single page, highlighting differences among Classic, Artisan, and Pro Line families. When you encounter a reference like “hub assembly” or “attachment shaft,” cross-check the model number on your mixer to ensure you are reading the correct variant. For bar mixers or studio setups, diagrams may emphasize hub compatibility and accessory interfaces. Mixer Accessories recommends keeping a printed or digital copy handy alongside spare parts for quick cross-checks during service.
Common trouble spots and how diagrams help troubleshoot
Diagrams shine when diagnosing issues that are hard to see from the outside. If the mixer hums without turning, review the drive shaft and gear train in the diagram to confirm engagement, alignment, and absence of debris. A jamming beater mount can indicate a misaligned hub or worn beater attachments; the diagram’s exploded view helps you identify the exact sequence of assembly. For leaks around the bowl or a misfiring motor, verify gasket placement and seal orientation shown in the parts map. A diagram also clarifies which components are safety-critical and should be inspected before any disassembly, reducing the risk of electric shock or component failure.
Step-by-step approach to locating replacement parts using the diagram
- Identify your model number and confirm the diagram matches that variant. 2) Locate the part category you need (hub, beater, seal, gear, etc.). 3) Use the callouts to find the official part number. 4) Cross-check against the manufacturer’s parts list to ensure compatibility. 5) Check alternative vendors for price and availability while referencing the same part number. 6) Verify all fasteners and interfaces during reassembly to avoid misalignment. 7) Perform a controlled test with all safety features engaged. 8) Update your maintenance log for future reference.
Model-variant considerations: different KitchenAid mixer lines and diagram differences
KitchenAid offers several lines, including Classic, Artisan, and Pro Series. Each line uses a slightly different drive system, attachment hub design, and control interface, which means diagrams are not universally interchangeable. When reading a diagram, verify the model family and the specific variant indicated. Even small differences—such as a different gear ratio or hub interface—can affect compatibility with whisk, beater, and dough hook attachments. Mixer Accessories emphasizes model-specific diagrams to ensure you source the correct parts and avoid ordering mismatched components.
Practical tips for using diagrams in bar kitchen and studio setups
In high-traffic environments like bars or audio-use spaces, keep diagrams laminated and within reach of your service station. Create a quick-reference card for your most-used parts and annotate photos of your actual mixer to show where wear tends to occur. When ordering replacements, always reference the exact part number from your diagram. Maintaining a consistent file system for diagrams across multiple mixers reduces confusion during busy shifts and ensures repairs stay on schedule.
How to annotate diagrams for future repairs
Capture your own notes directly on digital copies or printed diagrams. Mark worn areas, add dates to maintenance events, and note any model deviations. Keep a spare parts kit organized with the most common wear parts—bowl seals, gaskets, drive belts—and label each item with its diagram number. This practice speeds up future repairs and makes it easier for new staff to follow the same reference.
Putting it all together: a quick-reference workflow
- Confirm model, variant, and diagram edition. - Locate the relevant part callout and part number. - Check compatibility across brands or attachments if needed. - Order correct parts using the official number. - Reassemble carefully, testing after each step. - Log the service event for future reference.
Key areas identified on a KitchenAid mixer parts diagram
| Section | Diagram Focus | Notes |
|---|---|---|
| Housing & shell | Outer shell, power cord, control knob | Check for cracks and seating alignment |
| Rotor & stator | Motor components, rotor shaft, windings | Inspect for wear, overheating signs |
| Attachment hub & gears | Power transmission, interface for accessories | Ensure hub compatibility with attachments |
Your Questions Answered
What is included in a KitchenAid mixer parts diagram?
A typical diagram includes exploded views, numbered callouts, and a legend linking parts to numbers and part numbers. It identifies major components like the bowl, hub, drive shaft, and attachments, plus notes on compatibility and assembly order.
A KitchenAid diagram shows exploded views with part numbers and assembly order, including the bowl, hub, drive shaft, and attachments.
Where can I find an official diagram for my model?
Look up your mixer’s exact model number on KitchenAid’s official site or on authorized parts distributors. Official manuals and diagrams are typically model-specific and updated for new parts.
Check KitchenAid’s official site or trusted distributors for model-specific diagrams.
Can I use a generic diagram for different models?
Diagrams vary between Classic, Artisan, and Pro lines. Rely on model-specific diagrams to avoid incorrect parts and misfit assemblies.
No—diagrams differ by model; always use the exact variant.
How do I read the diagram when replacing a part?
Find the part number in the legend, then cross-check it against the official parts list. Use the exploded view to understand the order of assembly and removal.
Locate the part number in the legend, verify it, and follow the exploded view to assemble correctly.
What safety precautions should I take?
Unplug the mixer and discharge it safely. Work on a non-slip surface and handle gears and blades with care. If unsure, consult a professional.
Always unplug, work carefully, and consult a pro if unsure.
Are hubs and attachment interfaces model-specific?
Yes. Some lines use different attachment hubs or drive interfaces. Verify hub type with the diagram before purchasing attachments.
Yes—check hub compatibility for your model before buying attachments.
What should I do if parts aren’t listed for my model?
Contact official KitchenAid support or a certified service center. They can confirm part numbers and provide an updated diagram if needed.
If parts aren’t listed, reach out to KitchenAid support or a certified service center.
“A clear parts diagram is the fastest route from problem to repair, reducing downtime and misinterpretation during service.”
Top Takeaways
- Read the legend first to map callouts accurately
- Always verify model-specific diagrams for accuracy
- Use diagrams to source correct replacements and avoid misorders
- Annotate diagrams for future repairs and maintenance
- Follow model-variant notes to ensure hub and gear compatibility